A Japanese princess cut has a very distinct look. It's a long-standing traditional hairstyle that dates back to the Heian Period. It is characterized by straight hair that's one length in the back, a straight fringe and hime sections that frame the face shape.
There are no layers, just distinct sections. The styling is easy and just requires a round brush and blow dryer. Hime style hair represents high status and a look of elegance.
The hime cut hairstyle has been re-interpreted in Japanese culture through anime, music groups and other pop culture influences. This Japanese hime cut tutorial will walk you through the full haircut using scissors and explain how to do the front bangs with long hair and of course the hime sections. Watch the tutorial below and follow along with the transcript.
Hime Japanese Princess Haircut Tutorial:
Welcome back to Jatai Academy. I'm Russell Mayes, Director of Content. Today we're going to be doing the most classic of all haircuts, the hime cut.
This is made popular in Japan by all the princesses. The princesses would wear this haircut to designate that they were royalty. So all the girls that wear this, they're designating that they're princess and they're royalty.
It's very iconic with all one length. The longer the hair, the better. Blunt bangs straight across and then this accent piece that usually hits right around the jawline, maybe a little longer.
It's very iconic and I love this shape in this haircut. We're going to show you how to do it perfectly, how to get nice blunt lines, how to measure where you want to get your bangs and you want to get your jawline. So, let's get started.
So, the foundation of our hime cut is basically everything's one length in the back and all the way around. I have my blunt bangs that are probably a little soft and then I have my hime piece.
Establishing the Length
So to start with my overall length, I'm going to take a center part to the occipital bone, occipital bone to the mastoid. That's going to separate the flat in the back of the head. This is the area where this skin on the neck on the nape of the neck expands. So if their head is tilted down, it actually expands.
So when I cut it and they look straight back up, it's going to actually undercut the section. If I have them looking straight forward, it's going to tend to cut the section much more blunt, especially if I'm keeping everything perpendicular and blunt.
Now, if I have someone with very, very thick hair that tends to get broom-like, I'll tilt the head forward so I can undercut that and soften that edge. If I have someone with finer hair, I may want to keep it as blunt as possible and have them just looking straight ahead.
So, we're going to start right in the center. I'm going to section this out and keep it nice and clean. So, since we're going to go through and cut this blunt, I'm going to go through and practice my fundamentals on cutting everything really, really blunt.
So, to do that, I want to make sure I maintain very, very clean sections. Clean sections makes it easier to comb. Clean combing is imperative to cutting a clean blunt line.
Then, I'm going to use my Jatai Kyoto Scissors. This is the sharpest scissor I have. It's a nice fat blade, so it has a lot of weight behind it when I go through and cut.
So, it gives me the cleanest cut that I can get. The blade is very, very sharp. The metal is very hard, but it wears really, really well. It lasts for a long time. This is my favorite Jatai scissor.
Now, I'm going to comb clean from the root all the way down. You'll notice that I'll flip my comb away from me so that I can comb everything at the root nice and clean. Comb that all the way down.
Flip my comb to build up any kind of tension. That's the only tension that I'm getting is right from the comb tension. I have no tension being built up from my fingers. You'll notice that my fingers are now perpendicular to the section. I'm not flipping that at all. I want to keep this as blunt as possible.
Now I'll take my scissor and cut on the backstroke to maintain a nice clean cut. If I just close the blade, it pushes the hair out of the blade and I end up with a line that hooks to a little point and then cuts back in. So I end up with a crooked line.
Clean from the root all the way down. Make sure I got my line there. Perfectly straight and through.
Follow us on your favorite social media @JataiFeather
Everything gets combed straight down in its natural fall. No tension other than what the comb gives me. There's my line. Cut that straight across and through.
Now, I'm going to work on the other side. If I feel like my fingers aren't long enough to cut the whole section. I can break that in half. So, I have the center as my guide. I have my first half. I'm combing in natural fall.
Now, I notice that the head's tilted a little bit. So, I'm going to comb everything tilted. If that throws me off visually and I tend to drag, then I want to make sure everything is nice and square and perpendicular so that when I go to cut it, it gives me the greatest chance of going through and cutting a blunt, clean, even line.
Last section. Cut that down and through. Now, from here, I will go through, check the sides, make sure that they're even, and they look pretty good.
So, now I'm going to go through and continue taking parallel sections all the way up until I run out of hair. It's important that I keep the moisture content of the hair all consistent throughout the whole cut. I don't want one part to be really wet and one part to be drying. I'm going to get inconsistent results.
So, I'm going to use some Jatai Blade Glide. This is going to go through, slightly detangle. It works as a leave-in conditioner, but it also compacts the cuticle, so I have an easier time of combing it and give more consistent results.
As I work up the head and I start getting into sections that cover from the back into the sides, a lot of people will separate the back from the side of the head. I don't do that. I keep my consistent sections going all the way around.
If that is my angle that I'm working on, I'm going to take the exact same angle, come on baby, as I work from sides into the back so that as I cut my line, I can continue that around the front.
I find it's more difficult to cut the back and then come in and cut the sides than it is to just cut from the back into the side in one stroke.
Now, here in the back, I'm going to go through and do exactly the same pattern and methodology I was doing before, combing everything clean from the root. Anytime I see these little bands of hair, I want to make sure I get everything combed clean from the roots all the way down. Turn the comb away. Once I hit about the hairline, I rotate. No tension. Just whatever the comb gives me. Follow my previously cut guide.
All the way down. There's my previously cut guide from the back. Cut that blunt all the way through. Perfect.
Cutting the Fringe
All right. So, now let's go through and section out our fringe, our little bangs. I'm gonna take the first bump of the head where the head starts to curve back and I'm gonna go right to the corner of the hairline right at the recession.
Take about half of it because if the section gets too thick and I'm trying to cut it, it just doesn't want to cooperate. It always becomes difficult to cut. So, I want to make this as easy for me as possible. And especially since I'm trying to get something so strategically placed where it's right at the eyebrow.
So, I'll start right here in the center. And I'm going to do the same thing I was doing in the back. Comb everything clean from the root. Lay my finger right at the crux of the nose. No tension other than what my fingers give me. And then let's go through, cut this straight across on the backstroke. That way I can get that nice and blunt.
If I feel that that's going to be a little too long when it dries, I can cut more off. And I think I'm going to, I'm going to cut a little bit more. Just a wee bit more. I'd rather it be too long after everything gets dry than it be too short. Because if it's too long, it's easy to go through and fix. If it's too short, it's a little more difficult.
So, let's continue on with that length. Everything straight down. Cut that across. See how that's looking. Come on, baby. Your eyelashes are getting in the way. There we go. Take our next section.
Comb this straight down into my previous section. And the exact same thing. Comb clean from the root all the way down. There's my guide. Cut directly on top of the guide. Not longer, not shorter, exactly on top of the guide. That's why doing a one length haircut is so good for your fundamental skills is because you're having to focus on everything.
You're focusing on body position. You're focusing on cutting directly on top of the line. You're focusing on combing everything clean, not getting your body in the way and hooking your sections as you comb it. Everything clean straight down. This will magnify any flaws in your technique.
We're going to look at that. And I think that that's looking pretty good. When I dry it, I may modify it a little bit. I think I'm going to point cut it a little bit just to soften it up.
Creating the Hime Sections
Now, let's put our hime piece, which I want to kind of hit right at the jaw. I think that's the most striking.
Depending upon how exaggerated I want my Hime piece to be is going to determine how thick the section is. I could take it from the second bump all the way down to the front corner of the hairline and have a pretty strong piece.
Now, I can take less. I could take less of this and push that back. And I want to just kind of comb this down and see how much of a piece I want to stick out.
So I think I'm gonna go right at the bottom of the recession from the second bump of the head. Comb that straight down in natural fall. Angle my fingers the same as the jawline.
Give us a thumbs up. Click subscribe and the notification bell to be notified of future Jatai Academy content.
And I think that that's going to be pretty righteous. Yes. Then when I comb all of this down, yes, I think that's going to be the perfect amount to give me a little pop right there at the front but still have all this hair long on the sides.
What you got to watch out for is taking the section too far back and this becoming uh to where it falls behind the shoulder, not in front of the shoulder. Now, let's go through and do the same thing on the other side.
And I think that that's looking pretty fire. Pretty fire. Pretty fire. Pretty sugoi (amazing). There we go. All right. So, now let's blow it dry and see what we got. See what we need to modify.
Final Look of the Japanese Hime Haircut
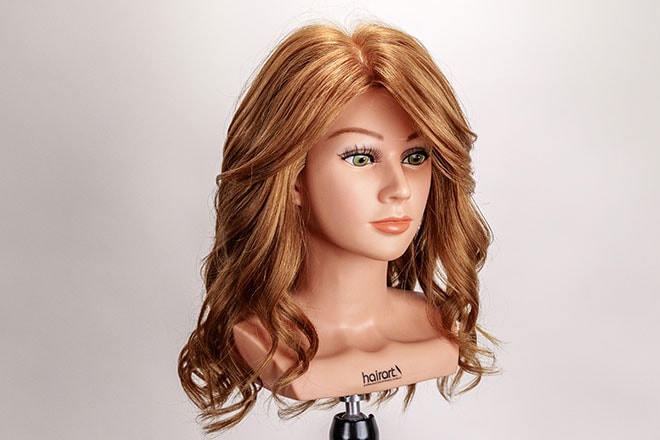
There we go. I think we're looking pretty good. We got a nice end result. We have the hime piece that hits right at the jawline, which is my favorite length for it to hit. Sometimes it's a little longer. And as long as it exaggerates itself and pops away from the rest of the hair, I think the shape really looks good.
We have Japanese hair bangs that are straight right at the eyeballs and that's really the style. Especially in Japan, those girls, I don't see how they can do it. They have it just perfect right in the eyeballs. It drive me crazy if I had hair. But such is the style.
We got nice one length straight cut hair here. Everything's nice and clean. And this shape really lends itself to like ponytails or even, you know, pigtail type of shapes like Atarashii Gakko.
And I think it looks really good, really modern with this kind of shape. Even though this is the most classic of all classic haircuts that there is.
So please check out the Jatai Academy. There's all kinds of fantastic information on there that will make you a better hair stylists and barber. Let us know what you'd like to see in the future and we will see you next time. Thank you so much.
 HAIRSTYLIST
 BARBER
 NAIL TECH
 ESTHETICIAN
 CONSUMER
 RAZOR HANDLES
 RAZOR KITS
 RAZOR BLADES
 SHEARS & SCISSORS
 END PAPER
 COMBS & BRUSHES
 LOTIONS & CREAMS
 ACCESSORIES

 NAIL CARE
 TWEEZERS
 EYELASH
 HAIRCARE & SHAVING
 SKINCARE
 KITS & SETS
 SPECIALTY


 Filter