-
SHOP BY
-
 HAIRSTYLIST
-
 BARBER
-
 NAIL TECH
-
 ESTHETICIAN
-
 CONSUMER
SHOP BY
ProfessionBrands -
-
HAIRCARE & SHAVING
HAIRCARE & SHAVING
 RAZOR HANDLES
 RAZOR KITS
 RAZOR BLADES
 SHEARS & SCISSORS
 END PAPER
 COMBS & BRUSHES
 LOTIONS & CREAMS
 ACCESSORIES

-
PERSONAL CARE
PERSONAL CARE
 NAIL CARE
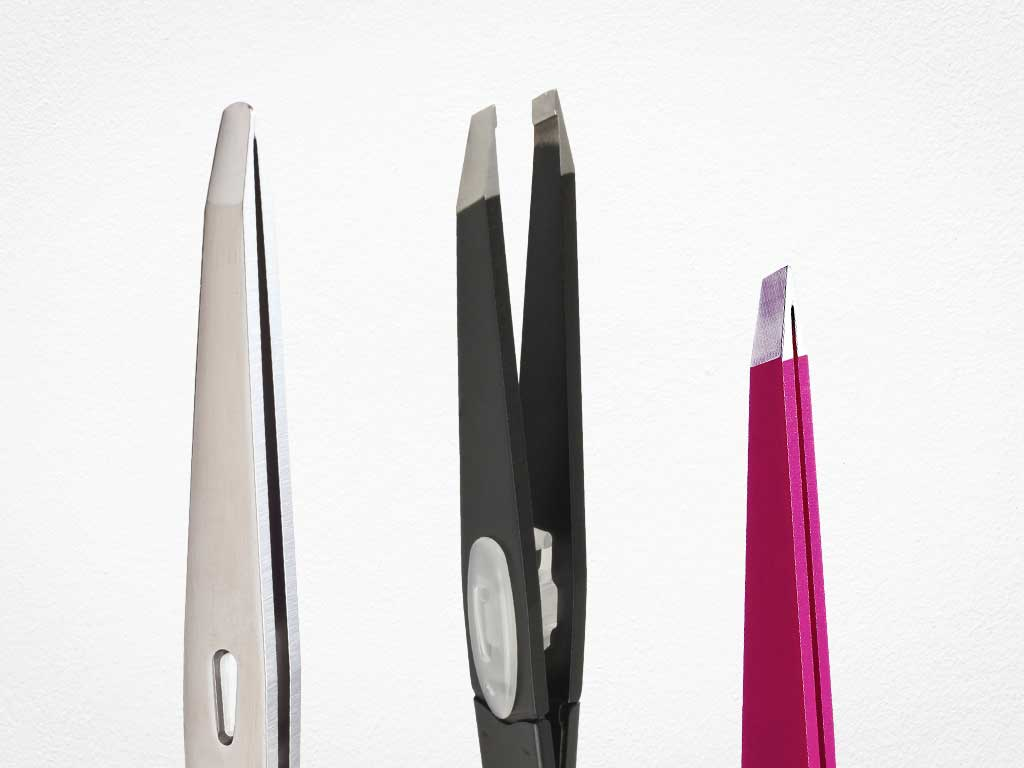
 TWEEZERS
 EYELASH
 HAIRCARE & SHAVING
 SKINCARE
 KITS & SETS
 SPECIALTY
COMBS & BRUSHES
LOTIONS & CREAMS
ACCESSORIES
SPECIALTY
COMBS & BRUSHES
LOTIONS & CREAMS
ACCESSORIES


131 products
131 products
Sort by:
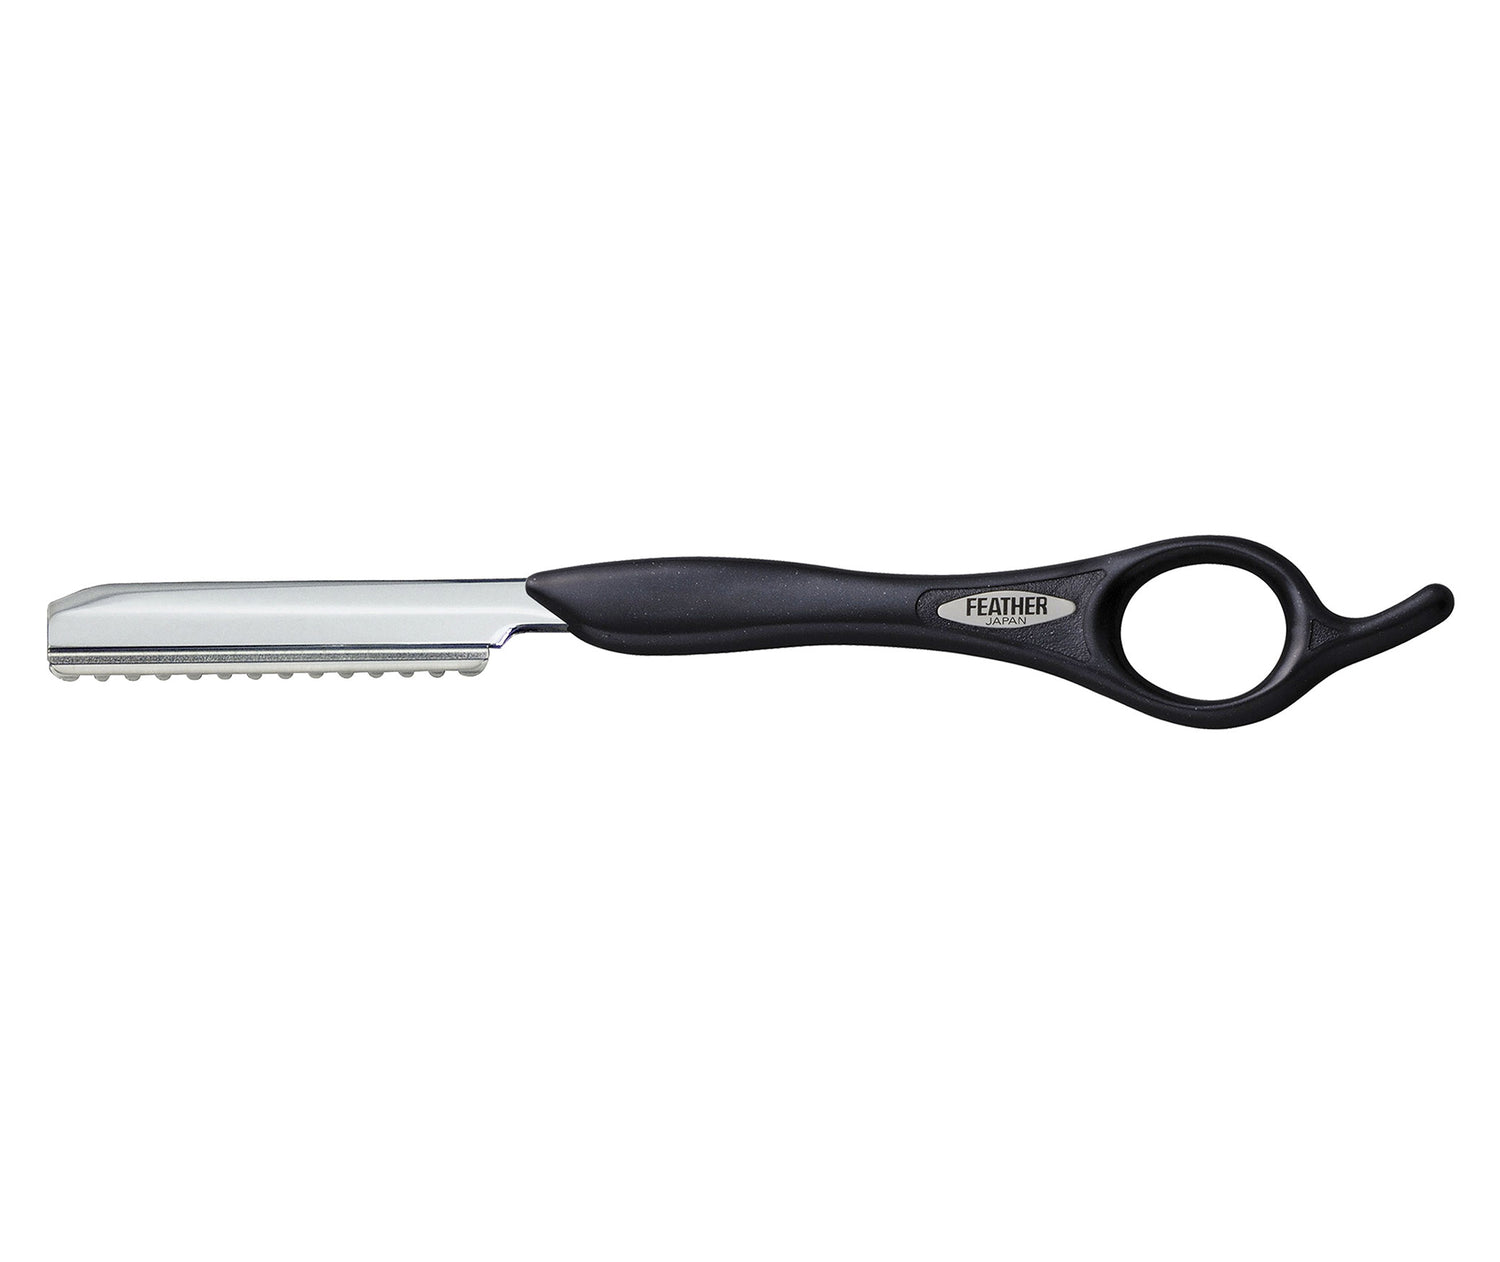

Feather Styling Razor
$49.95
Unit price perFeather Styling Razor
$49.95
Unit price per- World's #1 haircutting razor and LaunchPad Reader's Choice Award winner year after year!
- The balance and feel allows the razor to become an extension of your hand
- Guarded blade protects you and your client
- Hair does not clog between guard and blade
- Blades fit snug in the handle
- Blades are removed and replaced with a no-touch blade system
- Use any of the 3 Feather Styling Razor Blades to tailor your haircutting needs (Standard, R-Type, Texturizing)
- Comes with 1 Standard Blade
- Made in Japan
Click to learn more about Feather Styling Razors and blades.


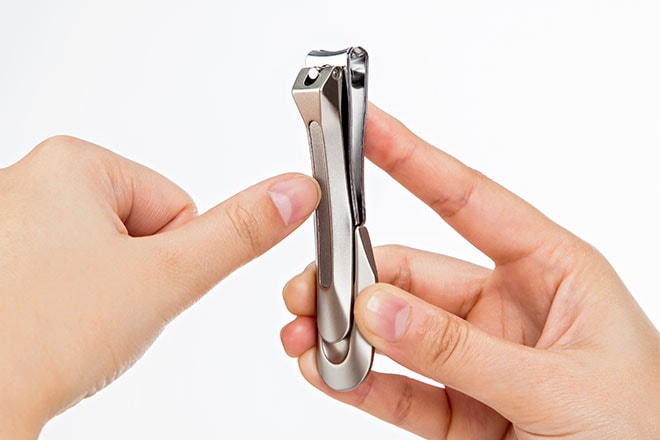
Seki Edge Stainless Steel Fingernail Clipper (SS-106)
Seki Edge Stainless Steel Fingernail Clipper (SS-106)
- Sharp cutting edges leave smooth clean cuts
- No more ripping, tearing or jagged nails
- Excellent weight and balance
- Ergonomic design for comfort
- Beautiful, sophisticated design
- One of our best sellers!
- Smaller than the Stainless Steel Toenail Clipper SS-107
- Made in Japan
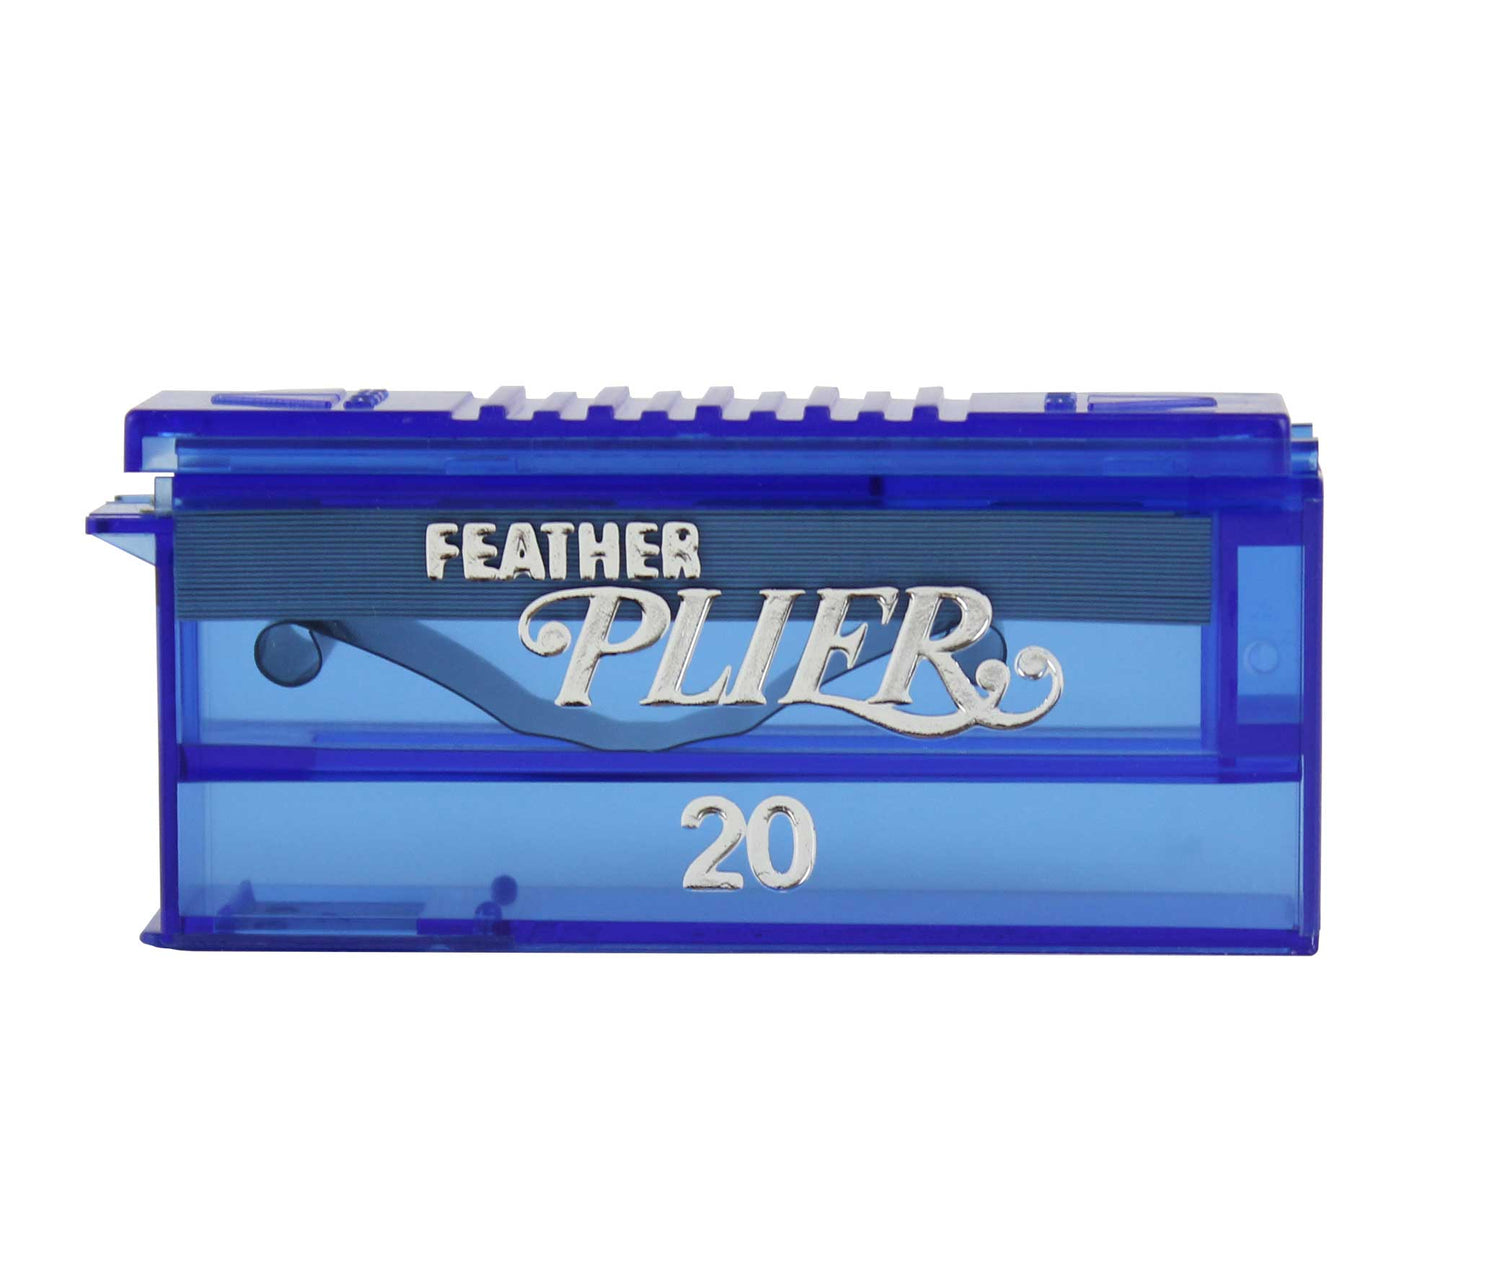
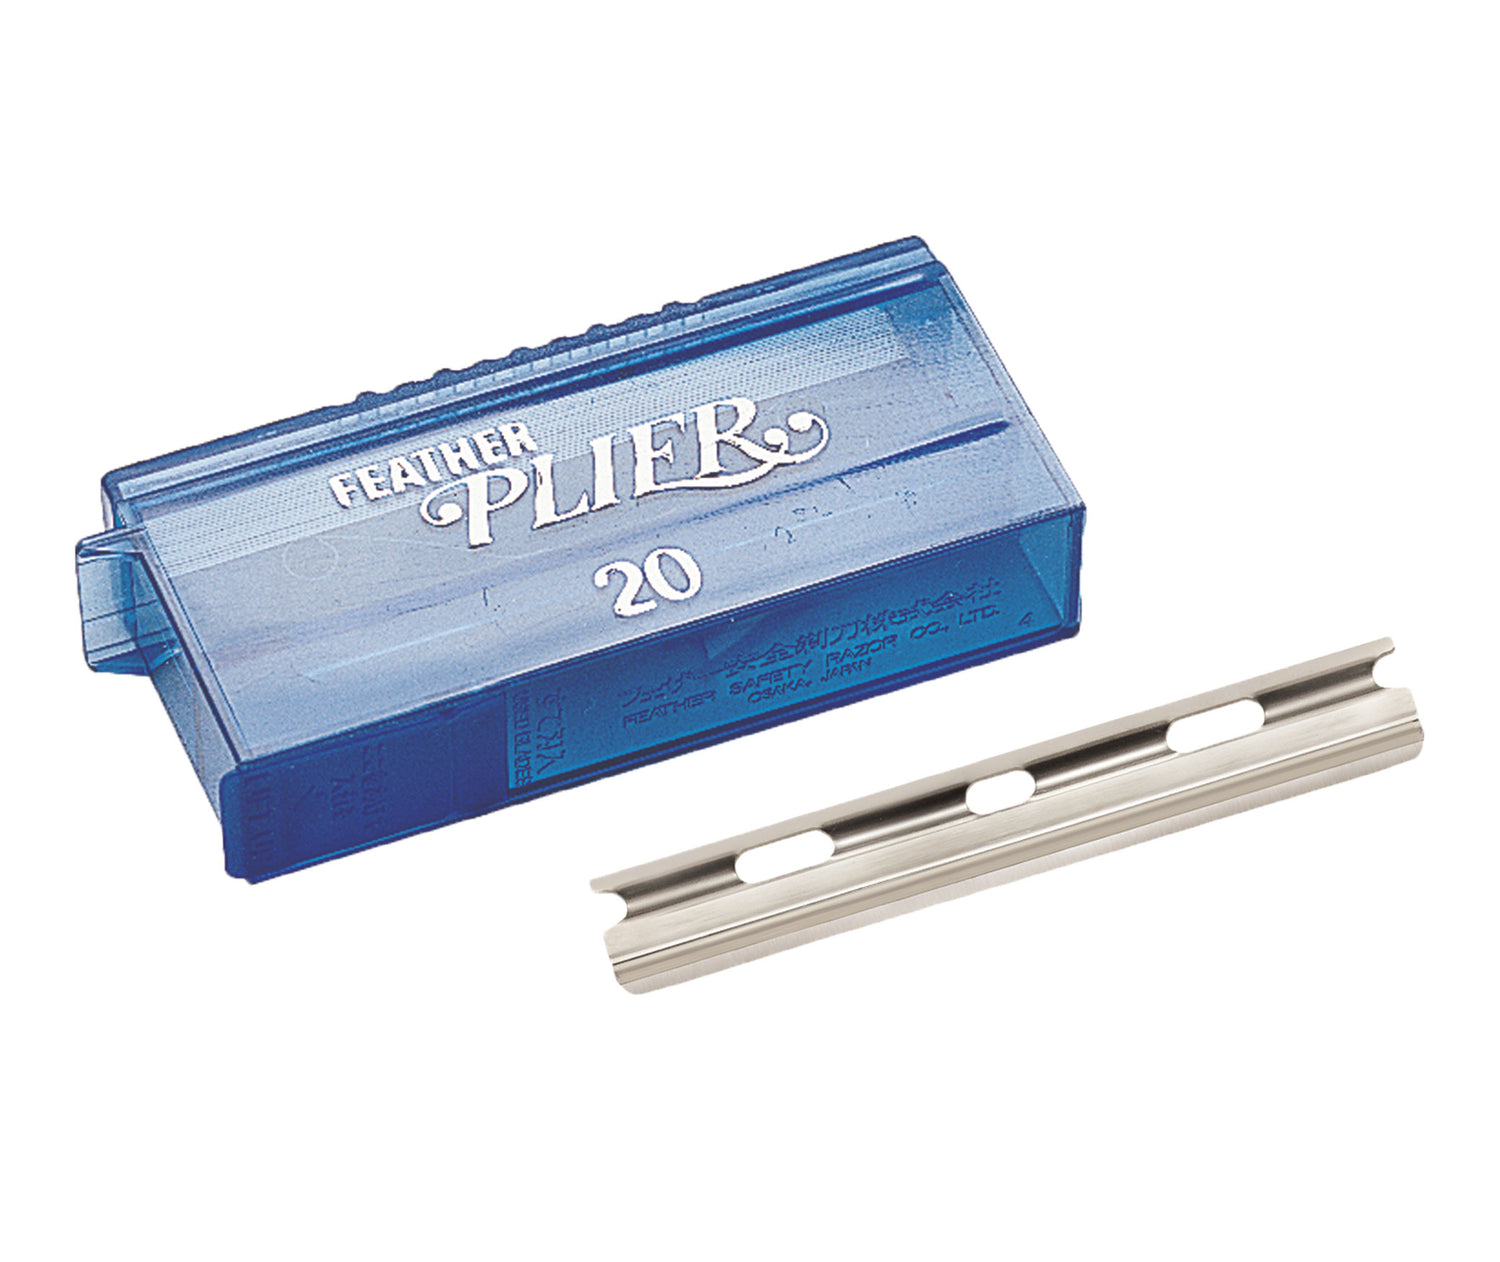
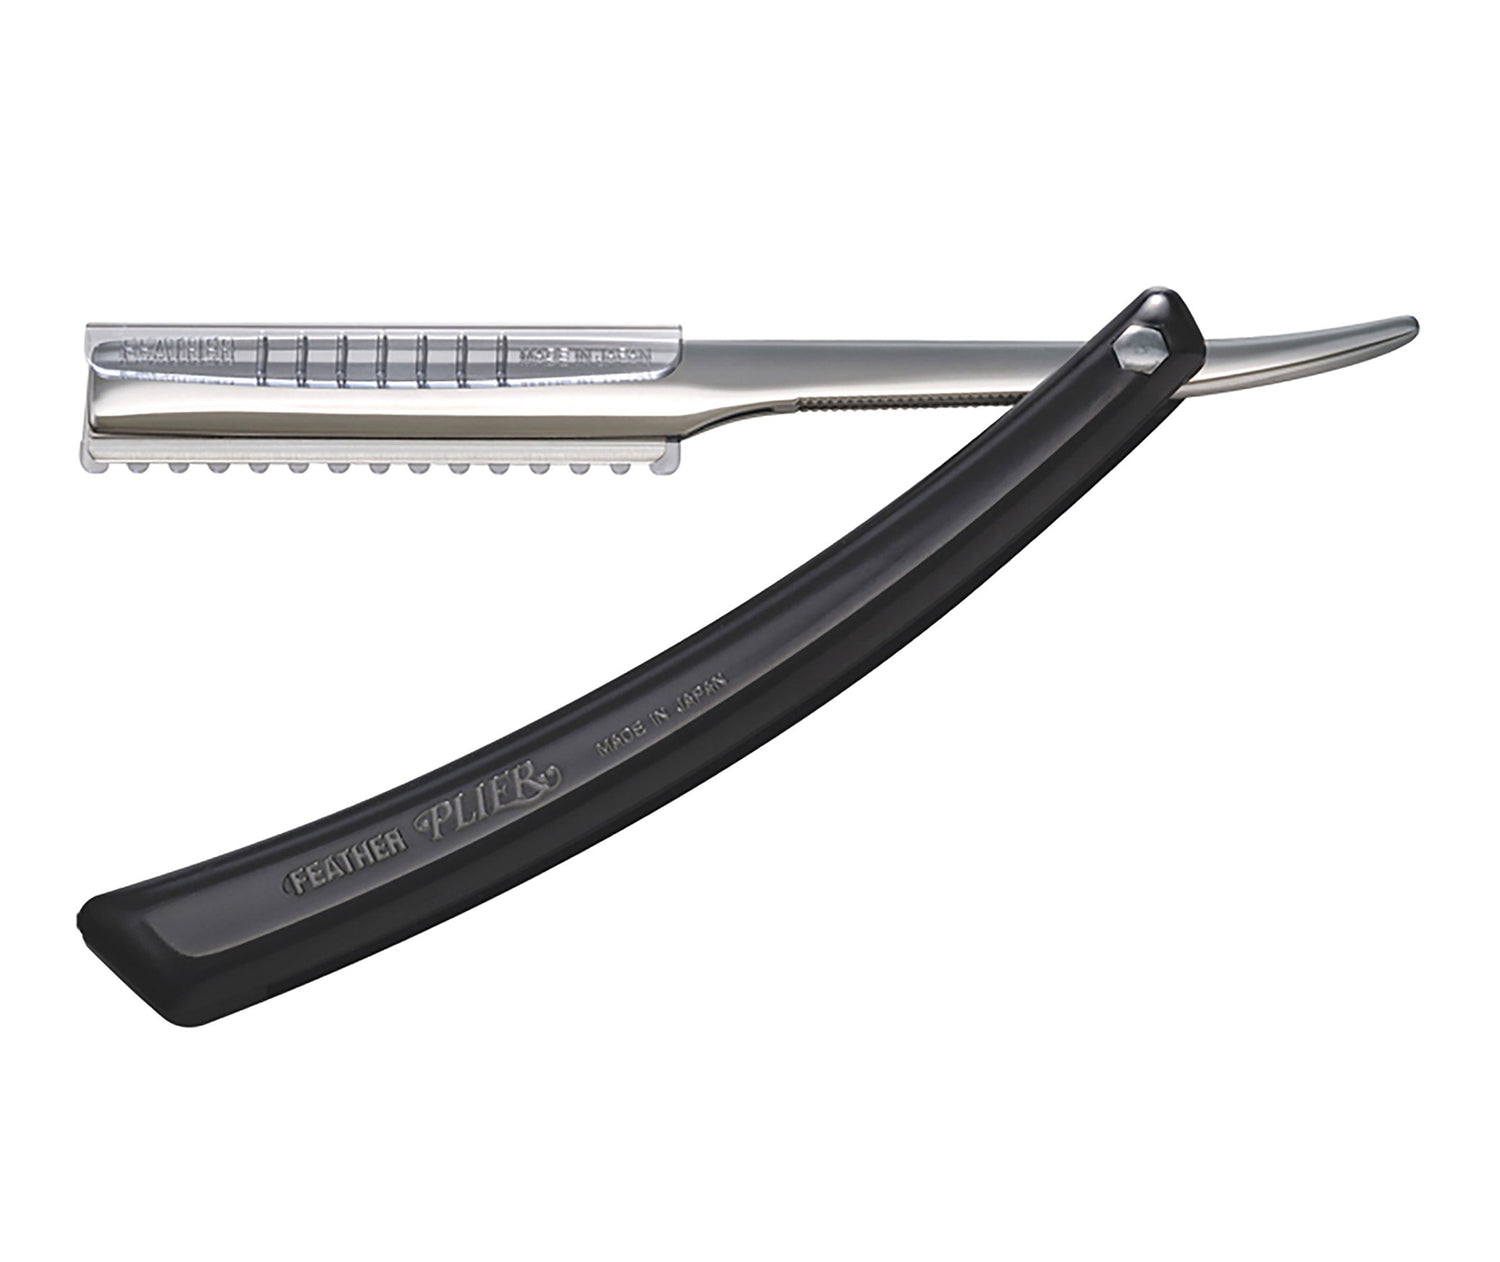
Feather Plier Razor Blades
From $16.75
Unit price perFeather Plier Razor Blades
From $16.75
Unit price per- The most advanced replaceable hair cutting blade on the market
- Used by top hair professionals and advanced stylists
- Unique 'S' blade shape prevents blade from moving while cutting
- Unguarded blade gives pure haircutting freedom
- Use in the Feather Plier Razor handle only
- 20 blades per dispenser
- Built-in blade disposal pocket at the bottom of the dispenser
- Subscribe & Save up to 32% on blades!
- Made in Japan
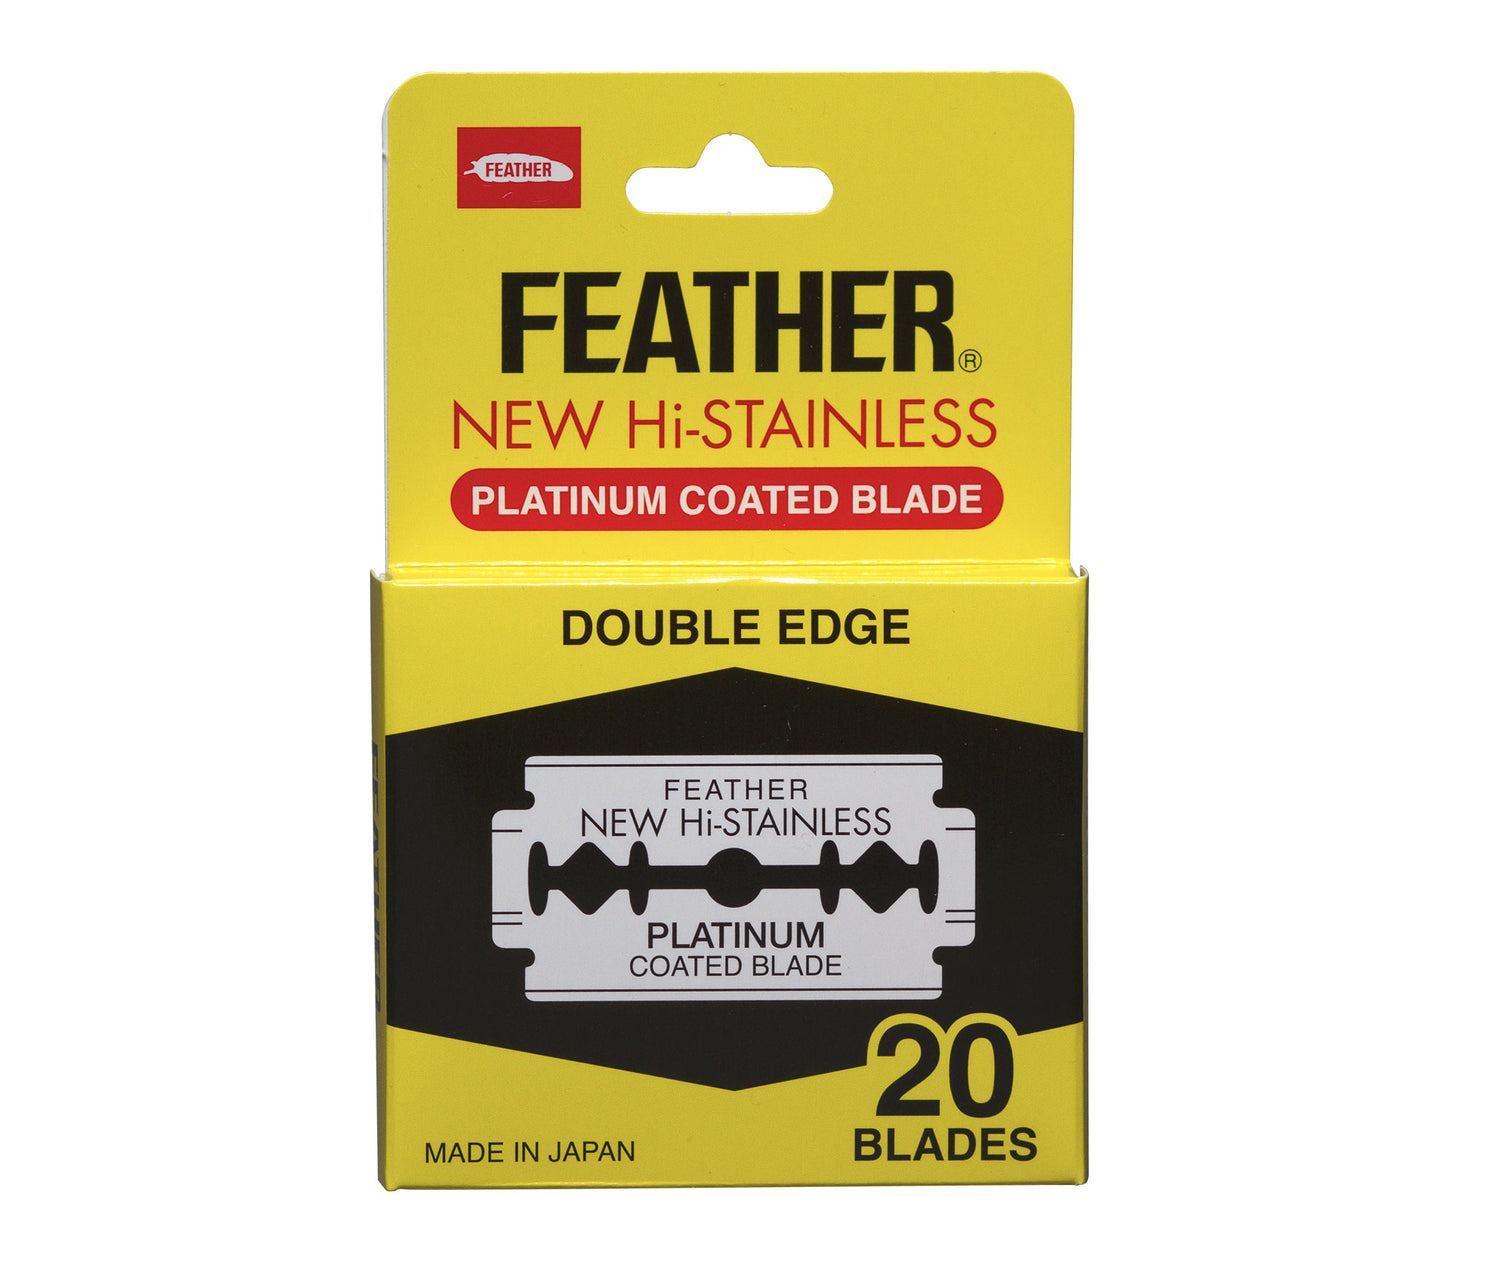

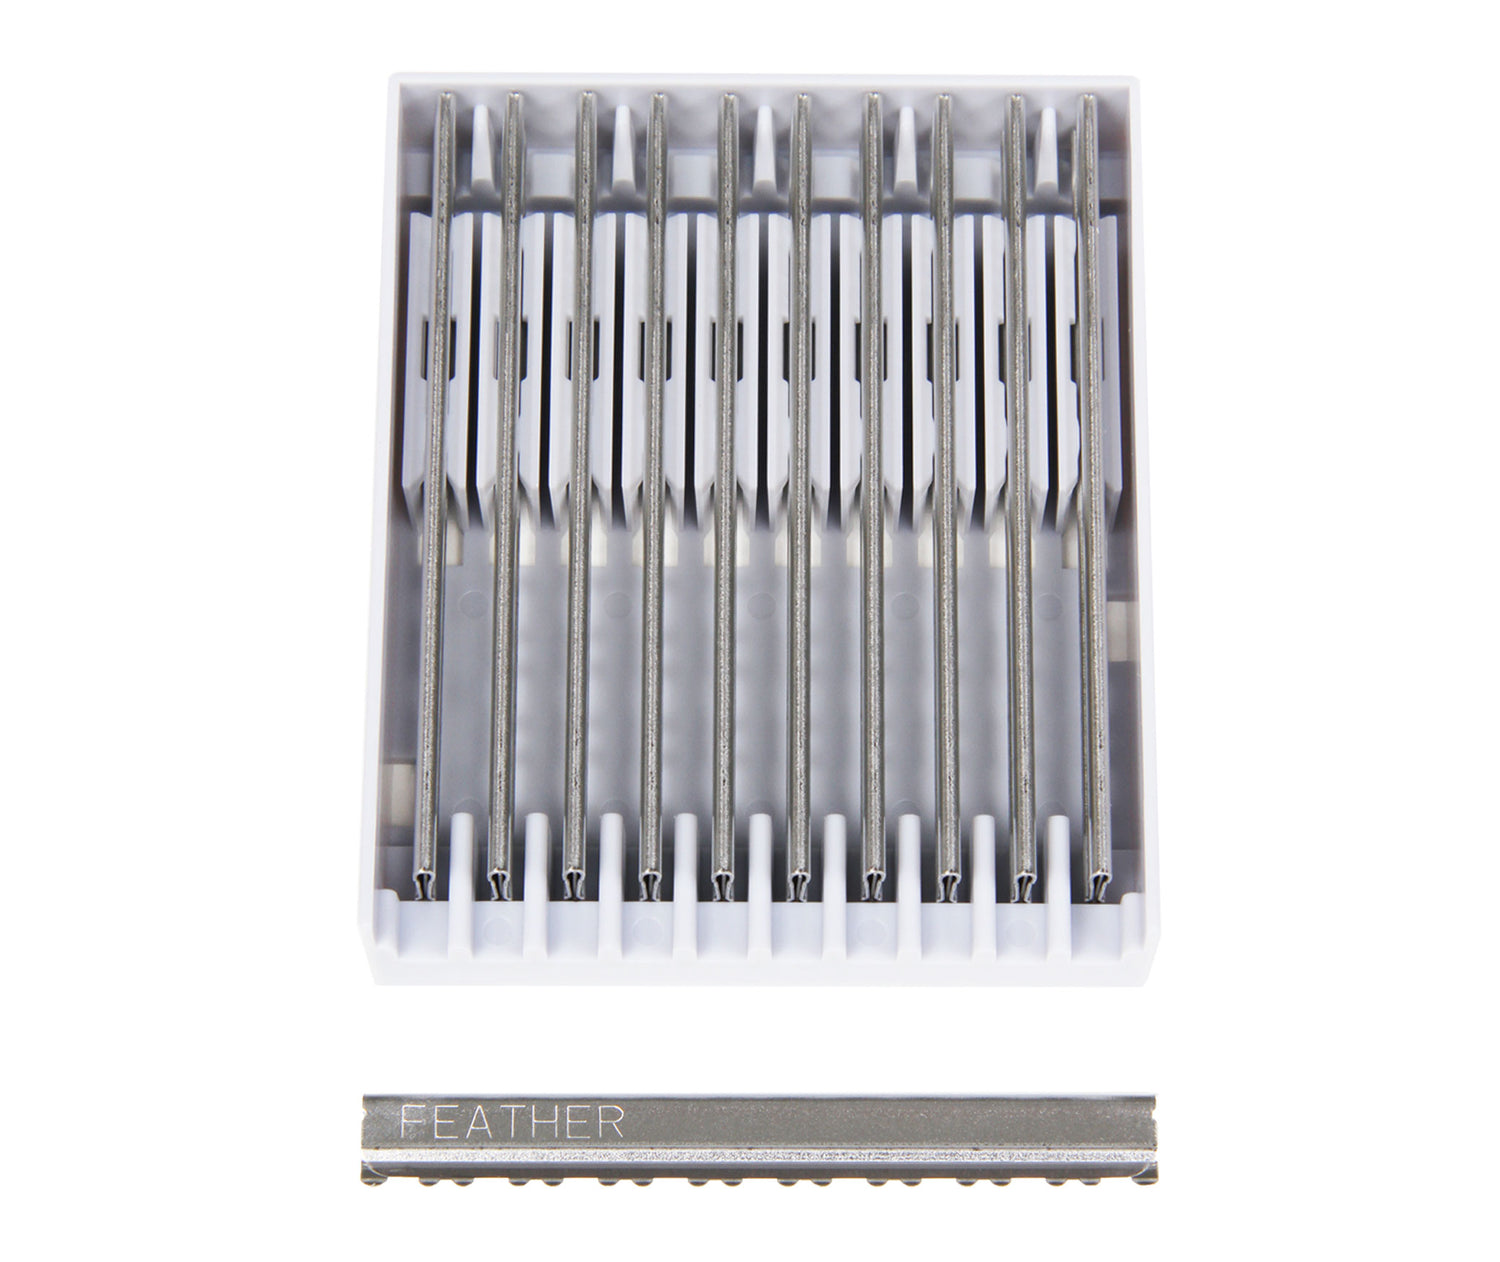
Feather Hi-Stainless Double Edge Blades (20pk)
$10.75
Unit price perFeather Hi-Stainless Double Edge Blades (20pk)
$10.75
Unit price per- Includes 20 Feather Hi-Stainless Double Edge Blades
- Gives a closer shave than multi-blade cartridges
- Saves money in the long term
- Environmentally friendly. Reduce your footprint
- Made in Japan
To learn more about Feather Safety Razor Blades, click here.
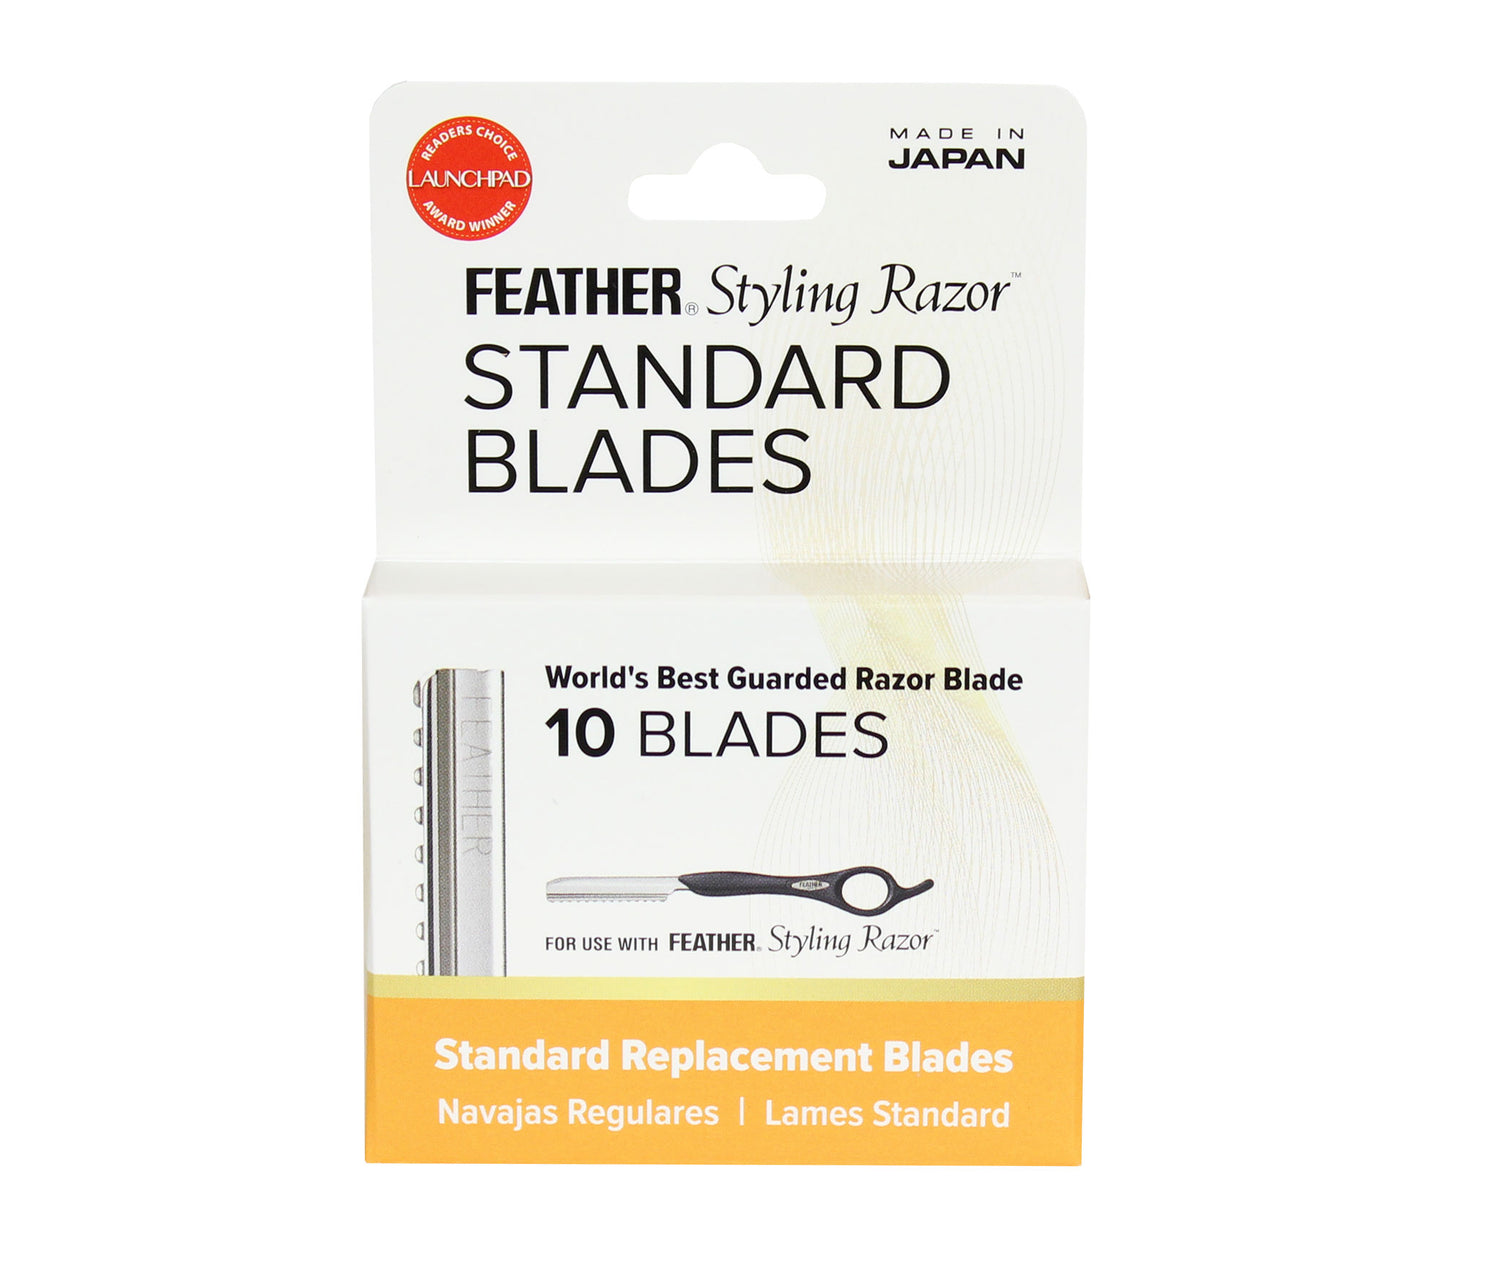
Feather Styling Razor Standard Blades
From $13.49
Unit price perFeather Styling Razor Standard Blades
From $13.49
Unit price per- The Standard Blades are the most popular Styling Razor Blade
- The sharpest and safest razor cutting blades in the industry
- Cutting edge is designed to give you the cutting control you need to be creative
- Replaceable guarded blades make it safe for you and your client
- Blade design prevents hair from clogging between the guard and blade
- For use with Feather Styling Razor handles only
- 10 Blades Per Pack
- Subscribe & Save up to 18% on blades!
- Made in Japan
Click to learn more about Feather Styling Razors and Blades.
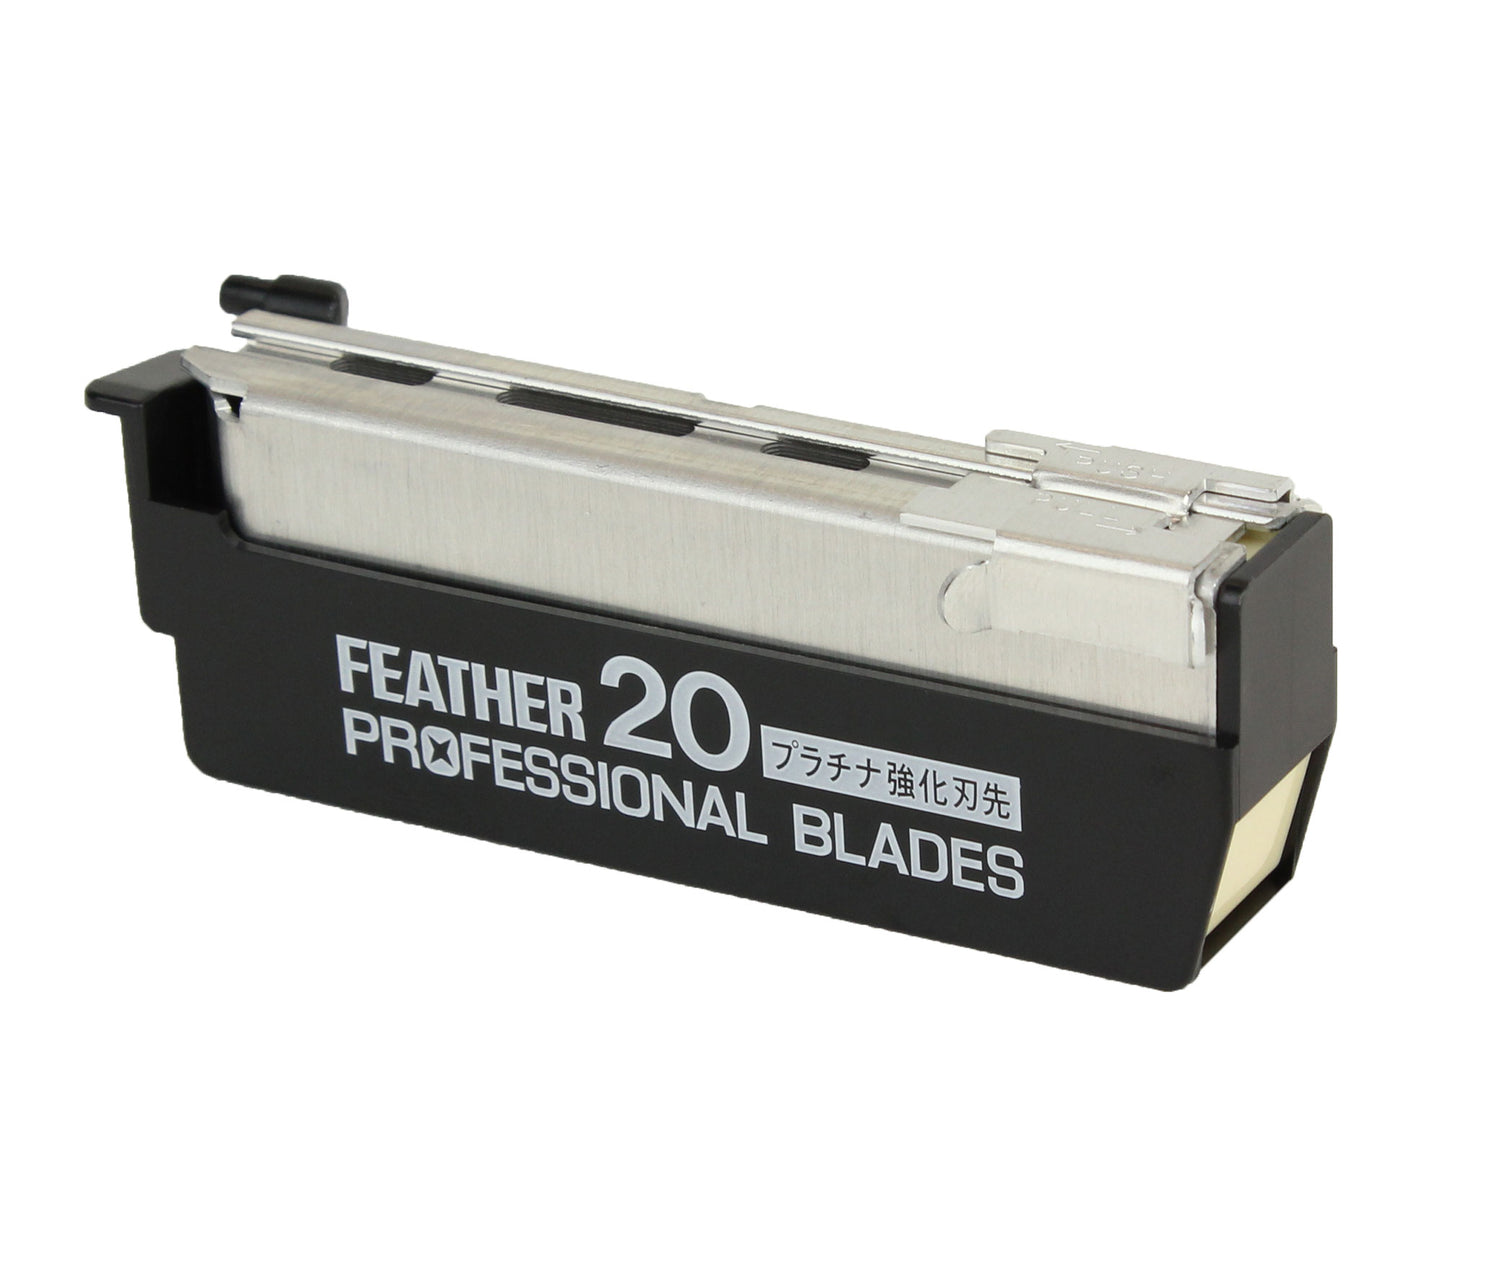

Feather Artist Club Professional Blades
From $14.00
Unit price perFeather Artist Club Professional Blades
From $14.00
Unit price per- The most versatile and economical Artist Club razor blade
- Used for full face shaving, outlining, line-ups
- Triple grinding for superior sharpness, quality and consistency
- One-touch mechanism enables easy, sanitary and safe insertion of new blades
- Fits any Artist Club razor handle
- 20 blades per cartridge
- Subscribe & Save up to 30% on blades!
- Made in Japan
Click here to learn more about Artist Club Razors and Blades.
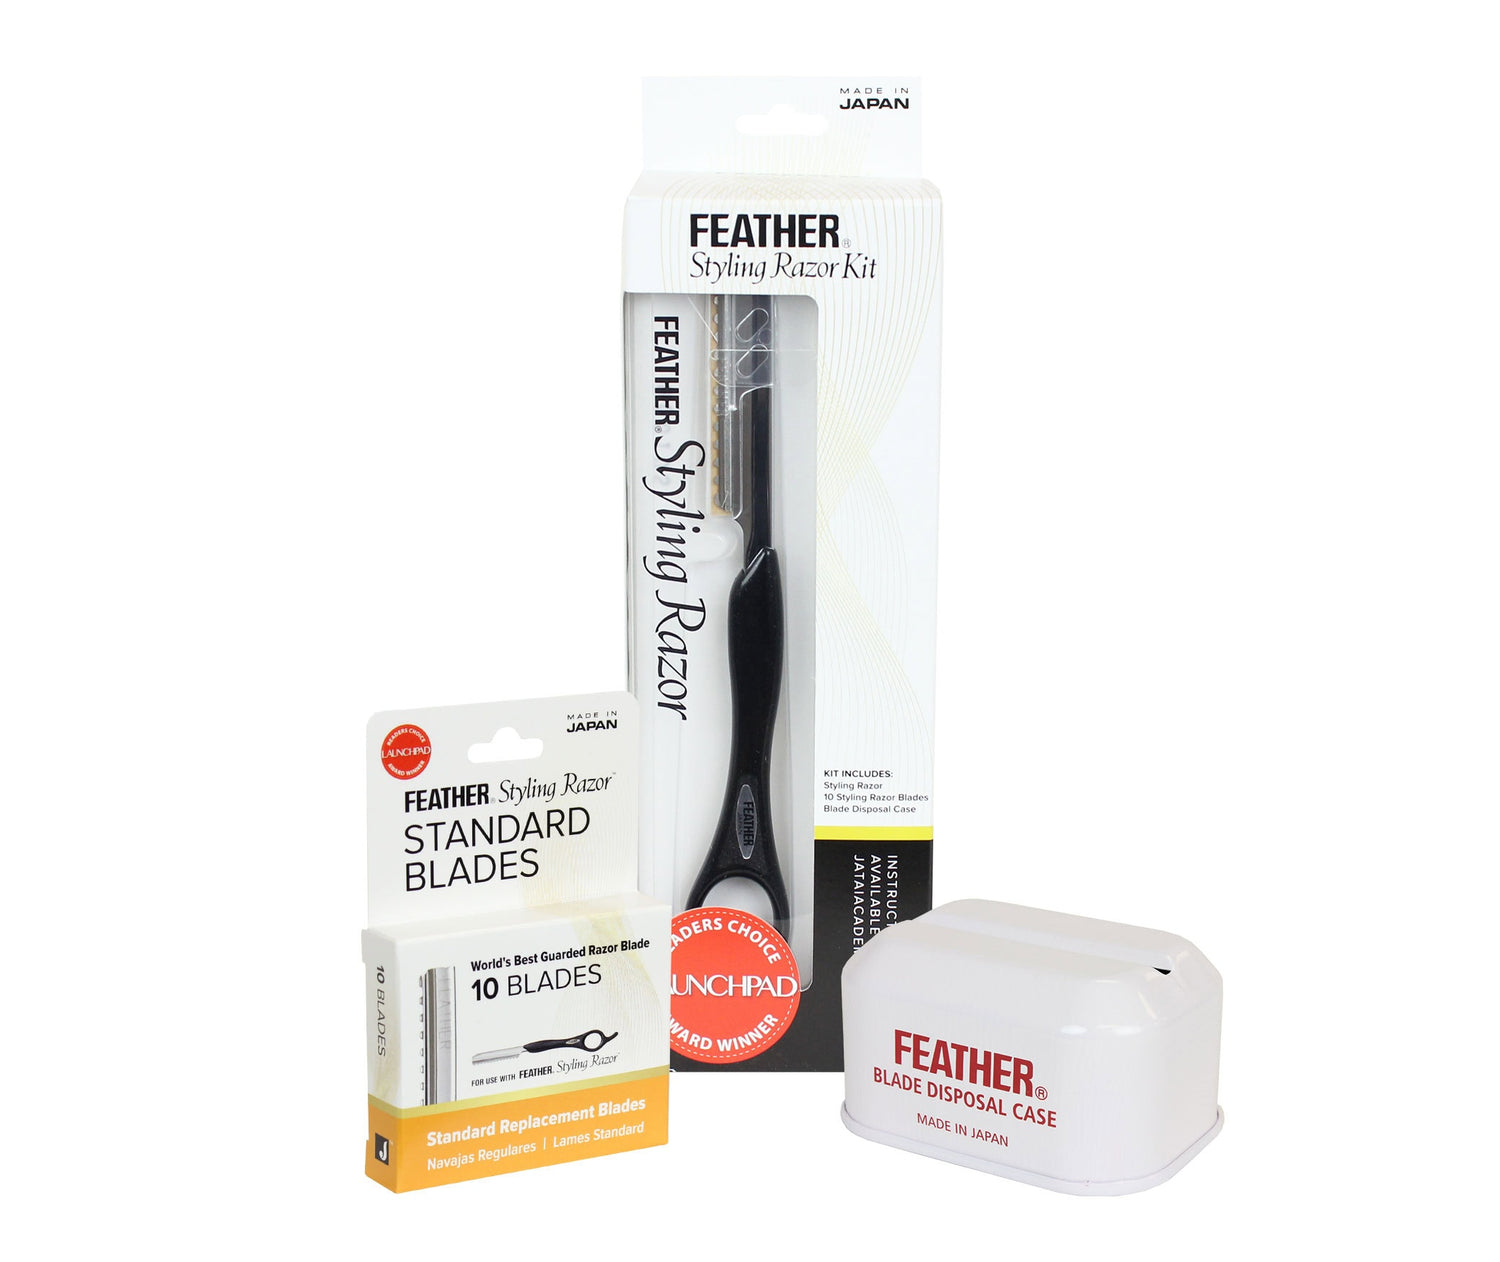

Feather Styling Razor Kit
$59.95
Unit price perFeather Styling Razor Kit
$59.95
Unit price per- World's #1 hair cutting razor and LaunchPad Reader's Choice Award winner year after year!
- Kit contains: Styling Razor handle, 10pk of Feather Standard Blades and a Blade Disposal Case
- The balance and feel allows the razor to become an extension of your hand
- Guarded blade protects you and your client
- Hair does not clog between the guard and blade
- Blades fit snug in the handle
- Blades are removed and replaced with a no-touch blade system
- Use any of the 3 Feather Styling Razor Blades to tailor your hair cutting needs (Standard, R-Type, Texturizing)
- Choose from a variety of handle colors
- Includes the new metal disposal case which is better for the environment and is recyclable
- Made in Japan
Click to learn more about Feather Styling Razors and blades.


Seki Edge Stainless Steel Toenail Clipper (SS-112)
Seki Edge Stainless Steel Toenail Clipper (SS-112)
- Sharp cutting edges leave smooth clean cuts
- Proprietary grinding and honing of the cutting edge gives a soft cut
- Excellent weight and balance makes cutting nails easy and precise
- Built-in nail file on top of the lever
- Hand-finished edges
- Easily cuts through hard nails
- Larger than SS-113
- Made in Japan


Feather Switch Blade Shear Blades 4.5"-7.5"
$15.25
Unit price perFeather Switch Blade Shear Blades 4.5"-7.5"
$15.25
Unit price per- Never sharpen shears again! When blades get dull, switch them out with sharp new ones
- Twice tempered stainless steel frames and blades for long lasting strength and durability
- Switch Blade Shear blades come in a variety of sizes (4.5"-7.5")
- Exclusive "No-Nip" tips are designed to eliminate accidental nipping of the fingers
- Made in Japan


Feather Artist Club SS Folding Razor
$109.00
Unit price perFeather Artist Club SS Folding Razor
$109.00
Unit price per- Beautiful folding handle design and SUS317 stainless steel head
- Built-in safety features to remove and replace blades
- Rounded ridge gently pushes the skin down raising the hair follicle and enabling a close shave
- SS head is spring mounted with a one-touch mechanism for dismantling and cleaning
- The ultimate replaceable blade shaving razor uses any of 5 different blades (Professional, ProGuard, Super, Light, SoftGuard)
- Blades sold separately
- Made in Japan
Click to learn more about Artist Club Razors and Blades.
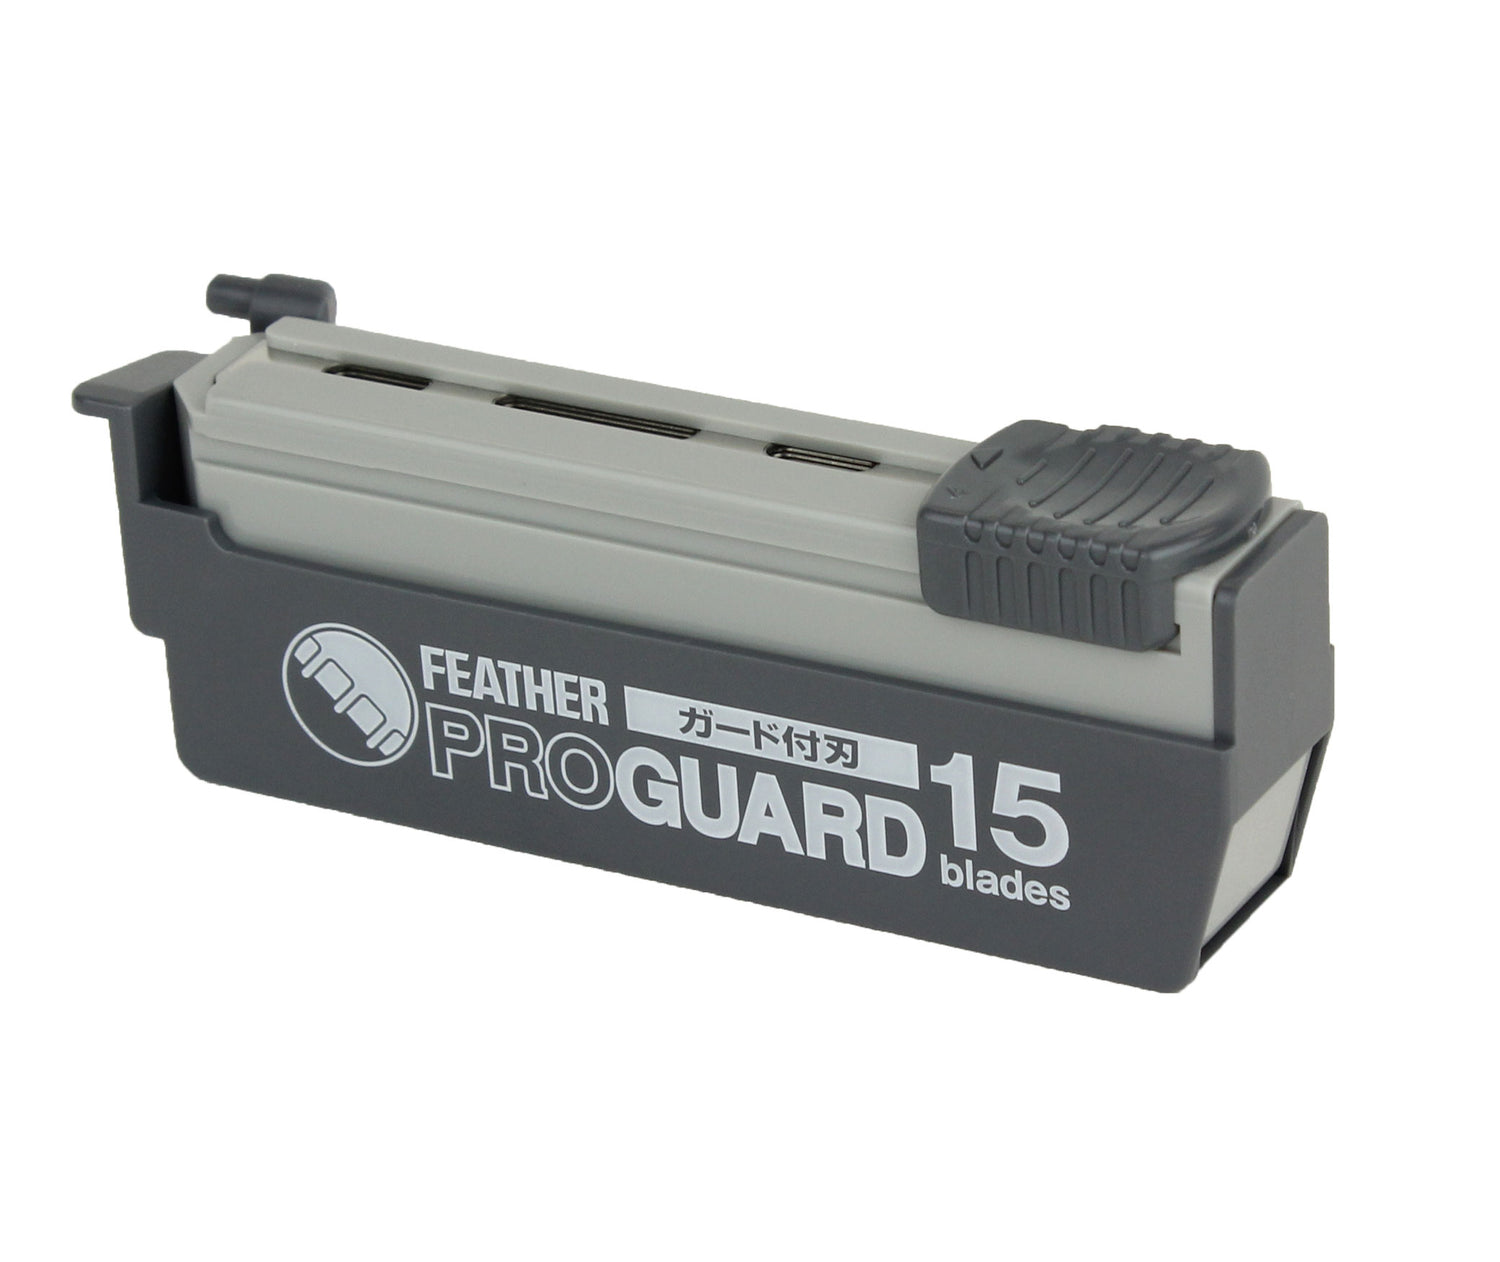
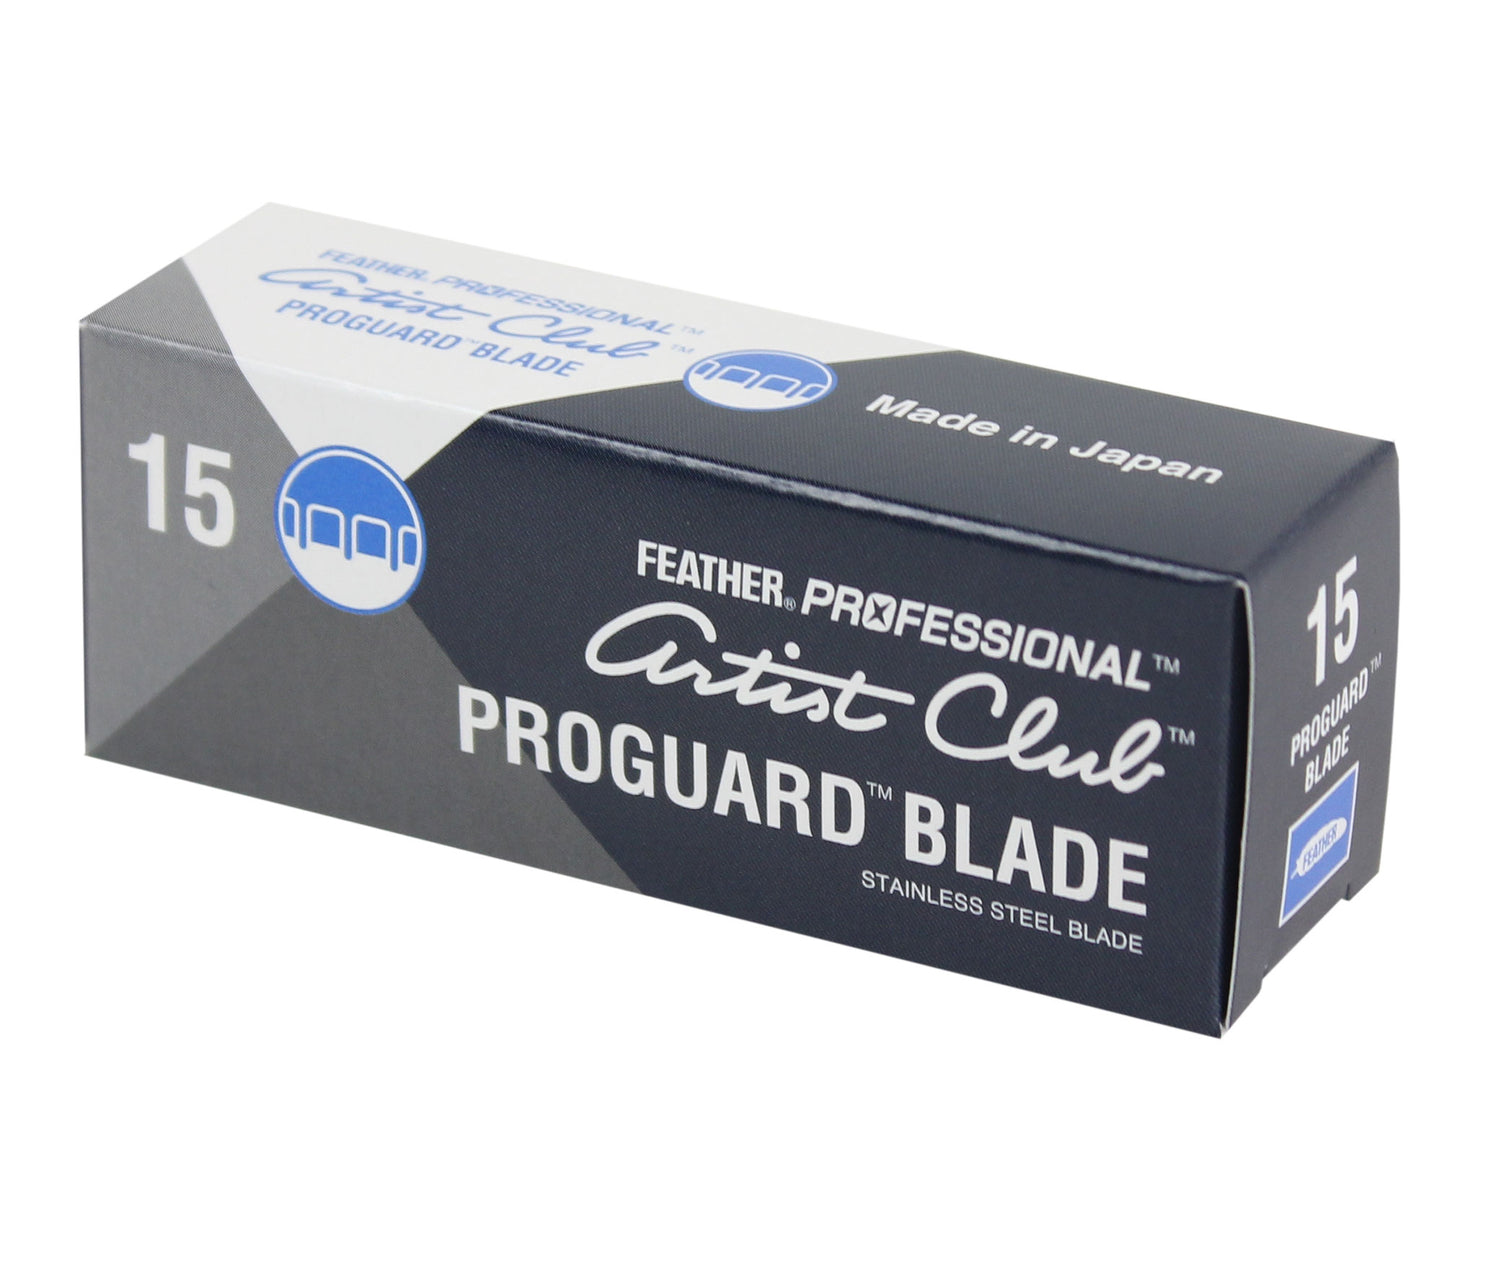
Feather Artist Club Pro Guard Blades
From $16.00
Unit price perFeather Artist Club Pro Guard Blades
From $16.00
Unit price per- Guarded blade provides protection from razor cuts
- Thin guard does not interfere with shaving
- Used for full face shaving, outlining, line-ups
- Triple grinding for superior sharpness, quality and consistency
- One-touch mechanism enables easy, sanitary and safe insertion of new blades
- Fits any Artist Club razor handle
- 15 blades per cartridge
- Subscribe & Save up to 30% on blades!
- Made in Japan
Click here to learn more about Artist Club Razors and Blades.
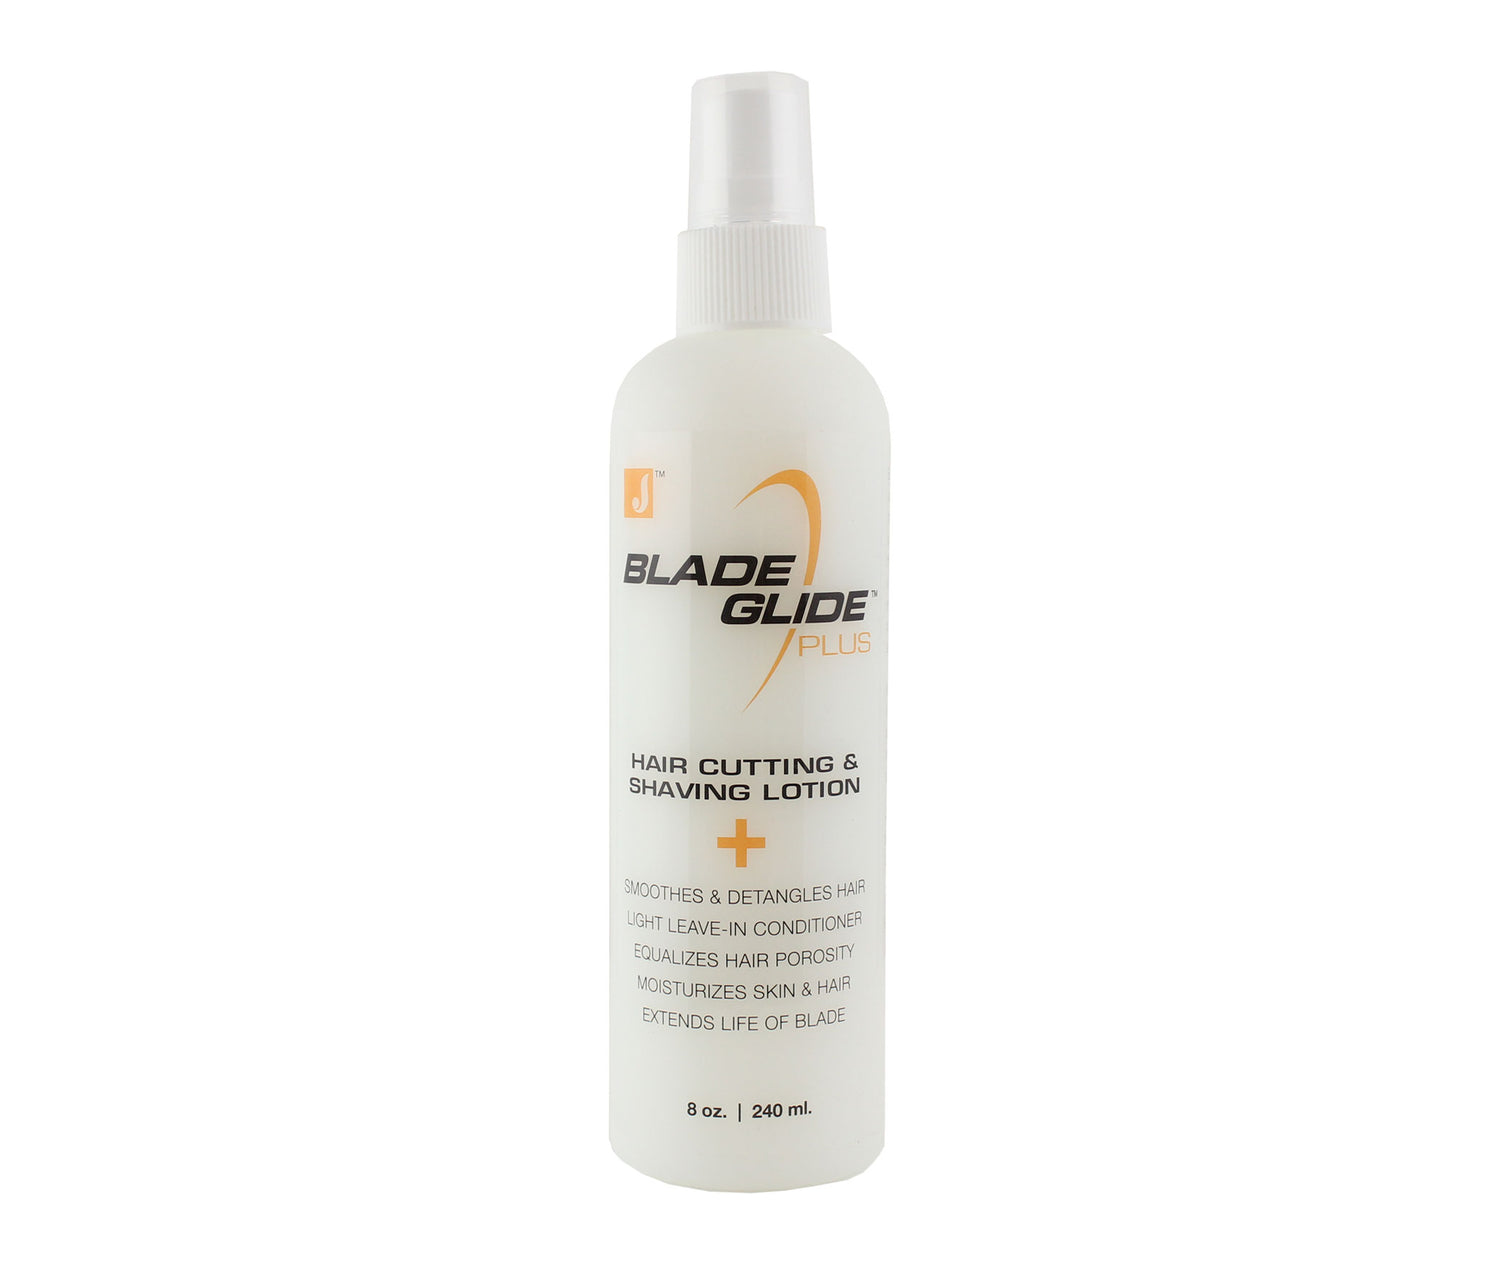
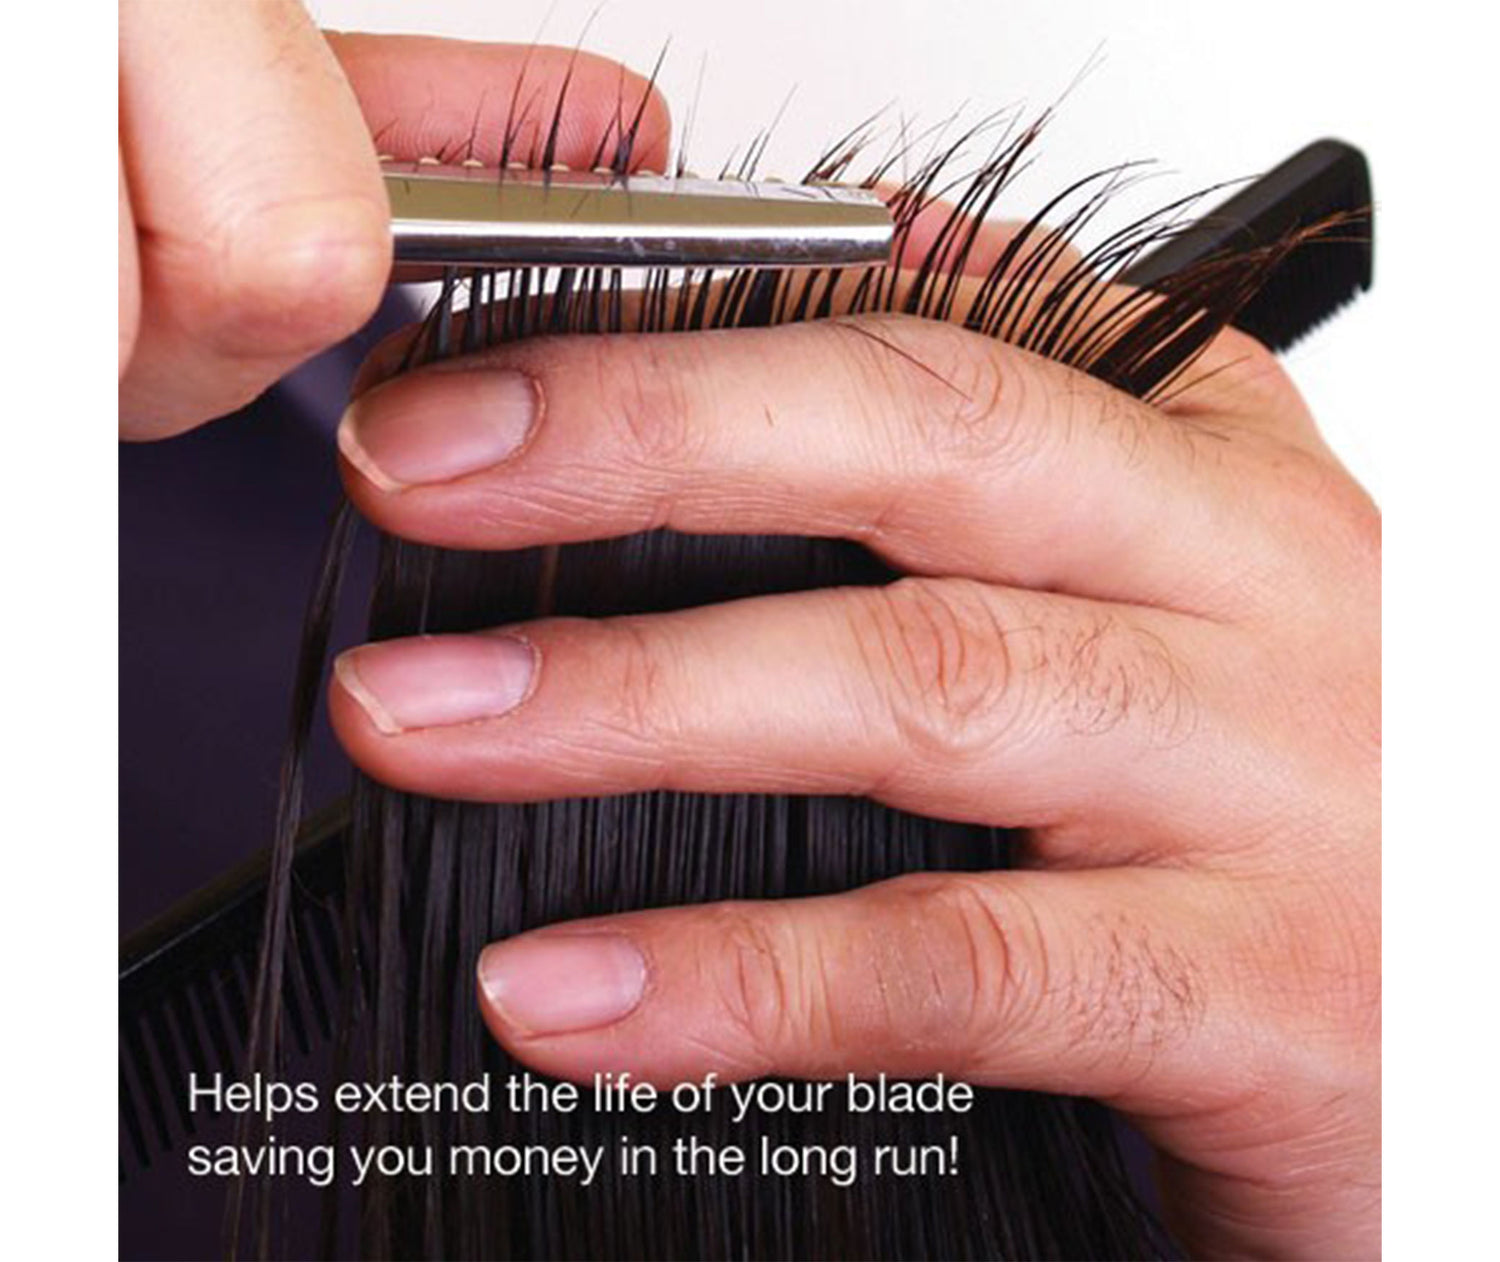
JATAI Blade Glide Plus 8 oz
From $11.95
Unit price perJATAI Blade Glide Plus 8 oz
From $11.95
Unit price per- Silky smooth lotion that help shears and razors glide through hair and on the skin
- Smooths, detangles and acts as a leave-in conditioner
- Contains Provitamin B5 , purified water and cationic conditioners
- Equalizes hair porosity for pre-perming and coloring
- Extends the life of the blade
- Moisturizes the skin and hair
- Subscribe & Save up to 25% on Blade Glide!
- Made in America
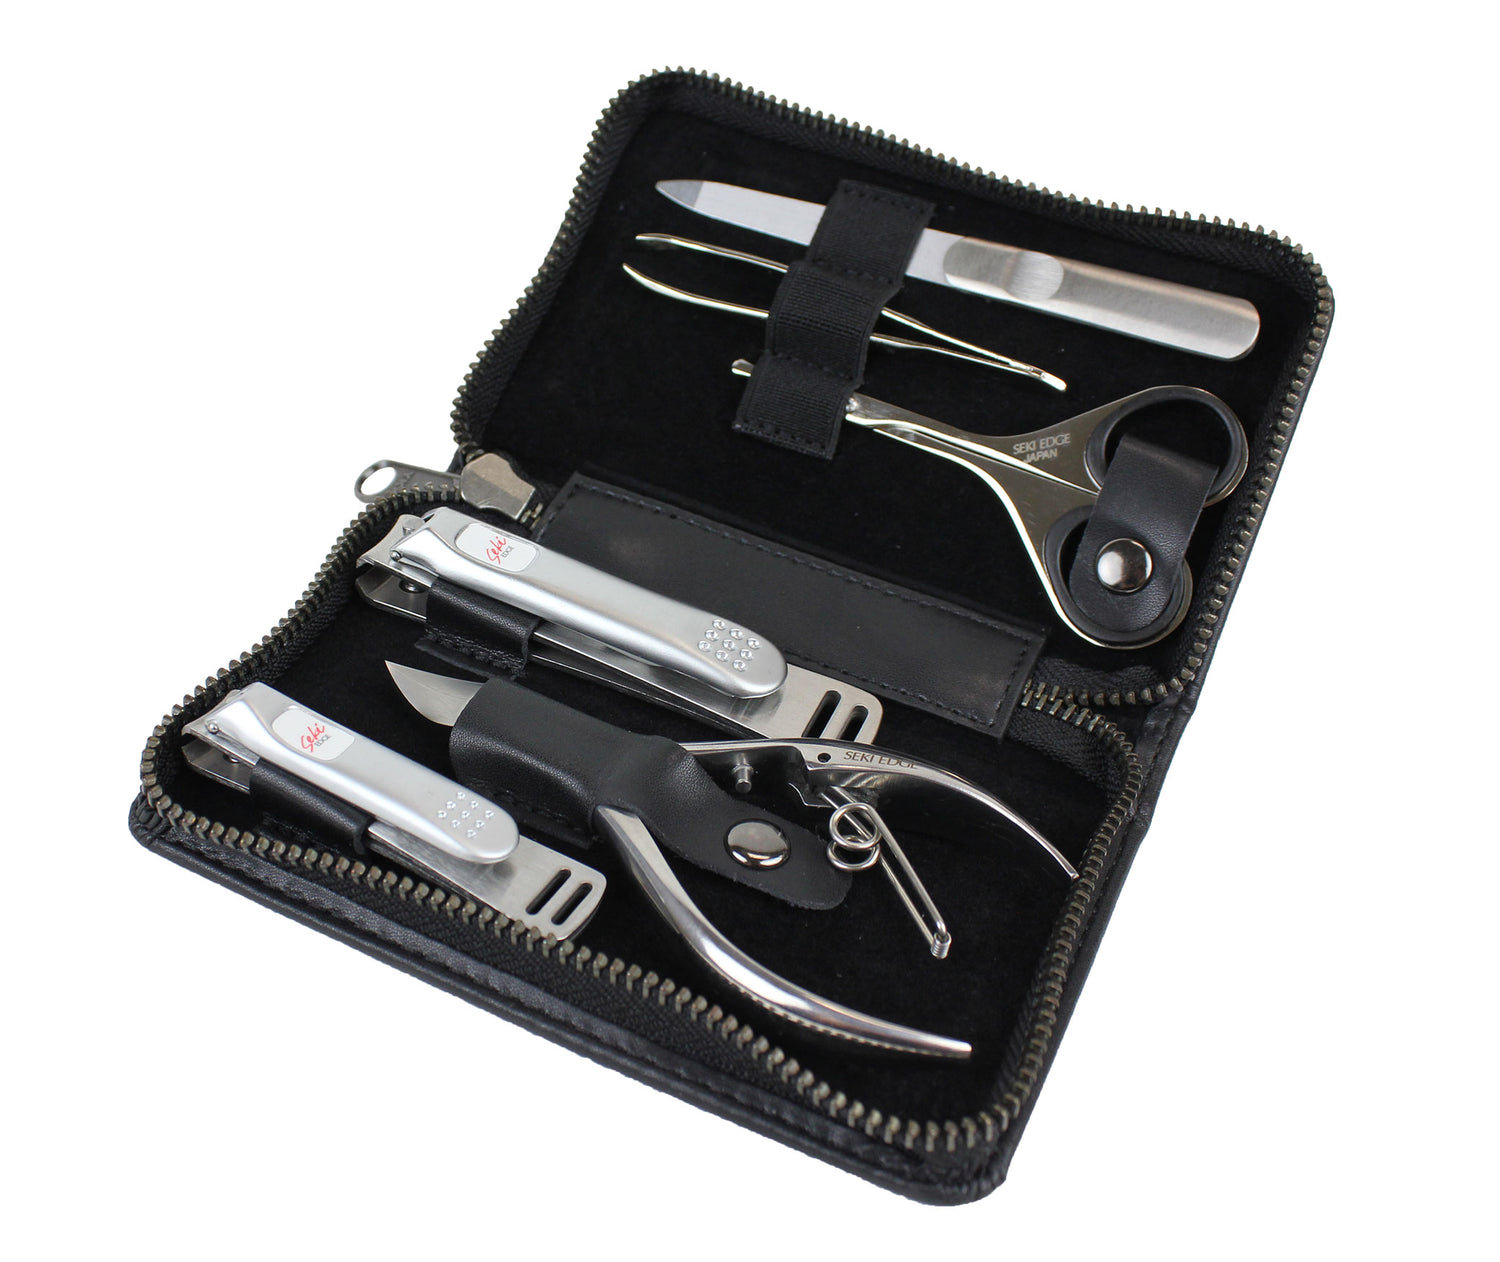

Seki Edge Craftsman Luxury 6-Piece Grooming Kit (SS-3103)
Seki Edge Craftsman Luxury 6-Piece Grooming Kit (SS-3103)
- Contains 6 high quality essential grooming tools, a luxurious kit for a luxurious man
- Comes in a synthetic leather carrying case perfect for traveling
- Includes our top selling toenail and fingernail clippers
- Other tools included are a stainless steel nail nipper, nostril scissor, nail file and slant tweezer
- Made in Japan
Learn more about Seki Edge Grooming Kits.


Seki Edge Deluxe Fingernail Clipper (SS-101)
Seki Edge Deluxe Fingernail Clipper (SS-101)
- An economical choice packed with cool features
- Built-in multi-directional nail file smooths out any rough edges
- Built-in nail catcher to easily contain and dispose clippings
- Die-cast lever and hand finished edges for sharp, clean cuts
- Smaller in size compared to the Deluxe Toenail Clipper SS-102
- Made in Japan
Learn more about Seki Edge nail clippers here.
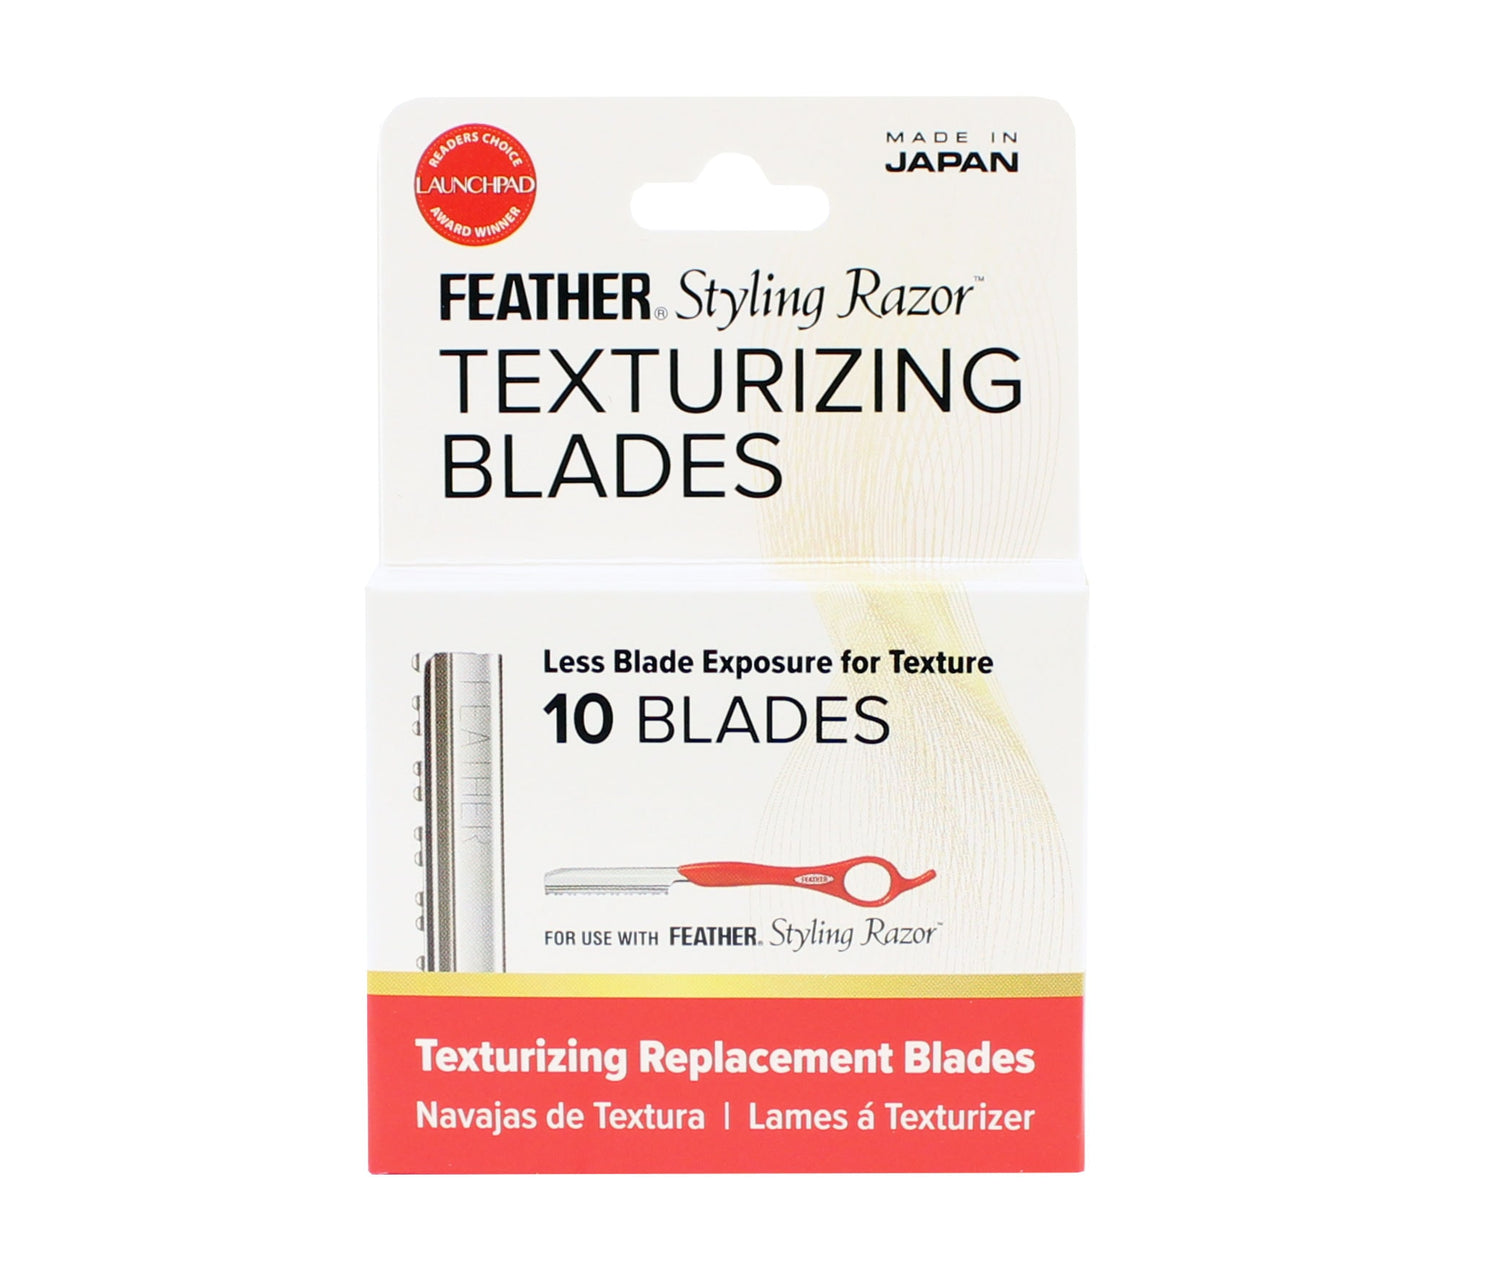
Feather Styling Razor Texturizing Blades
From $13.49
Unit price perFeather Styling Razor Texturizing Blades
From $13.49
Unit price per- Texturizing Blades remove 25% less hair than the Feather Standard Blades
- For texturizing and creating volume
- Cutting edge is designed to give you creative cutting control
- Replaceable guarded blades make it safe for you and your client
- Blade design prevents hair from clogging between the guard and blade
- For use with Feather Styling Razor handles only
- 10 blades per pack
- Subscribe & Save up to 18% on blades!
- Made in Japan
Click to learn more about Feather Styling Razors and Blades.
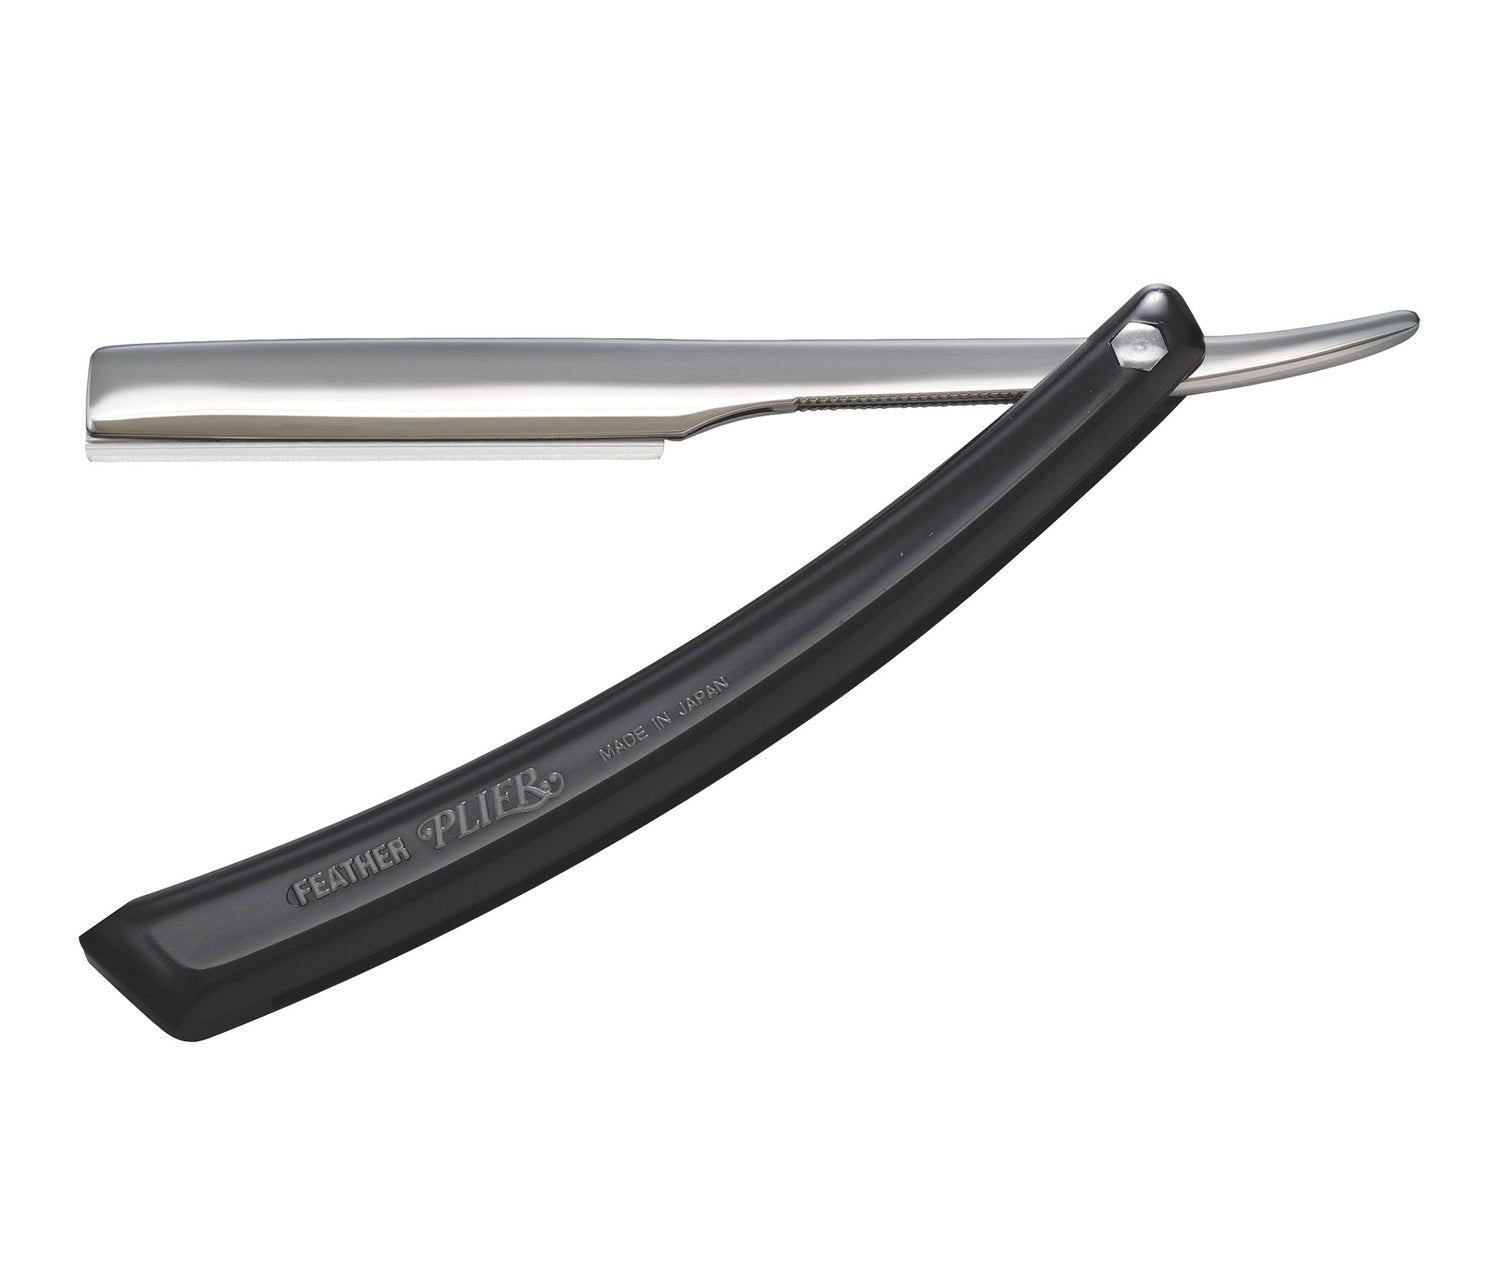
Feather Plier Razor
$162.00
Unit price perFeather Plier Razor
$162.00
Unit price per- The most advanced replaceable haircutting razor handle and blade on the market
- Slim French razor profile for free-form cutting
- Razor balance and weight allows the blade to glide through the hair effortlessly
- Complete cutting control to your hand movements
- Used by top hair professionals and advanced stylists
- Designed for clog-free hair cutting
- Unique 'S' blade shape prevents blade from moving while cutting
- Use only unguarded Feather Plier Blades for pure hair cutting freedom!
- Blades sold separately. No blade is included with this handle.
- Made in Japan
*White color is a limited edition handle. Only a predetermined quantity will be produced.
Showing 16/131
RELATED ARTICLES
The Best Fingernail and Toenail Clippers on the Market
A Simple Guide to Tweezer Types, Uses and Features

What You Should Know About Using a Double Edge Razor
"One of my very first graduating gifts from cosmetology was a Feather Razor"