-
SHOP BY
-
 HAIRSTYLIST
-
 BARBER
-
 NAIL TECH
-
 ESTHETICIAN
-
 CONSUMER
SHOP BY
ProfessionBrands -
-
HAIRCARE & SHAVING
HAIRCARE & SHAVING
 RAZOR HANDLES
 RAZOR KITS
 RAZOR BLADES
 SHEARS & SCISSORS
 END PAPER
 COMBS & BRUSHES
 LOTIONS & CREAMS
 ACCESSORIES

-
PERSONAL CARE
PERSONAL CARE
 NAIL CARE
 TWEEZERS
 EYELASH
 HAIRCARE & SHAVING
 SKINCARE
 KITS & SETS
 SPECIALTY
COMBS & BRUSHES
LOTIONS & CREAMS
ACCESSORIES
SPECIALTY
COMBS & BRUSHES
LOTIONS & CREAMS
ACCESSORIES


1 product
1 product
Sort by:
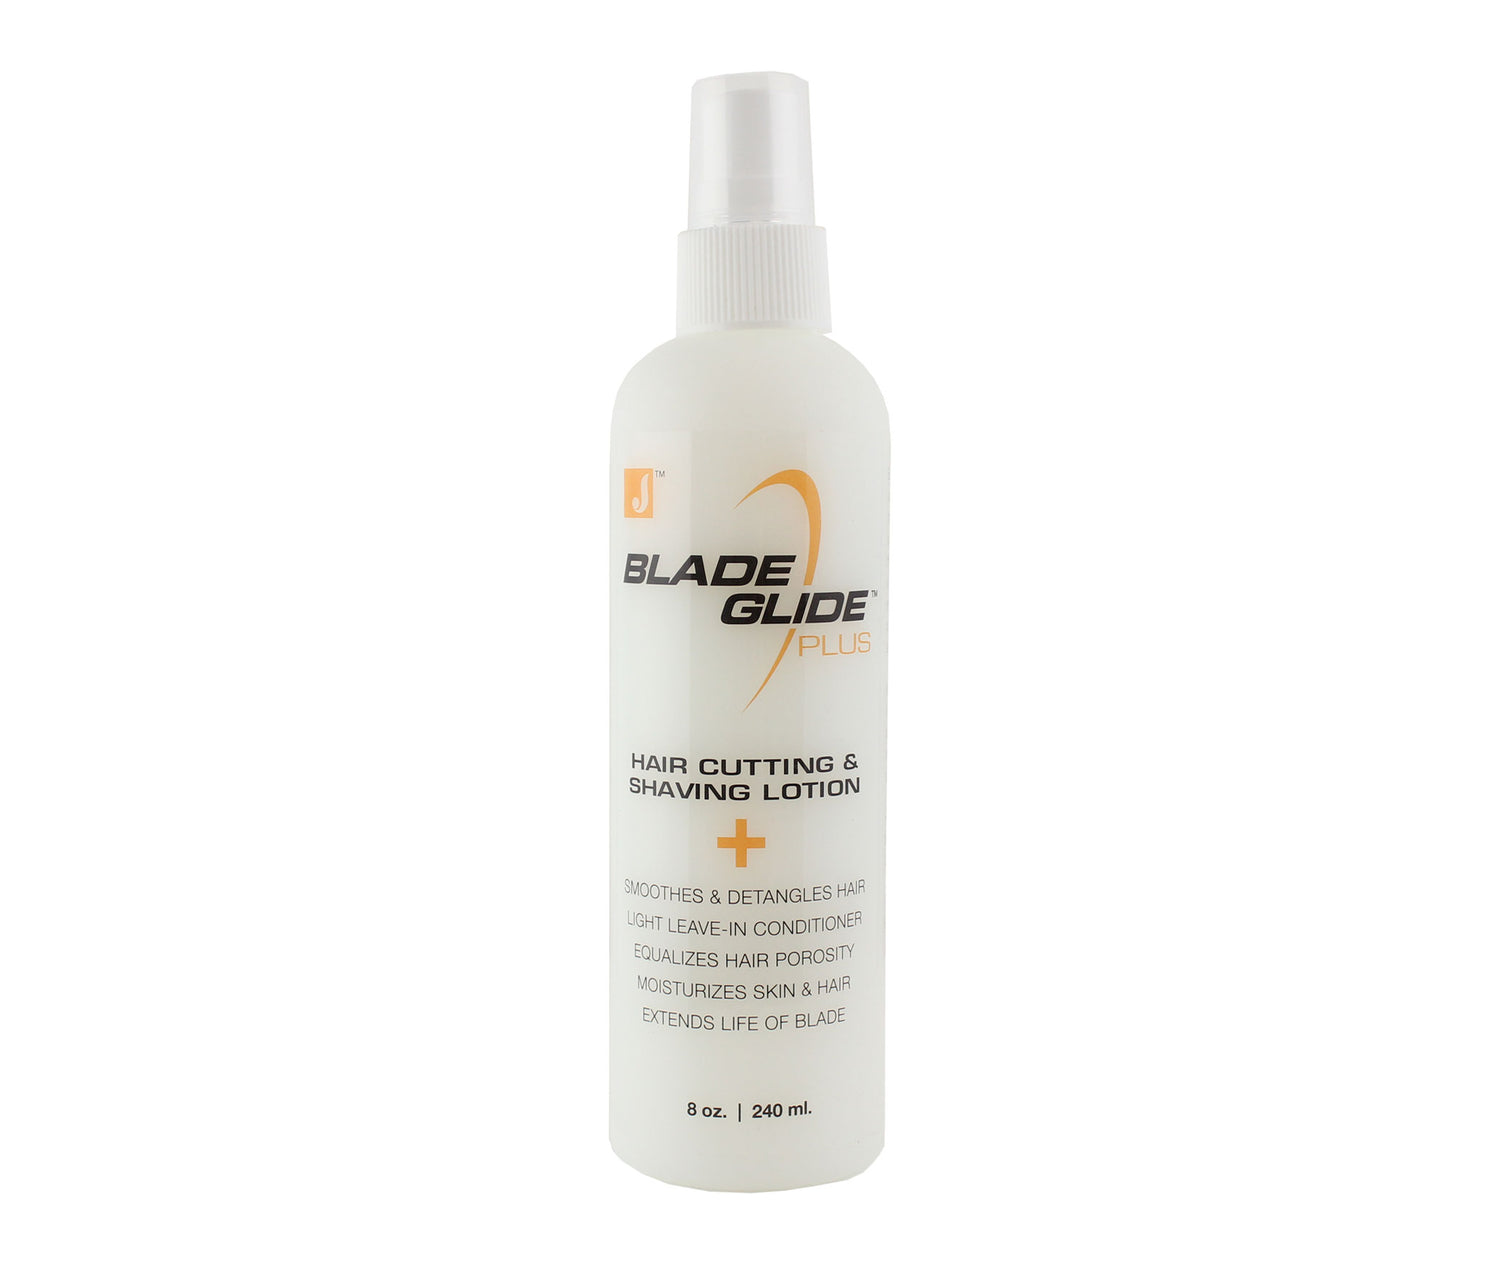
JATAI Blade Glide Plus 8 oz
From $11.95
Unit price perJATAI Blade Glide Plus 8 oz
From $11.95
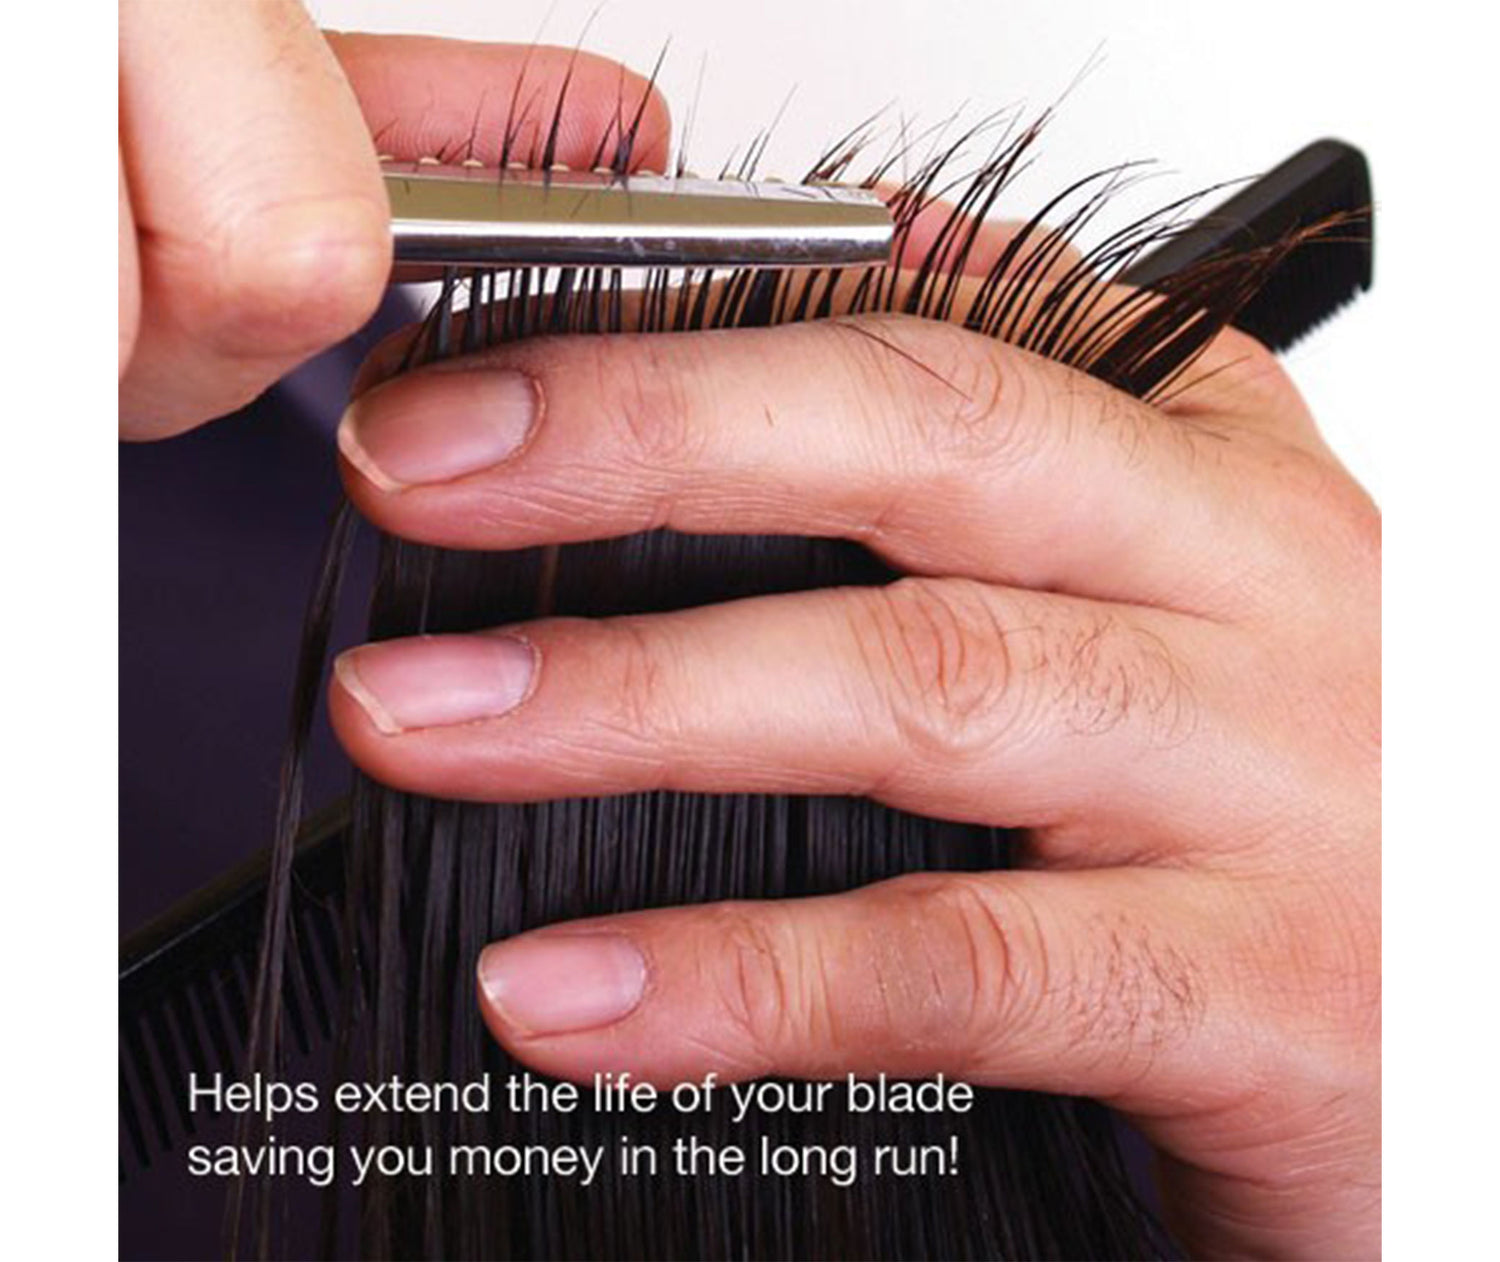
Unit price per- Silky smooth lotion that help shears and razors glide through hair and on the skin
- Smooths, detangles and acts as a leave-in conditioner
- Contains Provitamin B5 , purified water and cationic conditioners
- Equalizes hair porosity for pre-perming and coloring
- Extends the life of the blade
- Moisturizes the skin and hair
- Subscribe & Save up to 25% on Blade Glide!
- Made in America
RELATED ARTICLES

10 Safe Practices for Shaving to Minimize Cuts, Irritation and Razor Burn
The Feather Nape & Body Razor: A Razor that Stands Alone

Ensuring Safety: Guidelines for Proper Chemical and Equipment Usage in Hair Salons and Barbershops

How to Texturize Hair Using Scissors vs. a Razor on a One Length Bob
"One of my very first graduating gifts from cosmetology was a Feather Razor"