Choppy Layers for Long Hair Tutorial
by JATAI Academy,
22 Aug 2025
If you're looking to create choppy layers for long hair, you'll want to go through this tutorial. Layered haircuts can come in various forms as not all layers are made the same. Choppy haircuts are hairstyles with a lot of separation which creates more distinct layers.
These styles are trendy and have a more rock and roll feel. They work on short, medium and long length hair so the techniques described below apply to all lengths. Whether it's straight or wavy hair, choppy layered hairstyles can work for most hair types. Watch this long hair with choppy layers tutorial and follow along with the transcript.
Choppy Layers for Long Hair:
Welcome back to Jatai Academy. Today we're going to be doing a study on long hair choppy layers. But we don't want choppy layers like it was a mistake.
We want choppy long layers that looks good, balanced, and creates a lot of texture. This haircut's all about getting separation and pieciness and getting that kind of lived-in layered feeling.
So, we're going to show you how to section it. We're going to show you how to build the right texture by doing some deep channel cut with our razor. And we're going to show you how to do a nice little face framing around the front.
So, we're going to start here working on our perimeter shape and the overall length of the whole haircut. Natural part to the occipital, occipital to the mastoid. And then we're going to section off a center section.
Channel Cutting the Perimeter
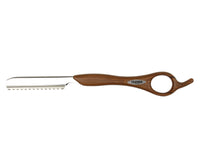
I'm going to go through and use my Feather Styling Razor. And I'm using the limited edition wood look. I'm also using the R-Type Blade. And the R-Type Blade exposes more of the cutting blade so I can cut thicker sections of hair and it gives me a little bit more control.
Now I'm taking horizontal sections and taking very very deep solid severe channels because I want this hair to separate. So I want to leave it a little longer than I think I need in order to give me the overall length that I want.
Because I'm taking such severe channels out of it, it's going to make the ends look and appear a little bit thinner, which is going to make it appear a little bit shorter. So, cleaning up my shape there.
Now, we're going to go through and take a parallel section as I work up the back of the head. So, every section is going to be parallel.

And I'm going to start the exact same way. Start right in the center. Comb everything clean and then a very deep solid channel cut all the way through to force that separation, to force that texture to pop into these tendrils.
If I take the channels much closer and much finer, I'm not going to see as much separation. It's going to diffuse the texture and I'm going to be more product dependent to get that separation.
So here I'm just cleaning up a few pieces that got a little bit longer that I want to make sure that it's not sticking out too severely. So it looks like it's longer on one side than the other.
And I'm just going to go through and follow the same methodology. The deeper the channel, the more hair I take. The stronger the gap becomes, the more separation that I force into each section.
So, my layering that I'm doing here is really only going to be in the last six/eight inches of the hair and just following through exactly the same methodology to cut the entire perimeter shape to get the texture like I want.
Sometimes the hair in the middle didn't reach so I'm not going to cut so much in the middle. Where it gets longer on the sides, I still want to get everything the same length all the way across.
As I pull some of the neck sections down, there's not a whole lot of weight removal that needs to happen. So, I'm just taking off any kind of length that hangs over my perimeter shape to make sure we get the lengths the same.
But then on the sides, it does need a little bit of weight removal and a little bit of channeling to make sure that the textures pop just like the center and the underneath sections.
Face Framing
Now, we're going to move on to the front. And I'm going to take the first bump from the hairline and take that all the way to the top of the ear. That's going to section out where the hair falls in the face.
Now I'm going to take a center section right where her hair parts. I'm going to pull that forward and that's going to be my length for her shortest layer around the front.
I'm taking that little triangular section right where her hair separates and splits. Now I'll split that in half. I'll take the left and the right so I can have a guide for each side.

Now here, working on the left side of her head, I will take a diagonal section, pull that over to the opposite side, and use my length from underneath to create a really steep angle for my shortest layer around the front where her bang section is to blend in with all the face framing that I'm going to start to introduce as I work into the sides.
Now, the steeper that angle is, the faster the speed of movement that I create going from short to long. And just continuing that all the way down to the perimeter length that I have at the ear.
Now, we're going to go through and do the exact same thing on the other side, but in the opposite way. So where on the left side I was pulling everything to the right, here on the right side I'm pulling everything to the left because I want that increase of length to force it out of her face right at the fringe bang section and then that blends into my face framing layers.
Now I'm not going through and putting a lot of texture into this section because it's already a little bit finer and thinner. And if I need to create more channeling, then I'll do that where the sections get a little bit thicker. Check our lengths. They look pretty good.
Now, we're just going to comb everything down. And anything that hangs over my face framing, I'm just going to cut that off.
Now, I want to be mindful of my perimeter shape right at the ear section. So, when I worked on my perimeter in the back, I've cut everything all the way around, and now I'm working on my face framing.
I want to make sure I don't cut that perimeter length right at the top of the ear. If I cut that, that shifts the weight behind the ear and it no longer hangs full around the front.
So, still taking a long razor stroke to make sure that I have a nice soft texture to it. If the hair gets thicker, then we'll go through and channel it and make that a little bit lighter and thinner.
Now, let's go through and work on some layering in the back of the head. And this is really what's going to make the haircut pop. Taking a triangular section right in the crown, hold the first section up. Find out where I want my layering to start.
And then just like I did underneath, I'm going to go through and take some really deep, severe channels to force that hair to separate when it falls. And because I'm holding it straight up in the air, that's going to add layering to it as well and airiness and softness.
So that deep channel will give me a little bit of weight. So when it falls, it pops. Now, here where the layering, I'm sorry, where the razoring stopped on the previous section is going to be the beginning of the razoring for the next section that I cut.
And I'm still going to follow the same methodology I was doing before. We'll separate the right half of the back from the left half of the back. Hold that straight up using my guide from underneath to start the razoring.
And still continuing that really severe deep razor channel. Just keep holding everything straight up, section by section by section, letting any kind of shorter hair underneath fall out. And there we see my guide from underneath. And I'll start the razoring as I go forward.
Checking our razoring on the left side, seeing how it looks before we move on to the right. Now, we're going to follow through with the exact same thing we did on the left side. We're going to do on the right side.
Where the razoring stopped from my previous section is where the razoring is going to start for the next section. So, I don't have to be real precise with this sort of layering because not only am I elevating it to the maximum elevation that I can get, which is going to remove the most weight, but because I'm using a razor and I'm going for a choppier look with this really deep kind of choppy channel cutting, it's going to blend smoothly throughout.
You're not going to see any kind of real hardcore lumps. It's going to have a smooth gradation in my layering. But because I got that deep channel, it's going to pop out and be a choppy type of layering.
Follow us on your favorite social media @jataifeather
Check our layering. See how it looks. And I think it looks pretty good. I am going to remove a little bit more weight right through the center. I pulled everything up and I pulled everything down.
So, I got a little bit of weight build up right in the middle part of the entire back of the head. So, I'm going to take a little bit more weight out through there.
And I'm going to go through and continue on with the same sort of deep severe channeling that I was doing underneath just to make sure that we can get those layers to pop and separate like we want.
And I want to be mindful of how I'm applying this channeling technique. Where the hair is thicker, I'm going to take a little bit more. Where it's thinner, I'm obviously going to take a little less because I want the weight distribution of her hair to be as consistent as possible.
Addressing the Top of the Head
So, now we're going to move on to the top of the head and I'm going to take a parallel parting right to her natural part. I'm going to pull the hair up in the crown as my guide.
And then I'm going to go through and channel it just like I was doing in the back on the side of the head to make sure that all the layering from the back blends into my face framing layering around the front.

And then just continuing to channel that through and not trying to be real precise and real meticulous about this. This haircut demands a looseness, a fastness of the razor application, and I can't be real precise.
This is more of a haircut about feeling. So, I want to make sure that I put that deep channel in it as consistent as possible throughout.
Now, we're going to continue on the opposite side, pulling everything up. Anything that that hangs out, that doesn't look right, that doesn't feel right, I'm going to take a little bit of that out.
Blowdrying
Now, let's go through and start to blow dry. And when I start blowing dry, I'm going to start right around the front. I'm going to pull everything forward, blow everything back so it kind of gets confused because I want this hair to have some volume, but I don't want it sticking straight out.
So, I'm going to start at the bangs because that's the most important part of a blow dry is how it looks around the front. Now we're going to work in the back. I'm going to blow dry everything at the roots to get it off of the scalp so it has a natural fullness.

And then I'm going to go through and polish it off from the mid-shaft and the ends with a little bit of a round brush. I want just enough bend to force the layers to kind of separate, but not so much that it starts to look real glamorous.
Around the front, I'm pulling everything forward with a little bit of bend moving back away from the face. And then I'm gonna take a cold air shot and blow everything around to get some air in it so it has a more natural kind of look to it.
After I got everything dry like I want, I'm going to put a little bit of styling cream on my hands and go through and just encourage those pieces to separate so we can really see our layering pop. And I think that that looks pretty good and everything's popping really, really well.
Final Look

Here's our end result. And I think we're looking pretty good. I like the way that the texture really fits with her natural texture. And we got a lot of separation to it. So, this is a type of long choppy layers that still blends and doesn't look too chunky.
You got the separation from all the layering in it. You got the pieciness from all that deep channel cutting. And the face framing lays perfect around the front.
And this is not about being super smooth. It's about getting some pop from the layers. So, it looks a little lived in and a little more rock and roll than a glamour type of layering.
So, I think it works really well and it fits on most types of hair. On all but the curliest types of hair this shape would work really, really well on.
Please check out the Jatai Academy. There's all kinds of fantastic information on there that will make you better hairstylist and barber. Also, let us know if you have any ideas for what you'd like to see in the future. Any suggestions would be great. Thank you so much. We'll see you next time.
SHARE