-
SHOP BY
-
 HAIRSTYLIST
-
 BARBER
-
 NAIL TECH
-
 ESTHETICIAN
-
 CONSUMER
SHOP BY
ProfessionBrands -
-
HAIRCARE & SHAVING
HAIRCARE & SHAVING
 RAZOR HANDLES
 RAZOR KITS
 RAZOR BLADES
 SHEARS & SCISSORS
 END PAPER
 COMBS & BRUSHES
 LOTIONS & CREAMS
 ACCESSORIES

-
PERSONAL CARE
PERSONAL CARE
 NAIL CARE
 TWEEZERS
 EYELASH
 HAIRCARE & SHAVING
 SKINCARE
 KITS & SETS
 SPECIALTY
COMBS & BRUSHES
LOTIONS & CREAMS
ACCESSORIES
SPECIALTY
COMBS & BRUSHES
LOTIONS & CREAMS
ACCESSORIES


4 products
4 products
Sort by:
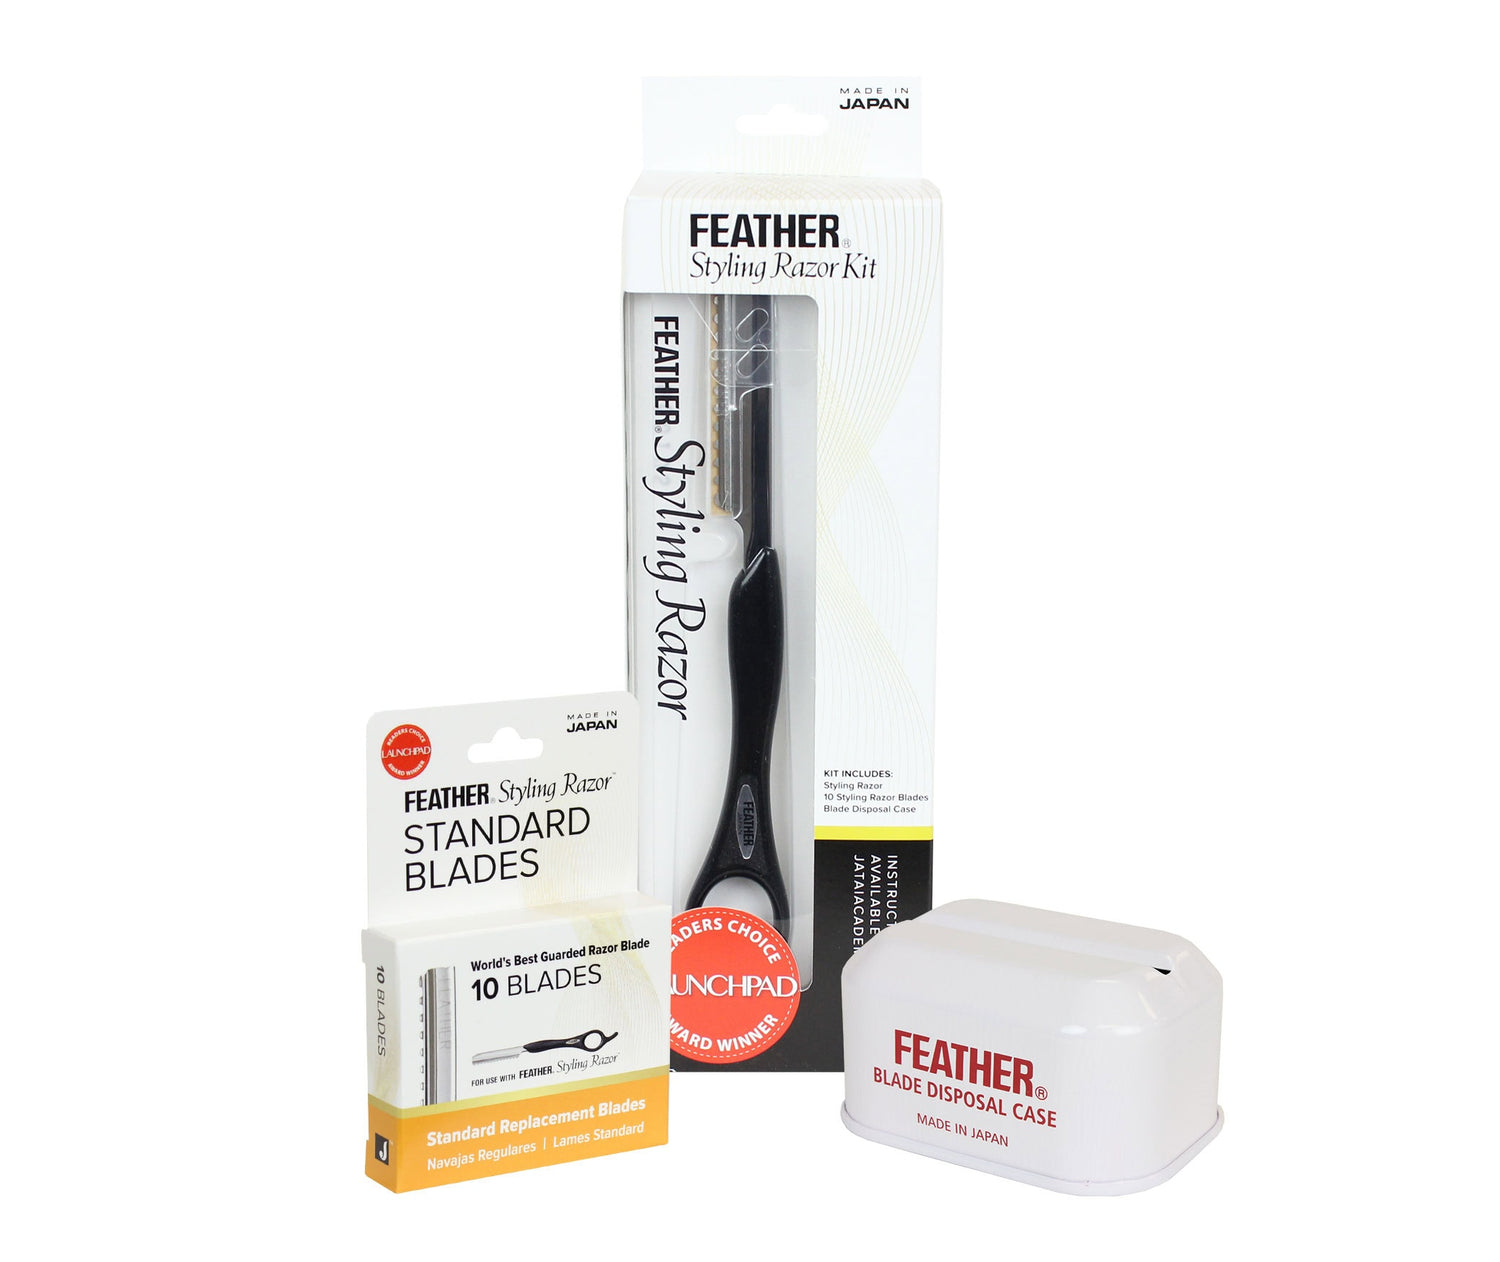

Feather Styling Razor Kit
$59.95
Unit price perFeather Styling Razor Kit
$59.95
Unit price per- World's #1 hair cutting razor and LaunchPad Reader's Choice Award winner year after year!
- Kit contains: Styling Razor handle, 10pk of Feather Standard Blades and a Blade Disposal Case
- The balance and feel allows the razor to become an extension of your hand
- Guarded blade protects you and your client
- Hair does not clog between the guard and blade
- Blades fit snug in the handle
- Blades are removed and replaced with a no-touch blade system
- Use any of the 3 Feather Styling Razor Blades to tailor your hair cutting needs (Standard, R-Type, Texturizing)
- Choose from a variety of handle colors
- Includes the new metal disposal case which is better for the environment and is recyclable
- Made in Japan
Click to learn more about Feather Styling Razors and blades.


Feather Detail Styling Razor Kit
$59.95
Unit price perFeather Detail Styling Razor Kit
$59.95
Unit price per- World's #1 hair cutting razor and LaunchPad Reader's Choice Award winner year after year!
- Kit contains: Detail Styling Razor handle, 10pk of Feather Standard Blades and a Blade Disposal Case
- A shorter version of the Styling Razor to position the hand closer to the blade and give more controlled short cutting strokes
- The balance and feel allows the razor to become an extension of your hand
- Guarded blade protects you and your client
- Hair does not clog between the guard and blade
- Blades fit snug in the handle
- Blades are removed and replaced with a no-touch blade system
- Use any of the 3 Feather Styling Razor Blades to tailor your hair cutting needs (Standard, R-Type, Texturizing)
- Includes the new metal disposal case which is better for the environment and is recyclable
- Made in Japan
Click to learn more about Feather Styling Razors and blades.


Feather Texturizing Styling Razor Kit - Red
$59.95
Unit price perFeather Texturizing Styling Razor Kit - Red
$59.95
Unit price per- World's #1 hair cutting razor and LaunchPad Reader's Choice Award winner year after year!
- Kit contains: Texturizing Styling Razor handle, 10pk of Feather Texturizing Blades and a Blade Disposal Case
- The balance and feel allows the razor to become an extension of your hand
- Texturizing Blades removes 25% less hair than the Feather Standard Blades to create volume
- Guarded blade protects you and your client
- Hair does not clog between the guard and blade
- Blades fit snug in the handle
- Blades are removed and replaced with a no-touch blade system
- Use any of the 3 Feather Styling Razor Blades to tailor your hair cutting needs (Standard, Standard R-Type or Texturizing)
- Includes the new metal disposal case which is better for the environment and is recyclable
- Made in Japan
Click to learn more about Feather Styling Razors and blades.


Feather Wood Look Styling Razor Kit
$64.95
Unit price perFeather Wood Look Styling Razor Kit
$64.95
Unit price per- Wood Look Feather Styling Razor Kit contains a Limited Edition handle with a wood-look finish
- No two handles are alike! The color and grain striation will vary from handle to handle
- World's #1 hair cutting razor and LaunchPad Reader's Choice Award winner year after year!
- Kit contains: Wood Look Styling Razor handle, 10pk of Feather Standard Blades, Blade Disposal Case, and free holster
- The balance and feel allows the razor to become an extension of your hand
- Guarded blade protects you and your client
- Hair does not clog between the guard and blade
- Blades fit snug in the handle
- Blades are removed and replaced with a no-touch blade system
- Use any of the 3 Feather Styling Razor Blades to tailor your hair cutting needs (Standard, Standard R-Type or Texturizing)
- Made in Japan
- Do not use alcohol (ethanol) based disinfectants on this razor as it may damage the wood-look finish.
Click to learn more about Feather Styling Razors and Blades.
RELATED ARTICLES

Setting it Straight: Not ALL Razors are Feather Razors
Your Top Five Razor Cutting Questions - and Answers!

The Must Need Tool in the Best Barber in NYC's Tool Kit: The Feather Razor

1970 Shag Haircut with Bangs Tutorial
Product comparison
"One of my very first graduating gifts from cosmetology was a Feather Razor"