Kourtney Kardashian Long Hair Tutorial
by JATAI,
20 Nov 2024
In this tutorial, Russell Mayes Director of Content for Jatai, demonstrates how to create Kourtney Kardashian long hair. She wore this style before she cut it into her more popular bob shape.
Kourtney Kardashian has had many hair looks over the years. From short hair to long, blonde to dark, blunt cut to soft cut, styled ponytails and more, Kourtney has shown she is a fashionista. But you won't usually see Kourtney Kardashian bangs.
Just take quick look at her Instagram profile @kourtneykardash and you'll see many posts with different hair styling. Kardashian hair, whether it be Khloe Kardashian, Kim Kardashian or the Jenner sisters, is always thick and healthy. Hair care is an important part of being able to carry different looks.
Watch this tutorial and learn how to create Kourtney Kardashian's long hair look and follow along with the transcript.
Kourtney Kardashian Long Hair Tutorial:
Welcome to Jatai Academy. Today we're going to be doing a study on Kourtney Kardashian's hair before she cut it off into a bob. So we're going to get the texture right. We're going to get the lengths right. We're going to get the styles right. So let's get started.
Now the thing with Kourtney Kardashian's hair is she's got a lot of hair. It's very thick and the thing that's remained constant through all of her hairstyles or through the majority of them is that the root of it has always been very very solid and full and thick.
And the ends of it have been very airy and wispy and light. So that's what we're going to focus on today is how to maintain a very solid shape from the center half up and then maintaining a very light airy shape on the bottom.
Kourtney Kardashian Long Hair - Razoring the Bottom

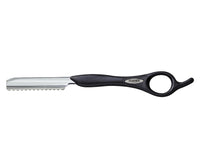
So I'm going to go through and use my Feather Styling Razor to create that effect. I'm going to take a natural or center part. Now with this haircut it's going to focus mostly on the texture of it and less on the overall style and shape of the haircut.
So we got our first section of the nape, occipital to the mastoid. This just gives us our baseline that we can build our length and shape off of. So I'm going to start right in the middle.
So instead of going through and cutting a baseline and then trying to texturize it, I'm going to do everything at the same time. So I figure I want to go about right here and I want to start maybe not quite halfway but certainly fairly deep in and then start channel cutting that all the way down to the tip of my fingers.
So we're going to start and just real gently go through and take a nice wispy angle and I'm not moving my left hand at all. I'm keeping that the same so that way I know that is going to be my length overall and then putting that texture in just the bottom is going to make each of these little pieces here separate.
I'll take a small little piece as my guide, comb this straight down. There's my guide right there. So I'm going to plant my fingers and now go through and cut me a nice little soft wisp.
I want to try to be consistent with the thickness of my wisps that I'm cutting and the angles that I'm doing but there's obviously going to be some variation to that and that's okay.
We're going to continue on the other side. Comb this straight down, plant my fingers right where my guide is and then once I get to my fingertips there that's going to be my length. I'll cut that off. Right through there. Right through there. Parallel to the previously cut section.
Follow us on your favorite social media @jataifeather

Alright, so I've got my next section here and I want to be conscious of the hair that I've cut before my previously cut section. I don't want to go through and re-thin that every time because I'm doing a channel cut and there's a possibility that I can cut that again.
So what I'll do is I'll remove that out of my hand. I'll take the next section comb it down. There's my previously cut section. So now I have where the guide was but it's not in my hand and I can get close enough to the overall length and then go through and do the exact same methodology that I was doing before with this really really deep channel.
So now when I combine those together I still have a nice soft texture and I don't re-thin the previously cut section. I have my next section. Let's go through and remove the previously cut section.
There is my guide from underneath. Comb this straight down without picking up the hair from underneath just using that as a visual guide and then going through and doing my deep channel to cut my length and to cut my texture at the same time.
Same thing on the other side. I want to remove the previously cut hair, comb my neck section down. There's my guide length.
Then go through with my deep channel. Vary it up a little bit according to the thickness of the hair. If the hair is really thick I may take the channel a little bit deeper. If it's thinner maybe a little bit less.
Take my next section, hold that straight down. Then with my Feather Styling Razor, deep channel cut all the way to the perimeter length. Now as I come into the side since I don't have any previously cut hair underneath I'll take a small piece from the back as my length guide, comb that straight down.
There's my length from the back. Then we'll go through channel that through and down, down and through. Perfect. Same thing on the other side. Okay so here is my last section on the left side. We'll pin that out of the way there.
Comb everything down and through. Try not to pick up any of my previously cut hair. There's my guide length.
Not a whole lot of hair here to cut but I still want to maintain the same sort of texture. So even though I'm not cutting a lot of hair off right through here, here I am but through there I'm not cutting a lot of hair off. I still want to maintain the same sort of textures so that everything flows together evenly.
There's my length. This is probably the most solid section of the whole haircut that she has. So let's go through. Oops! I cut a little bit too much off there but that's okay. That's okay.
There we go. Perfect. Now that we've got our perimeter shape done, I want to go through and lighten a little bit of layering just around the front to help it get out of her face a little bit.
Face Framing Layers

So we're going to go through and take a section from the first bump of the head to the high point of the ear. Same thing on the other side here. Alright. So I have everything that has the tendency to fall in her face and I'm going to start right in the middle.
So I'm not trying to cut this too short. I want to go through and keep this fairly long, but I just want to start to put an etching in to help get this back out of the face. So I'll start right in the middle, work to the right, right in the middle and work to the left.
So this is going to be my shortest layer for both sides. So now I'll take this right side, comb everything straight down. There's my guide length. So now we're going to go through and real gently, evenly with care and love and sweetness and tenderness cut that all the way down.
So I'm cutting a real steep angle going down. I'll take the hair behind it, comb all of that straight down. There might be a little bit that hangs over right here on the bottom.

And that's basically the only part of layering that I'm going to put in this section. Now we'll take our section on the other side and do the same thing. Now you notice I cut the top down.
So I'm going to cut top down on this side. There's my line. There's my guide and then I'll go through and gently tenderly with intent cut that down to my guide length down here at the very perimeter.
And so I know since I'm starting at the same point and I'm going to the same point I can get my angles pretty close to being the same.
Comb everything else down. See if anything hangs over. We got a little bit right there. That's looking pretty good. I don't like that one but that looks pretty good and I think we got the basic shape built in.
Kourtney Kardashian Long Hair Final Look

So now let's go through and blow dry and see what we got. Here's our end result. I think we're looking very reminiscent of when Kourtney had her long hair and the whole point of it is to keep these ends really nice and airy and soft so that when you curl it, it has a little bit of separation to it.
It doesn't have that 70s you know beauty pageant kind of look to it. And also with that real steep angle around the front it gives us just a little bit of movement to be able to keep it out of her face and I think that this works really really well.
So just remember that this haircut is more about getting the texture right and focusing where that texturizing is going to be in the lower half of the hair.
Please check out Jatai Academy. There's all kinds of great information on there that will make you a better hairstylist and barber. Also let us know what you'd like to see in the future and thank you so much for watching. We'll see you then.
You can also check out the Feather Styling Razor in our shop.
SHARE