Wavy Lob Haircut Tutorial
by JATAI Academy,
01 Jul 2026
When it comes to popular bob hairstyles, longer length hair is a modern style that women gravitate to. Lob haircuts are the perfect compromise to a 'not too short' but 'not too long' look that has a lot of versatility for styling. Whether extra body, curls, volume, bangs or a simple blunt cut, the lob can incorporate all.
In this video, we address wavy hair and specifically the wavy lob haircut. It's a short hair style that can be done on both fine hair and thick hair, but the technique given will cater to thicker hair. The technique can also apply to a wavy bob or shorter hairstyle to prevent the 'broom' effect. Utilizing minimal products to style, this is a fun summery look for many women.
Stylists are often faced with challenges with hair types when trying to achieve particular looks. This video helps with one of these issues. Watch the video and read the transcript below.
Wavy Lob Haircut Tutorial:
Welcome back to Just Academy. I'm Russel Mayes, Director of Content. Today we're going to be doing a short wavy lob haircut. Now, we're going to approach this a little bit differently. We're going to apply our texture and then we're going to apply our blunt lob cut in two steps.
That way we can maintain the soft, wispy, airy texture that a wavy lob demands, but also have a real solid shape that the lob demands. So, we're going to show you both methods. We're going to show you how to apply it. We're going to bevel our shape a little bit to keep it from being too broomy. So, let's get started.
So, we're going to start with a center section straight back to the center of the spine from the occipital bone to the mastoid. Going to separate the bottom. This is the bottom flat section. Now, I'm going to separate that in half so I can have a much more manageable amount of hair to deal with.
Establishing the Length and Creating Texture

I'm going to start right in the center and holding this straight down, combing everything clean, keeping a real good amount of tension on my fingers just to keep that in control. I'm going to go through and channel cut the bottom and then cut my length.
So, I'll put texture in the last two inches of the hair and then cut the length. So the thicker the hair is, the deeper and the more channels that I'm going to put per section. The finer the section is, the less deep the channeling is going to go and maybe the less I channel.
So this is going to put texture and cut the length in at the same time. Just going to go through and comb everything straight down in its natural fall as I would any kind of lob. I want to make sure that this lob hits somewhere around the collar bone length, which gives it that kind of lob shape fullness. I want to keep it just short enough to where it doesn't get flippy from the shoulders, but long enough that it hits and kind of swings over them.
We've got our guide length established. Now, we're going to take the rest of the nape section, comb that down, and follow the previously cut guide that I established. Now, this whole flat section that I'm working on is setting up the lengths for the entirety of the haircut.
So, everything from the rest of the haircut is going to be built off this foundation. So, I'll take my time and make sure I get everything fit in just right. Make sure that the sides are balanced because it becomes my length guide for the rest of the haircut.
Going through and following the same methodology that I was doing, just being very patient and very diligent about my application of my cut line.
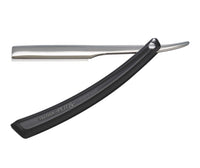
Now, when I'm working with the razor, I'm just mindful of how sharp the razor is. And as long as I respect the razor, I don't have to have any kind of fear of it, and I just go through and focus on the application of my cut using the tool. I don't get willy-nilly and haphazard with it.
Creating Shape Structure and Bluntness

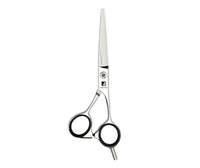
So, now I'm going to transfer to my Jatai Tokyo Scissor. This is a 6-in scissor. This is a very very nice sharp pointy blade. So, it allows me to get a real nice point cut on it. And that's what we're trying to do here is after I've gone through and cut everything with the razor, I want to go through and just point cut the ends to give it a little bit more bluntness.
Sometimes if I get a little too excited with the razor, I can make the ends a little bit too wispy. So going through and just retracing the ends and keeping the lengths the same length that I want, but just point cutting the ends will give the shape enough bluntness to really emphasize my bob shape without going through and removing all of the good razor texture that I put into it.
Now I'll check and make sure both lengths are the same on both sides. And then I'll start to move up the head. As I move up the head, I'm following the same methodology that I was doing before.
I'm taking a parallel section. I'm going to split that in half so I have a much more controllable section of hair. Keeping all of my sections parallel as I work up the head.
Now, I'm going to apply a little bit of Jatai Blade Glide. This keeps the hair at a consistent moisture level and also gives it a little bit of slip so that when I apply my cut with the razor, it glides through much better and gives me a cleaner cut.
Beveled Graduation and Point Cutting

I'm showing you right there the elevation that I'm lifting up each section as I go up the head. This is called peak curvature. So where the peak curve of that section, that's the elevation that I'm going to hold that.
So, what that's going to do is I'm following the same guide I had underneath, but as I slightly elevate it as I go up the back of the head (this is the elevation that I'm holding that section) it's going to bevel my cut line.
So, I'm actually cutting a little bit of a curve in my blunt lob line. So for thicker sections of hair, this really helps a lot in keeping the shape from being very, very broomy. If it's very broomy, it doesn't have any kind of movement to it at all.
So, by beveling the shape, I introduce a little bit more movement and it really fits well with the airiness that I'm putting in it with the razor. Now, each section that I go up, I'm slightly elevating it a little bit higher. I'm allowing the head shape to show me the exact elevation that I need to hold each section as I go up the head.
Following the same guide that I was using underneath, being patient with my application of the cut and trying to get it as precise as I can using a very artistically imprecise tool.
So that combination of working really precisely, trying to build my structure and following my sectioning in detail, but using a soft application tool like a razor really gives me a unique type of cut and texture that I can't get any other way.
There's my elevations that I was doing for each section. So, you can see in the center of the head, the elevation is a little bit higher. And as I work towards the ears, the elevation gets lower and lower.

After I finish that section, I'm going to go through with my Jatai Tokyo Scissors. And then point cut to refine the perimeter shape and the perimeter line. This not only makes sure that I keep the ends blunt, but it also makes sure I can keep both sides the same length and really maintain my lob shape.
You know, the thing about a lob or a bob is it has to have that certain pop of it being the same length on both sides and having that solid structure that really makes it swing.
Now, we're just going to follow along with my next section as I go up the head, following the exact same methodology that I was working before. You can see my elevation gets slightly higher, but it's not really high. So, because I'm holding it lower, it's still going to have weight from my graduation that I'm putting in it.
And this is a kind of beveled graduation. So, it's going to curve, but it's still going to be heavy and solid. And following the same methodology all the way around the front of the head.
Working on any kind of bob or lob wavy hair shape is as much about me being patient and diligent about my cut line. I have to really really focus that the client's head is in the proper position.
You know, on a mannequin head, it's easier because they don't move. But clients, they tend to move and they want to turn around and talk to you. It's like trying to cut a moving target sometimes. But be patient.
Now, as I start to go up the round of the head, you'll see that the elevation does not continue at the peak curvature. Once I get above the parietal ridge area, the recession area, the drop crown area in the back of the head, I'm no longer going to hold this at peak curvature. I'm going to hold it at the same elevation that I held the previously cut section.
So, there's that recession area, the top and the bottom that goes along the side of the head and that curves around the back of the head. So that's kind of like the parietal ridge around the entire head.
I don't elevate above that. If I elevate above that section, then I start to round out my shape and I lose that solidity that a bob shape demands. So I'm holding the elevation at the previously cut section, not at the elevation that peak curvature shows me for this particular section.
After I go through and follow the same methodology with the razor, I then am going to go through and apply some point cutting with my scissor.
Follow us on your favorite social media at @JataiFeather
After I feel like I've got everything nice and point cut and blunted up, we're going to go through and just make sure the lengths on the sides are even. This keeps my shape solid and it's looking pretty good. I think that this is looking pretty good so far.
Now, as we work up into our last section, following the same methodology I was doing before, there's probably less blonde hair to cut, so I'm not going to put any channeling into it. I'm just going to go through and cut the length off.
Most of the time I will not go through and channel the very top section if I want to keep my lob shape really blunt and solid. That gives me like that top layer of solidity so it really maintains the shape. If the hair is really thick and I want more texture to it, then I'll certainly go through and channel the top as well.
After I do that, I'll go through and point cut, check everything, make sure that my length is good, make sure I got my weight distribution right, and then blow it dry. So, let's check it out.
Long Bob Wavy Hair Final Look

That is not bad. Here's our end result of the long bob for wavy hair. And I think that we're looking pretty good. I think we've done a good job of balancing how much texture that we can apply that the waviness needs it. Keep that kind of airy fullness to it, but also we've had enough bluntness to keep the bob shape.
Now, the thing you have to watch out for is getting that broom shape on really thick hair. So, by stacking that a little bit and beveling that line, that takes that corner out of it and opens it up to a softer look, especially on thicker hair.
Please check out Jatai Academy. There's all kinds of fantastic information on there that will make you a better hair stylist and barber. Let us know what you'd like to see in the future. Thank you so much for watching and we'll see you next time.
SHARE