Ultra Short Bob Haircut Tutorial
by JATAI Academy,
08 Apr 2026
When it comes to bob hairstyles, short bobs have a certain edgy style that can also be structured and clean. This bob haircut creates very short hair with no layers or curls. Nor does it have any added texture or volume. It's completely straight.
It's probably not the best look for fine hair or very thick hair, but it can compliment certain face shapes. The ultra short bob is cut fully with scissors with some razored bangs. Very little beauty products are used to style the hair. Watch the video below and follow along with this transcript.
Ultra Short Bob Haircut Tutorial:
Welcome back to Jatai Academy. I'm Russell Mayes, Director of Content. Today we're going to be doing a super short bob with bangs. The bob that has the perfect balance between edgy and cute. It's going to be so short, shorter than a French bob, but not so short that it gets into bowl cut territory.
I'm going to show you how to section it properly. I'm going to show you how to make sure you get a clean line, and we're going to throw in some super soft bangs. So, let's get started.
We're going to start with a natural or center part. We're going to take just above the occipital bone to about the middle of the ear on each side. This is going to section out the nape section where I'm going to taper this in nice and clean.
Cutting the Length at the Nape

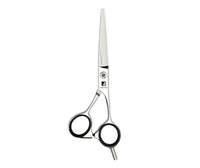
I'm going to start with my Jatai Tokyo Scissor. This is my favorite scissor for doing scissor over comb with, which we're going to get into in a little bit. I'm going to start cutting it finger length right at the nape. And then I'm going to follow that slowly up the back of the head.
So I'm going to cut everything the same length in the nape section through here. So each section I'll go a little bit higher following my guide from underneath and just working that all the way up and out. That way, if I have a lot of hair, this allows me to get rid of the bulk of that hair without having to worry about being real meticulous and real precise with my tapering.
This is more of let's just remove this excess hair that will allow me to dial it in much cleaner and I won't have to fight it when I start doing any kind of scissor over comb work that I'm going to do or in areas that I want to taper really nice and clean.
I'll cut a basic shape, get rid of the length, and then start to fine-tune the shape. Now, we're going to go through with my scissor over comb. And with this, I want to trace what I've already put in. I'm not going to go through and cut everything finger length and then go back and lay the comb against the head and cut everything the length of the comb. That's just doubling the work.
So I go through and cut it finger length to build up the length that I want. And then I go back in with my scissor over comb and fine-tune the shape. So the idea behind fine-tuning the shape is I want to trace what's already there. And anything that sticks out beyond what I'm tracing gets cut off and allows me to clean up the shape with each pass.
After I get the shape done closely like I want, then I'll go through and start cleaning up the perimeter shape. And then also this little perimeter area right behind the ear. Be very delicate through there. And just go through and start to clean up my perimeter. Now, any hair that's kind of sticking out and porcupining out, I'm just going to go through and scissor just like I would cut a hedge.
I'm just...anything that cuts, anything that sticks out, I'm going to cut off. Gently laying my scissor against the hair and just tracing what's already there to clean up the shape.
Cutting the Rest of the Length

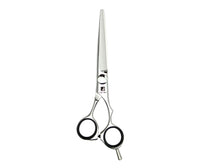
Now, we're going to move on to my next section. And I'm taking about an inch section as I go up. I'm now I'm going to switch to my Jatai Kyoto Scissor. The reason I'm switching scissors is this is the sharpest, heaviest bladed scissor that I have. So that when I go through to cut a really clean line, this will give me the cleanest line with the least amount of scissor push that I can have of all of my tools.
So when I want a really, really clean line, I'm going to use my Kyoto Scissor. I'll cut the initial length. Look at where that that falls on the ear. And if that needs to be a little shorter, I'll cut it a little shorter. So, I'm looking where it's going to the ear because I want this to hit the bottom of the ear. I don't want it to be longer than the ear, but not quite in the middle, but I want like the earlobe-ish length.
So, I'll start in the center and slowly work that line towards the ear. When I'm combing each section down, I am using zero tension. The only tension that I have is whatever the comb has given me. So, I have to be very, very mindful that as I'm combing this down to not lay my fingers and drag my fingers across the section so that I introduce any sort of tension, which is going to cause the hair to spring up and graduate
After I get my initial line like I want, I'll take my next section as I move up the head. Start in the center exactly the same way I was doing before. Comb this nice and clean from the roots all the way to my fingers. Then once I get to the length that I want to cut it, clamp my fingers down, go through, cut everything perpendicular to the hair.
You'll notice that I'm not flipping my fingers up. I'm keeping everything held down low and perpendicular to the section. If I start to roll my fingers up, that's going to give me a little bit of graduation and cut the top layer a little shorter than the underneath layer. And it's going to really, really show on a simple haircut like this.
Since this is such a simple line, it's going to magnify any little mistake, any little graduation that you get. Now, I'm not going to be super neurotic about making sure that everything is absolutely flawless and work myself to death, but I want to maintain proper technique. So, it gives me the best chance of success that I can get.
So, it requires, it will require, let me get that straight, less clean up. The less I clean up afterwards, the better. Now, I could sit here all day and clean this line up and clean it up and cut it and clean it up and cut it, but then I'll end up with no hair left. So, there's a certain amount of diminishing returns of cleaning it up. I can only clean it up so much before I have no hair left.
So, now we're going with our next section. The same methodology I was using before. Comb everything clean from the root, zero tension, clamp my fingers, and then cut straight across. This will give me the least amount of graduation and the cleanest straightest line that I can possibly get. The thing about cutting one length is it will show all of your technical flaws.
Are you combing it straight? Are you cutting it perpendicular? Are you flipping your fingers? Are you flipping the scissor? Are you cutting it directly on top of your previously cut guide or shorter or longer? A simple shape reveals all of your flaws. So, you have to pay attention to that.
Now, we're going to go through here with our last section. Again, no tension. The more tension that you apply, the more graduation that you're going to get and the more it's going to spring up. Especially on thick springy mannequin hair like this or with someone that has a lot of cowlicks. Tension will make a cowlick spring up and it will be Alfalfa all over the place. So make sure as least amount of tension as possible.
Here we're coming to our last section. Looking pretty decent there. Now I'm not trying to get it perfect when it's wet. After it's dry, I can go through and clean it up a little bit more. That's looking pretty good. I like the length there. It's just showing a little bit of the bottom of the earlobe, which I like.
Razored Bangs

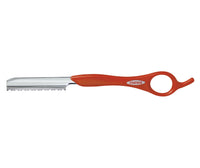
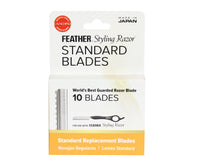
Now, I'm going to use my Feather Styling Razor, and I'm using the Standard Blade, and I'm going to take my bang section, comb everything straight down. Now I'm holding in my left hand with a lot of tension so I can keep that real taunt and then gently applying the razor to the top surface of the of the section so I can cut everything off to the length that I want.
I'm taking a pretty broad stroke so I can keep this very very soft. The broader the stroke, the softer the end result. The shorter the stroke, the cleaner and more blunt that the end result's going to be. And I'm liking that.
So now we're going to continue on to the right side of her hair and then comb that down following my guide from the middle gently running my razor across the section and clean up as needed.
So even though I'm taking a broad stroke, I still want a straight line across the face. So I'm keeping my left hand stationary so that my line doesn't drag or waver and get longer towards one side or the other. I'm trying to keep that as even as possible.
Now, even though I've used a really long stroke, sometimes I have a little bit of weight buildup somewhere that I don't want. So, I'm going to comb everything down and then just take the razor and gently comb across the top of the hair.
And that way, I'll start to remove a little bit of length. And it won't be introducing any kind of separation. It's only going to thin it out nice and evenly across the entire section. Gently apply the razor. Don't get aggressive with this. So, you end up with patches. You'll end up with patches. Looking good.
Now, let's go through and blow it dry. I put a little bit of cream on it to help smooth it out. Using my Du-Boa Brush to get everything nice and smooth.
Softening the Line

I'm going to start at the bottom and trace my line that I've already cut. As I go up into my bob line, I'm only texturizing the very, very tips of the section. What that's going to do is that's going to give me a softening of my line. It's not going to change the shape. It's just going to soften that edge.
And you can see right through there how it softened and beveled that line just a little bit so it doesn't look so lumpy and it doesn't look so overly thick. It softens up the back of the shape.
But since I still have that hard edge line right around the sides, this blends perfectly with the hair as it transitions into the side of the head. Now in the bottom, I'm just going to go through and retrace what's there as I get into my bob line, just the very eighth inch of the tips to just soften that edge up. And that's looking pretty smooth. I like how that's beveling that edge just a little bit.
Follow us on your favorite social media @jataifeather
And we just keep working until everything is polished and finished exactly like we want.
Final Look of the Very Short Bob Haircut

Here's our end result of this short short bob. And I think that this looks pretty good. I really like this hard line that we have here on the sides and it being at an uncomfortably short length for most people that are going to wear a bob. This is going to be too short for them.
So, I think because it's shorter than common, it adds that kind of edgy aesthetic to it. But at the same time, because we've beveled this line in the back, but still have a good solid line. It softens the shape up, especially from the back. And then these super short 'kawaii' cute bangs I think really add to it overall. Gives us the perfect balance between edge and cute. I like it.
So add the technique of no tension one length cutting to your repertoire. I think that will go a long way towards enhancing your overall skills.
Also check out the JATAI Academy. There's all kinds of fantastic information on there that will make you a better hair stylist and barber. Let us know what you'd like to see in the future. Comment below. Thank you so much for watching. We'll see you next time.
SHARE