Short Bob Undercut Hair Tutorial for Thick Hair
by JATAI,
08 Aug 2025
In this short bob undercut style, Russell takes a look at a modified bob haircut that utilizes an undercut to remove weight and prevent a mushroom shape. This is not a shaved undercut bob but rather a subtle, soft undercut that leaves a classic hairstyle look. The undercut bob haircut works great on thick hair to reduce volume. Bob haircuts will always be in popular style.
Watch this short bob undercut tutorial and follow along with the transcript.
Short Bob Undercut:
Welcome back to the Jatai Academy. Do you have problems with short bobs getting real bulky and looking too mushroomy?
Well, we're going to show you how to fix that today. Very easy with some undercutting and some texturizing and a little bit of razor work. And you'll be amazed at the results that you can get. So, let's get started.
To preface this whole thing here, when you're doing a short bob, it can get very, very thick very, very quick. We're going to go through and we're going to undercut the shape, but we're going to undercut it in a specific way where we're not necessarily skinning it and making it very, very edgy.
We're just going to take all the weight out from underneath and it's still going to bevel through and blend in the back. So, I think that that's very important for this sort of shape even though we're going to disconnect it and we're still going to maintain a nice clean bob line.
All right, so first let's get with sectioning. Here we go. All right, so the first thing I want to do is go through and separate the top from the bottom. So, I can take it as high as the center of the recession or I can take it anywhere lower from there. So, I'm going to go a little lower than that.
So, I still maintain a real strong bob shape, but I start to take this hair out. That's just going to make it bulky. So, we're going to go to the quarter part. From the quarter part down to the occipital bone. Then I'm going to take it right across straight across the back.
Creating the Bob with Undercut to Remove Bulk

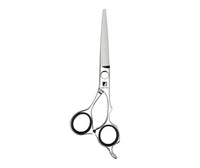
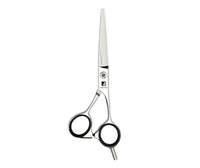
So after I feel like I've got this balanced like I want and I have enough that I feel I can remove enough bulk to keep my bob from being too bulbous, I'm going to go through and take my Jatai Osaka Scissor.
Now this is a 6-in scissor that has a nice strong solid blade, so I can take and cut a large section of hair easily. and it's nice and sharp. So, I'll go through the entire section without any kind of resistance.
So, from there, I'm going to take hold this section. Take each section. I'm going to comb everything straight up. And I'm going to lay my finger right at the parting. Pull this straight up.
Cut that straight across. So, what that's going to do is that's going to cut the top of the section a lot shorter than the underneath so that when it falls, it's going to fall and collapse that shape really close to the head and remove a lot of that bulk.
Start here on the sides. Comb that section straight up to the parting. Cut that straight across. And just do that all the way from the front into the nape.
I don't have to be real precise about this. I'm just going through cutting the length off. Oops. And since I'm holding it so high up at such extreme elevation, it's going to take all the weight out of this section and leave me just enough hair around the edges that I can start to fit in.

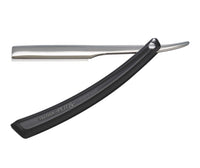
So after I've got that finished, I'm going to go through and start fine-tuning this in all around the edges. And I'm going to use my Feather Plier Razor in white, no guard.
And I'm gonna go through and just visually take a little piece of hair, a little vertical section, go through real gently, lay this flat across my section, and start to fit that in closely against the head.
I can go through and start really fine-tuning this shape and take some of that length out and make it fit in a little bit nicer around the edges.
And I'm just going through this is called filleting. So I'm just going to fillet this section off to get some of that really long hair out of the way. Going through here real gently taking some of that out.
My whole idea is just to remove the weight and remove the excess length that I don't need underneath. That tends to make everything really blocky.
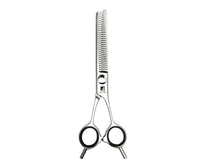
Very easy to go through and cut all this length off and take that weight out and still have a nice soft underneath shape. Now, before I move on to the top, if I feel like this underneath with this length that I've cut is too much, if it if it still feels like it's going to be too thick and make my bob kind of pop out and get kind of lumpy, then I can go through with my Tokyo Thinning Scissors from Jatai and remove some more weight.
And the way I would do that is just take the comb, scissor over comb, and I would do it really deep and just walk that all the way up because really all I have to thin is the middle of that section. I don't have to thin the whole thing even though I'm going to. And this will take this will take any of the remaining weight that I have that I don't want out of it.
I feel like the Tokyo Thinning Scissor takes the right amount of weight that I can go through and do this very very deep without fear that it's going to come back and bite me because it took too much hair out in one shot.
I can hit it multiple times to take more hair out, but I don't have to. We've got all this underneath hair taken care of, and now we can go ahead and start working on our bob.
Creating the Bob

All right. So, I've got my natural part, which is a little off center, and I'm going straight back down and halving the head, and then one flat section above where the occipital bone is diagonally towards the ear.
And this is going to be the start of my little bob. So, I'm just going to take a center section. And here, I'm going to look at the side of her head and see where that's going to go. So, I'm going to go fairly short here and just cut that straight across.
Check my line. See if my length there will be short enough and how it's going to build up there. And I think that's going to be fine. So now I'll start using that as my guide, angling it towards the chin and just start at the innermost part and cut towards the face.
Do the same thing on the other side. See where that's going to go towards the jaw. Since I don't have a line underneath, I only have this line here and my length there. Start cutting from the center going towards the face. Check my lengths. See if they're building up similarly. And they're looking pretty good.
That's pretty nice. And I'm liking the way that this hair in the back is really kind of stacking in and fitting in underneath the weight of the bob that I'm starting to build up. So now we're going to go through and take a parallel section right there.
Here's my next section. I'm going to hold it out at elevation. There's my guide from underneath. And then we're going to lay that flat horizontally right across that. Cut my one length and start to build up some weight. Here this comes.
I'm starting to build up towards the front using my guide from underneath and the guide in the center and building up the shape that I want to flow towards the shape up towards the face.
Parallel sections as I start to work towards the front. Starting in the middle, seeing my guide length from underneath. Combing clean from the roots all the way down. There's my guide length. Get that out of there.
I'm just going to continue with this until I get to the last section. Now, we're working here into our last section on each side. And we can comb that down. And we can start to see a nice little bob shape developing up.
And the whole idea behind this this haircut is to give me a bob shape without it having that really mushroomy type of bob because if she has thick hair and you're doing something short, you have to undercut it and you have to start relieving some of that weight from building up and looking very mushroomy.
So, by going through and undercutting it and then going through and cutting my bob shape with the razor, that certainly helps alleviate some of that bulk and some of that that mass that starts to develop.
Even though I'm holding this down and still cutting it exactly like I would cut a one- length bob, but I'm loosening up from the technique and allowing it to develop visually as opposed to going through and trying to build it very structurally and very geometrically.
Now, we're going to go through and blow dry, and I'm going to see what we have. And I'm gonna see how we need to taper this in and fine-tune this in the nape to make sure everything pops just right.
Follow us on your favorite social media @jataifeather
Now to go through and remove some of this kind of 70s bevel that we have to it, I'm going to take a vertical section, hold that straight out from the head. Take my thinning scissor and go through and vertically thin some of this hair out so it helps the shape collapse a little bit more.
We're going to check that. That looks better. And then let's continue that on as I work around and get to the mastoid bone.
Nice short little bob undercut to relieve some of that heavy heavy mushroomy weight that we usually get. And I like that right there. That's looking pretty good. Not bad.
Short Bob Undercut Final Look

Here's our end result. We got a nice little blend back in here, even though we did completely disconnect it and undercut it. And we got a nice little bevel to our bob, even though it still maintains a real solid shape right at the jawline.
So, this is a very good technique to add to your repertoire in case you have someone with very, very thick, stiff hair that you can get some of that weight out.
Now, you don't have to do as much as I did or you can do more. It's very versatile shape and it works on all different types of textures. Maybe if the hair is real fine, maybe I wouldn't do it because you want to build up as much weight as you can to get a real solid bob shape.
Check out the Jatai Academy. There's all kinds of fantastic information on there that will make you better hair stylist and barber. Also, let us know what you'd like to see in the future. And thank you so much for watching. We'll see you next time.
SHARE