Retro Comb Over Mad Men Jon Hamm Haircut Tutorial
by JATAI Academy,
06 Feb 2026
If you've ever watched Mad Men featuring Jon Hamm as Don Draper, you would know he had an iconic hairstyle that reflected the haircuts of the time period. He had a classic men haircut that was short and clean cut with a side part.
Classic hairstyles will always be popular and so in this tutorial we focus on his haircut from the show. It's a versatile cut that works with any face shape and uses minimal products (if any). Follow along with the video and transcript below.
Jon Hamm Haircut Tutorial:
Welcome back to Jatai Academy. I'm Russell Mayes, Director of Content. Today we're going to be doing a study on a masculine comb over. Now, most of the comb overs that you see today are going to be really tight skin fades with the top longer, parted on one side, really extreme and combed over.
We're going to do a more Mad Men style where it's a little bit more conservative, a little bit more retro, but still just as cool. So, let's get started.
Cutting the Sides

So, we're going to start here with a side parting. And I'm usually going to separate the top from the bottom around the center of the recession. Since we're going with a kind of comb over look, I'm going to take a little bit higher. So, I'm going to the top of the recession, straight back to the quarter part, down into the nape.
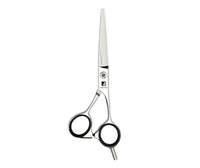
I'm using my Jatai Tokyo Scissors. This is the 6-in variety. And I like a long pointy scissor whenever I'm doing shorter type of work like this. So, I'm taking a diagonal section back and I'm cutting it parallel to the parting. I'm going to take a little bit shorter right there at the front.
Just a little scissor over comb to get my length nice and clean there in front of the ear. And now I'm going to walk my guide from the first section all the way back. And what I mean by walking my guide is I take the first section as my guide and then I add the second section into the first section. The third section I can remove the first section. So it's just the second and third section.
Here I'm working on the third and fourth section. So the guide is moving with each section that I go. And I remove the previously cut guide for that section. So this allows me to cut everything fairly similar in length from the front all the way into the back. And I just have to be methodical about this and take all my sections and partings at about the same width.
If I do one section thicker and one section thinner, I'm going to end up with inconsistencies in my length, meaning that it's going to get more length as I go to the back if I take inconsistent section sizes. And it's going to make my layering kind of lumpy.
So, here we're going from the top of the parting down into the nape and I'm just following the same parting size or section that I took from the very front. It's the same angle. That angle right around the front of the hairline is the same angle right behind the ear. So, that hairline is very similar. And this allows me to keep everything very symmetrical and nice and smooth and also be able to match it on the opposite side.
I'll work all the way back into the middle section and cross over just a little bit right here onto the left side from the right side. So then after I finish this section, I'll go through and do the exact same thing on the opposite side.
Now, it's important that I take sections very, very similar on both sides so that I have a symmetry in my parting and symmetry on the top separating from the bottom. So, here I'm making sure I got everything the same on both sides. And I'll cut the right side exactly the same way that I cut the left side.
Cutting the Back

Here, I just want to take it and taper it in a little bit tighter just at the hairline. Now, when I first cut this, I'm trying to cut it as short as I can at the nape, but it's only going to allow me to cut it as short as my fingers are thick.
So, here, going back in and doing a little scissor over comb just at the hairline, and then blending that up and out will get it a little bit tighter and cleaner at the hairline. Now, I'm just starting here close at the hairline, cutting it really short, and then blending it up and out.
As I get to the top of this section, I'm not really cutting that much hair, but I keep going through the motions so that I can keep my scissor over comb rhythm going.
I find that when I have a rhythm doing my scissor over comb, even if I'm not cutting hair, if I just keep going through the rhythm and the motions of it, it will allow me to get a much cleaner result, and I don't have to go through and clean it up so many times.
Fine-Tuning the Sides

Now here, just starting out crude and then fine-tuning my shape by more scissor strokes gets me cleaner and cleaner and cleaner. And just being patient as I'm going through and doing this. Right there. Good. Now, we're going to clean it up a little bit over the ears here. That's looking pretty good. I like that.
There we go. Making sure I don't cut his ear. The poor boy there. I can't have that. And that's looking pretty good. Now, I'm not trying to get this super clean. I'm just trying to get a cleanish shape because I can go through and clean it up more when it's dry.
Graduating the Back

Now, I'll take a center section just so it shows me where the head shape is and I can separate the front of the head from the back of the head. Now I'm going to go through and take a parallel parting.
Like instead of a pie section that most of the time you're taking here in the back, I'm taking more of a candy bar section where it's just parallel. It's not pivoting like a pie triangular shape. It's just parallel.
I'll hold that straight back and then follow whatever the line of graduation that I had underneath and I'll follow that same kind of length angle as I go up towards the crown.
Once I got that cut and I've got everything blended like I want, I will take a parallel section to the right. So, I have the center part and my first section to the right that are both parallel. I'll hold it into the center of both of those two sections and follow the previously cut guide as I'm cutting from shorter at the occipital bone, longer as I get up towards the crown.
Now I'll remove the first section and take my third section right here as I'm walking my guide over from the center. So there we have second and third section. Hold it to the center of both of those two sections. Pulling it straight back and then cutting any length that hangs over my previously cut guide.
That's looking pretty good. Now I'll take and remove my second section. So I have my third section as my guide. The next section I'll pull straight back. I'm not rounding it out across the head. I'm just pulling everything straight back to make sure it blends in the back. And that's going to leave me a little bit more length right there as I get closer to the ear.
And you'll see it right here. Right there. You can see that little bit of length right there. That's going to allow me a little bit more length as I get into the sides. But we're going to go through and do the other side exactly the same way we did in the back.
Razoring the Right Side and Top

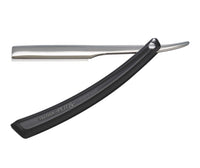
Now we're working on the sides. I'll take a parallel section using my Feather Plier Razor. And this is no guard. No guard razor gives me a lot more control and I can get a cleaner cut because I don't have the guard stopping me from getting as clean as I would like to or need to.
Here I'm using the guide length that I had at the back of the head and working that into the side. So, I have my parallel section that I took that was parallel to the first section on the side that we took. And I'm combing everything kind of down at a graduated angle using that guide length in the back as I work forward.
Now, here I'm trying to determine what's the best length for this side here as I'm working through because I want enough length that it can kind of slick back and provide me with enough to slick back and really give that full look, but I don't want so much length there that it starts to flop forward like an undercut would.
So, I'm trying to balance between how much length is right and how much is too much. And I'll cut a little bit and comb it. And cut a little bit and comb it. Once I feel I got that right length, then I'll continue working up towards the center of the head, taking parallel sections.
Here's my next parallel section. I have my guide length from underneath that I feel like is the right length. And I'll work that from front to back. Just taking even strokes on my razor so I have a consistent kind of razor stroke and a consistent amount of texture that's going through and thinning the hair and cutting it at the same time.
Once we've got everything cut there, I'll continue to work this length all the way up into the center of the head. There we go. That's looking pretty good. I like that length.
Now, if I feel that that length on top is becoming too thick, I'll take a broader razor stroke or I can go through and channel cut it a little bit or I can fillet internally a little bit more texture to remove weight. But since this is a fuller type of haircut, it has more weight to it. I'm going to go through and take very little each time so I don't over thin it.
Razoring the Left Side

Now, we're going to go through and cut the left side and I'm going to comb everything back and find out where the hair wants to kind of part on its own. And then I'm going to take that parting and I'm going pretty far over.
This side I'm going to completely cut different. I'm not looking to comb everything back. A typical comb over is combed over on one side. One side's going to be really short and blended in. This is the side that's going to be blended in.
So, instead of taking a horizontal section, I'm taking a vertical section like the first section that I was taking on the side of the head, and I'm combing everything straight out and blending it through into the length that I cut underneath.
And I'm just going to take parallel sections as I work all the way back here. You can see the angle of the section that I'm taking. And I'm just going to cut everything straight up and down that same length to make sure it blends together on this side because one side gets combed over and back.
The other side just gets combed straight down. This is the side that gets combed straight down. So, I don't want any kind of overhang here. I don't want any kind of undercut on the shorter side. So, I just take my time and go through and blend this through and make sure everything blends perfectly.
And I'll take parallel sections as I work all the way into the back of the head. And it's important to keep your sections very very similar in size and also in thickness. Now, if the hair gets a little thick, I may take a thinner section. If it gets a little bit thinner, I may take a larger section. But I want to try to maintain as much consistency as possible.
Follow us on your favorite social media @Jatai Feather
Here we're just continuing the same sectioning all the way back until I run out of hair. That's looking pretty good. Being careful to not go through and get too exaggerated and excited with my razor so I don't cut myself. Perfect. That's looking pretty good, the last section here. And everything's blending through quite well.
Clipper Over Comb

Now, we're going to go through and blow everything dry. And just blowing everything dry as neutral as possible on the side. So, if I have anything that sticks out, I can go ahead and fix that.
After everything's dry, I'm going to take my clippers and right there at the nape, I want to fit that in a little bit tighter. So, I'm taking my clipper and doing a little clipper over comb. Just getting it real clean and tight right there at the nape. Doing the same kind of methodology I was doing with my scissor over comb. But with the clipper on dry hair, I can see exactly how much hair I want to take off. I can see the exact result as I do it.
If I'm doing scissor over comb on wet hair, it's a little bit hidden because the hair is wet and it hides things. But on dry hair, you can see the exact result you get. So, I like to use clippers more on dry hair than I do on wet hair. They cut better on dry hair as well.
Final Look

So, here's our end result. And I think we're looking pretty good. I think we've got a nice little taper going on without it being a skin fade, which is so typical of this type of haircut. And not everybody can wear a skin fade. Someone's got a funky head, you can't do that on them. So, a little bit longer is good.
So, this is a study on how to do it longer and keep the essence of the shape with a little bit more length. And I find that most of my younger clientele that's coming in is over the fade. They don't want it skinned anymore. They want a little bit of hair. So, this is a perfect transition of someone that is growing a fade out.
You can still keep it really clean and groomed around the edges, but still start to grow some hair out. So, I think this is not only a great style in and of itself, but also an excellent transition style when you're going from really short to really long. And I think this looks pretty good.
Please check out the Jatai Academy or our shop. There's all kinds of fantastic information on there that will make you a better hair stylist and barber. Leave us a comment below if you have a question. And thank you so much for watching. We'll see you next time.
SHARE