Home
/
Trend Connect
/
Tutorial
/
Invisible Hair Layers for Reducing Bulk and Creating Subtle Movement
Invisible Hair Layers for Reducing Bulk and Creating Subtle Movement
by JATAI Academy,
07 Nov 2025
In this invisible hair layers tutorial (aka ghost layers), we review a technique to reduce broomy hair when creating a bob but still maintain natural texture. This layers haircut is meant to addresses thicker hair types as opposed to fine hair in order to reduce bulk and create movement.
For styling a blow dryer and brush are used but you can also air dry for a more natural look. For a stick straight style, a flat iron can also be used. No styling products are necessary.
We love this technique in the salon as it's useful and applicable to everyday situations when creating this desired bob style. Watch this invisible layer haircut tutorial and follow along with the transcript below.
Invisible Hair Layers Tutorial:
Welcome back to Jatai Academy. I'm Russell Mayes, Director of Content. Today we're going to be doing a deep dive study of invisible layers. Interior layers will help us de-broom and de-mushroom our bob.
We want a sleek, cool, modern bob. So, I'm going to show you two ways of adding invisible internal layers that can help collapse the shape without destroying the overall appearance of a one-length bob.
There's two ways I'm going to show you. One removes a lot of hair, one removes less hair, but they both go a long way towards controlling the amount of weight that's built up in a bob. So, let's get started.
So, we're going to start with our bob. We're going to take a natural or center part down to the occipital bone, occipital bone to the mastoid on each side. That's going to give us our foundational flat section that we're going to build our whole shape off of.
Now, a lot of times when we're doing a bob, if the person has very, very thick hair, you can end up with this broomy, overly bulky looking bob that doesn't have any kind of movement to it and just looks solid and stiff and kind of stuffy and dated.
Establishing the One Length Structure

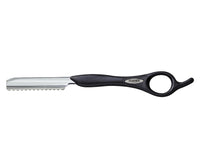
Now, we're going to start in the center section. I'm going to pin the other hair out of the way and I'm going to start with my Feather Styling Razor. The Feather Styling Razor, I'm going to use the Standard Blade. And this gives me the most protection and allows me to go through and cut my shape and cut it real blunt without fear of cutting myself or the client.
Comb everything straight down and just start working on my bob shape. I'm going to go straight across here on the bottom. I'm going to lay my blade directly at the length that I want and then very gently slightly going up and down with my razor stroke.
Keeping this very very tight, very small razor stroke so I can build up as much length. I'm sorry, as much one length structure as I can get. I don't want a whole lot of movement in this. I want to keep this as blunt and as solid as possible.
Going through and using a razor by cutting my one length is the first step in removing some of that overly bulky broom shape. Because even though I'm cutting this one length, it's giving me a little bit of variation, the overall length of my shape. So, it doesn't have a tendency to stack nearly as much and look as stiff. It gives it a little bit of movement.
The next section, we're going to comb everything straight down. There's our guide length. Same short abrupt razor stroke just to cut everything one length. Comb that down. Look at it. That's looking pretty good.
Now we're going to come back. Same thing on the opposite side. I'm combing everything as clean from the root all the way down as I can get it. There's my line, my guide.
Cut that straight. Same razor stroke through. Last piece here. If I want to keep this as blunt as possible after I go through and do the razor, I can go through with my scissor and very gently just cut off any extra long little strings that hang off. And this will give me an overall blunter appearance but still have the textural advantage of using my razor so that it doesn't get overtly bulky.

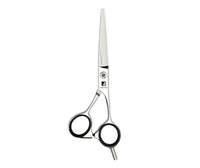
And I'm using my Jatai Tokyo Scissor. This is a 6 inch. It's a good blunt sharp clean cutting scissor. One of my favorites. Now I'm going to go through and take my next section straight to the center of the ear. Same angle that I was taking from underneath. Combing everything clean from the root all the way down to the ends. As even a tension as I can apply. Plant my fingers. There's my line from underneath. Cut that blunt across.
Follow us on your favorite social media @jataifeather
Comb everything straight down. There's my line from underneath. Cut that across. Now, when I'm going through and using a razor to cut everything one length and blunt, I have to be mindful.
So, I want to take a section that's thin enough that I can easily cut through it without a whole lot of resistance, but not so thin that I can't continue to build upon my line.
There sometimes I can take a section too thin that I can't really build any kind of structure off of that. Lay the comb against the head where it is flat. That's going to determine the size of my section.
I will follow the same angle underneath. This section here should take me, if I'm consistent, to the top of the ear. Comb from the root all the way through to the ends. There's my guide length and very gently cut exactly the same line.
Once I cut my... once I have my razor cut done, I will go through again with my scissors and just trace the line that's already there. Very very little hair is cut off. And you may think that that doesn't make a difference, but it makes a huge difference in the appearance of everything being blunt.

Even though I'm taking off just whispers, dustings of hair, it will make a difference in the way that it lays and the way that it flows. So from here, I'm going to go through, take a vertical section. I'm going to comb this straight out from the head towards me. After some of my perimeter shape drops out, I'm going to go through and cut this shape straight up and down and actually layer the underneath and a square shape.
So now when I check this, I want this to be straight up and down. So when I comb this out, you can see it's straight up and down. The reason I'm doing this straight up and down is so it's anti- head shape.
The head shape is actually curving. So by me going through and cutting it straight up and down, it's actually cutting the center shorter, the top is longer, and the underneath is longer.
So now when this falls, it collapses the entire shape. I'll take a parallel section straight to that. I'm gonna comb these two sections together. There is my guide from underneath.
Cut that straight up and down. Last section here. Now, I will not go past the mastoid because this hair here hangs and creates my perimeter shape here behind the ear where I'll need that length. I'll remove the center section. So, I have section two and section three. Straight up and down. Comb these two sections together. There's my line, my guide from underneath.
Cut that through. Now, when this falls and everything's combed, it ends up being anti-head shaped layer in the middle and hang straight down. Do the same thing on the other side.
Now, my next section I've taken is parallel to the section that I had underneath. And we're going to go through and follow our same bob methodology that we were doing before. We're going to take a center section. I'm going to comb everything straight down. There's my guide. I'm going to cut everything one length at my guide.
Only two more sections left. We're going to take parallel, work that around. When the hair starts to lose moisture, I want to make sure that I use some Jatai Blade Glide just to keep everything moist, keep everything conditioned, keep the cuticle closed, and make it easy for my razor to glide through the hair and get a clean cut.
After I finish the second section on the side, if I feel that I'm building too much bulk up here, I'm gonna layer it internally, but I'm going to do it a different way because in the back of the head, I had this much head space and curve to cut around.
So, anti-head shape layering is going to help that collapse a lot and give me a nice thin kind of perimeter shape. But on the side if I do that, it's not really as curved as much on the underneath. So, it's not going to have the same effect.
Vertical Sectioning

So, what I'm going to do is I'm going to take a section from just behind the ear to right in the front. I'm going to pull everything in this section straight up in the air. Comb that straight up. Once my perimeter shape starts to fall out, take some of that weight off.
Now, when this falls, it's going to fall at a different layer than my perimeter shape. I can layer it as much as I feel is necessary according to how thick that person's hair is. Now, when I'm going and working on my last section, I want to evenly distribute everything off of the parting so that when I comb it down, I have the greatest shot of cutting it and its natural fall.
If I start pulling hair out of the way that it falls naturally when I blow it dry, I'm going to see longer stringier pieces hanging over and I'll have to clean those up. And that's okay. Sometimes you have to do that. Come here. Let's look straight ahead. Everything's straight down.
Check our lengths. Everything's looking pretty good. So, now let's go through and blow it dry and see what we got.
Invisible Layers Haircut Final Look

Here's our end result. And I think we're looking pretty good. We got a good solid bob shape here. Uh, I might have you a little longer on one side than the other, but that's okay. She didn't pay for this haircut, so we're not worrying. We're just practicing.
And I think that the internal layering, the layers underneath hair that we put in it was really what this hair needed to keep it in a sleek bob and not have that overly thick, bulky broom looking bob that looks really dated.
Now vertical type of internal invisible layering will take out more bulk and make it more sleek than if you did horizontal like we did on the side. So play with each different types of technique because with great power comes great responsibility.
So start small, baby step your way into the technique until you got a feel for it and then you can really go to town with it and get the effects that you want, especially on thicker hair.
Check out the Jatai Academy. There's all kinds of fantastic information on there that will make you better hair stylist and barber. Let us know what you'd like to see in the future and thank you so much for watching. We'll see you next time.
SHARE