Double Layered Textured Bob Cut with a Razor
by JATAI Academy,
24 Dec 2025
In this tutorial we look at a textured bob haircut that's stylish and modern. With lots of movement and separation this is a bob cut perfect for the new year! If you're looking for bob haircut ideas as a hairstylist, this one says 2026. Bob haircuts will always be in style and with a wide variety of bob hairstyles, textured hair gives the most modern look. Watch this video and follow along with the transcript below.
Textured Bob Haircut Tutorial:
Welcome back to Jatai Academy. I'm Russell Mayes, Director of Content. Today we're going to be doing an experiment in a double layered overt bob. Double layered means it's going to have more layering than you think a bob can have.
Overt because we're going to open everything up and show you exactly how to do it. Is it still going to look like a bob with that much layering? Yes, it will. Still going to be a bob.
Alright, so let's get started. Let's start with some sectioning here. We're going to take a side section to the quarter part, then down to the nape. And then we're going to section out right behind the ear.
Establishing the Length

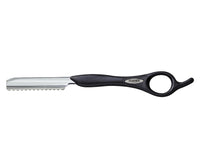
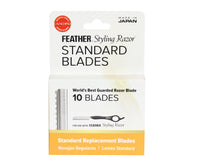
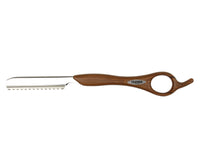
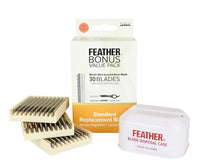
I'm using my Feather Styling Razor. This is the limited edition wood-look. I'm also using the Standard Blade. Starting on the side, I'm going to take a little section of hair right above the ear and use that to get the lengths balanced on both sides. This is also going to be my length for when I go through and hold this straight up in the air and layer it.
So, I see that piece falling out. That's the length that I'm going to use as my guide to cut that length right through there. By cutting my length guide first and using that as my layering guide, it prevents me from cutting my layering too short.
You'll also see me using that length that I cut initially as the visual for me to pinch cut all this length here and start to build my one length shape.
So by pinching a little section of hair that wants to separate together, that's going to allow me to build up a bob-like shape without going through and cutting everything perfectly blunt.
So, by leaving it a little haphazard and some sections a little longer and some a little shorter, I can get a lot of movement through it without it being really hard or blunt.
And the more movement that I have, the more visually interesting that the shape can be and the more ways that I can style it and the broader range of hair textures that I can put this shape on.
After we've done one side, we've got it like we want, we'll go through and match that to the other side until both sides match. Now, I'll start in the center of the nape.
Collapsing the Shape

I'm going to pull this center part of the section straight up in the air and cut that about an inch longer than my parting right there at the occipital bone.
Now, granted this is very, very short right here in the nape, but because I'm pulling it up, it's going to leave me length on the bottom. But it's also going to collapse the shape. So, it's going to keep the shape from being too thick and too bulky and not having that same movement that I'm going to have on the sides.
So, I can match the fluidity and the movement from the back into the sides. Now, I'll just match this on both sides. Pull everything straight up using the center section as my initial guide and blending it towards each side.
There we go. A good look at it right there. Going from center out. Just keeping the same broad razor stroke that I was using throughout. Once I got that done, check it out.
Blending Around the Ears

Now, we're going to go through and blend the section right behind the ear. We're going to hold that straight up in the air just like I did the other sections underneath, but this time I'm using the length that I used on the sides, not the length I used in the back. I'm going to match this on both sides.
So, I'm leaving a little bit more length and a little bit more density right behind the ear because that section of the head doesn't have as much hair. So, it gives me a good way to blend.
And by having that a little bit weightier and a little bit heavier, (that kind of looks like a cool mullet right there by the way) but by having that section behind the ear a little weightier and heavier, it also makes my bob a little stronger. If I was to layer that as much as I had layered the back, my bob shape is not going to be as strong.
Addressing the Back
Now, we're going to hold everything straight down. I'm going to cut my one length that I choose in the back. I'll take a little bit of weight out right through there and then just lay the blade flat across the section and cut my one length right in the back.
Now, I'm not worried about this being the same length all the way around for a one length bob. I want to bevel this a little bit towards the sides. So, I'm going to leave it a little longer in the back and then round my corner out as I start working from the back into the sides. I want that kind of bevel.
Follow us on your favorite social media at @jataifeather
Short Front, Long Back

I have been fascinated with a lot of the Asian bobs that we're seeing and they're all beveled around the front. A little shorter in the back and a little, I'm sorry, a little shorter in the front and longer in the back. And I find that very visually interesting when it's coming to these bob shapes.
Now, we're going to take a little section right in the front, right there in the center of the front section of the head. I'm going to comb that down.
And this is going to be the guide for my shortest layer. It's not going to be the bangs. It's going to be the guide for the shortest layer. I'll take a center section, hold that straight up and using that short little piece that I just cut as my guide, I'm going to start cutting from shorter to longer.
So, I'm trying to keep this idea and this feeling of shorter around the face, a little longer in the back, but I don't want it to be completely bi-level. I want it to blend through.
So, by holding this straight up and cutting my layering from short to long in the back, I can remove more weight around the front, but still have a good solid bob shape. But it introduces movement where it flows around the front a little bit more.
Because it's shorter in the front, longer in the back, hair flows to its longest piece. I'll take a parallel section, hold that straight up into the center of the head, following my initial guide, and then razor that through just as I did in my previous section. I'm taking a pretty large section here. And then also with the hair underneath as my guide, that's a pretty thick section.
So, if you can't work in sections as big as I am, it's easy to take much smaller sections. Again, pulling everything to the center of the head using my guide lengths from underneath. And anything that hangs over that I get to cut off.
Keeping the same razor stroke that I was underneath, now I'll take everything on this side of the head. The underneath is going to fall out, but anything on the rest of the head, I'm going to pull up into the center and cut those lengths off. Make sure you keep a good firm grip on the hair and it makes it easier to cut.
Now, after I finish the left side, I will go through and do the exact same thing on the right side. After I finish both sides and it's looking the way I want, I'll take a center section again and start blending that through the back. I'll take my center section in the back. I'll hold that straight up.
You'll see my guide length from the front right through there. And then I'll continue cutting that length all the way back. But I'm not increasing my length as I go back like I did in the front. I'm cutting everything just horizontal straight across.
So after we cut that all the way down till we run out of hair, I'll take a parallel section just like I did in the front. Hold that up into the center again. And using my guide from underneath, anything that hangs over, I will cut off.
As I'm working these layers through into the nape, I'm not increasing the length. I'm keeping it the same. Or I could layer it down and bevel the shape a little bit more depending upon the thickness of the hair.
And I'll just keep working this section over until I run out of hair on the right side. Then I'll go through and do the exact same thing on the left side. There we go. Looking good.
And you can see that long little corner right through there, right behind the ear because the hairline behind the ear doesn't have any hair. So I need to add a little bit more weight to make sure I can keep my bob shape.
Beveling

Now I'm going to start right in the center just like I was doing underneath on the sides. I'll take a little section. I'll pinch it into my fingers and then cut that until I can bevel it. So, I'll start cutting on one side, then maybe on the other side.
And I want to keep piecing that out and just little pinches of hair so I can start fitting my bob shape in. This is where the bob starts to really pop.
But by going through and doing this, it gives me a lot of movement and a lot of variation and a lot of softness, but it doesn't build up an overly strong structured shape.
And I just keep working that all the way around until I get the shape looking like I want on my perimeter. So in this shape, I've gone through and layered it first and then cut my perimeter shape into it. 99% of the time I will go through, cut my perimeter shape and then layer it.
If I go through and I'm trying to get a lot of texture and a lot of lightness and a lot of airiness in it, by cutting the perimeter first, I've already made it too solid and it's very, very difficult to get that solidity out of it once I put it in.
The Bangs

Now, we're going to go through and take our little section right around the front and make sure that that blends into where my shortest layer was.
So, I'll start in the center and just bevel that a little longer towards the corners on the sides. So, it's shorter in the middle, a little longer towards the left and a little longer towards the right.
Now, after I've got everything fit in, I'm going to go through and put a little undercut bang right here in the front. I think a little undercut will give it a little bit more airiness and poppiness around the front without being overly solid or overly styled.
So, we're going to start in the center doing the same thing. Just pinching into a little section. Cutting it visually as I see it needs to be cut. Doing the same thing on both sides. Shorter in the center, a little longer as it goes towards each side.
Now, this shape offers a lot of variation depending upon hair types like the thickness or the thinness of the hair. You could even do this on curly hair, but I might use a scissor to point cut it as opposed to a razor depending on the texture of the hair.
Textured Bob with Bangs Final Look

After I get all that done, I'm going to go through and blow it dry. And you can really see the texture popping here. And I like it. Here's our end result.
And I think that we have a really strong bob shape to it even though we have double layered it. We've layered it underneath so much that it barely has any shape at all. But we still have a strong perimeter shape.
We've layered the top maximum layer that you can get into it with a razor, but yet we still have a strong solid bob shape. And I think the benefit of going through and razoring the layering first and controlling how much layering we're taking out and then going back in and putting in our perimeter shape, it really helps us control exactly how strong of a perimeter shape that we put into it.
Add this textured bob cut with layers to your repertoire. Experiment with it a little bit. Get your doll head and play around and I think it will open up a whole new world of possibilities for your layering and your razoring. If you're looking for bob ideas or specifically textured bobs, this one is a good one to pin.
Please check out the Jatai Academy. There are all kinds of fantastic information on there that will make you better hair stylist and barber. There are also a ton of other not so classic and classic bob tutorials.
Also, let us know what you'd like to see in the future. If you have any questions, post below. Thank you so much for watching. We'll see you then.
SHARE