
Trend CONNECT puts ‘what’s new’ together for you when it comes to the season’s most current trend updates in fashion, hair design, make-up, skin care, nails and grooming products. From the runway to the red carpet, Trend CONNECT puts you in touch with what the guest beauty bloggers and fashion influencers know you want to know-and need to know – as they report on what really impacts your world as a stylist, barber, nail artist or consumer. Enjoy the opportunity to talk amongst yourselves in this exciting, upbeat and fresh exchange of details and dialogue!
When it comes to texturizing hair there are multiple ways create it. To create texture using a tool, hair professionals can turn to either shears, thinning shears or razors. If you use one of these tools, it’s important to learn various texturizing techniques. Each tool will give slightly different results. In the salon, hairdressing can be challenging. You are constantly...
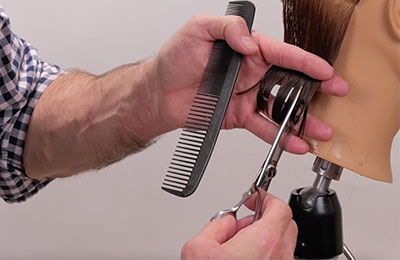 So we're going to start right here on the right side of our section of the nape which is the occipital to the mastoid. I'm going to use my Jatai Kyoto Scissors. This is the sharpest scissor that I have and so it's going to be easy for me to apply a deep point cut without having to fight it. I'm going to comb everything straight down and about halfway through I'm going to comb this right against my fingers to kind of flatten that section out and get it real straight and then I'm going to go through and just point cut real deep. I'm not keeping the scissor completely 100% parallel with the hair. I want to go through and cut it at an angle so I can create some separation and some pieciness to it. Now whenever I go through and do a deep point cut like this I'm basically only adding texture to the bottom 2 or 3 inches of the section. Now from here I'll continue on taking parallel sections as I go up the head. And one thing that I want to be mindful of is to not pick up my previously cut section. I don't want to go through and overly texturize hair that I've already gone through and cut and texturized.
I don't want to take too thin a section. If I take too thin of a section I won't be able to see how much that I'm actually taking out so I want a thick enough section that I can actually see my channel point cutting going through. Each section I will cut, I will cut independently of any other section so I have no guide. Each section is cut strictly by feel. If if I need to I'll ribbon that section together go through, cut that up and in. And I'm going to continue my sections until I run out of hair.
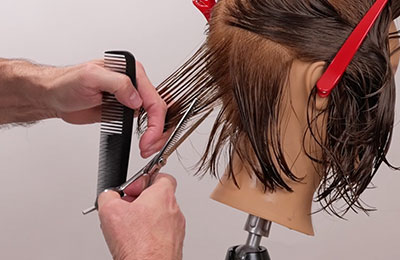 Now we're coming to the last section. Now for areas that I feel like are too thick I can change up my approach by either going through re-sectioning standing up and going through and cutting through but it's not very easy to control when I do that. On the bottom it you don't have to have that much control but when you're working internally you need more control. So in that case where I need more control over how much hair I'm thinning I'm going to use my Jatai Tokyo Thinning Scissors. This way I can control exactly how much I take and exactly where I'm taking it from and I can choose if I want the texture blade on top of the section or on the bottom. If I go through and use the cutting blade on top it'll be a little bit more seamless so that's what I'm going to do. I'm going to go through take a vertical section, point cut about halfway through. Where it gets longer I may hit it twice. That way I can thin without leaving any kind of scissor marks at all and I can also be much more in control of where I take my hair from and how much I take.
Like right here there's less hair. Here there's a little bit more so I'll take a little bit more. This section there's very little through here but just a little bit underneath so I'll take there. And I'm going to go through and do this to all the sections. I will take a larger section and since I'm taking it vertical it'll be easier for me to control than if I take a real fine small horizontal section.
Pull that straight out. Little bit there. A little bit more. A little bit more. A little bit more. Where it's thicker I'll take more. I'll hit it more times. Where it's not as thick, I won't take as much. On the top I don't want to run the risk of any kind of alfalfa sprig sticking up so I will never texturize more than about halfway through the section. If I start texturizing up here close I run the risk of that sticking up. Now that's texturized for thinning to even out the thickness and point cutting on the bottom.
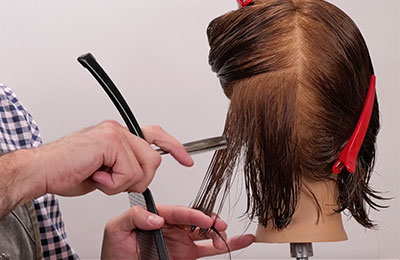 So now let's learn how to make hair textured with a razor. On the razor side I'm going to go through and use a little bit of Jatai Blade Glide to help my razor slide through the hair more effortlessly. So now I'm going to use my Feather Plier Razor which is a guardless razor and I'm going to go through comb this section straight down just like I did on the other side but instead of point cutting up I'm going to razor cut and channel some of this out and take out as much hair as I feel that I need to. Now with this method I will actually thin and separate at the same time where the other side with the scissor I had to go through and do both independently.
I will not channel more than about halfway through the length of the section. I could probably get away with it more underneath than I can on top which sometimes I will actually go through and thin it deeper if I feel that the hair is so overly thick and really really stiff. Now I'm going to continue taking parallel sections as I run up the side of the head. Start in the center of the back and then work towards the front.
Close the blade each time so I don't end up cutting any hair or cutting myself. Get that out of the way. Now as I'm going through and channel cutting this I want you to notice that I'm starting with the tip and then I will go in and that way I use the entire length of the blade not just the tip of the blade. I don't thin this very very front piece here. I'll thin the hair just behind it. Now I'm just going to continue on and do the same thing until I run out of hair being mindful to not pick up hair underneath as I texturize each subsequent section.
Now let's see if we can tell a difference while it's wet. Oh yes the scissor side is going to be a little bit well actually it's a lot more solid than the razor side. And it's heavier. It doesn't have the same amount of movement to it that the razor side has but let's blow it dry, take a look at it, see how we're doing.
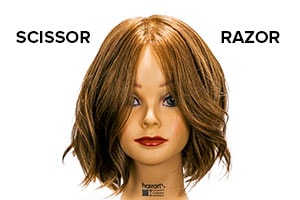
We've got our lovely model blown dry and now let's compare the differences between the side done with the a scissor and a thinning scissor versus the side done with the razor where you channel cut it and controlled the weight at the same time. You can really see the differences with dry hair. Now on the right side you can certainly tell when I run my fingers through it it still has this nice solid shape and the texturizing is a very soft diffused kind of separation. I still have a good solid strong shape. It creates a lot of movement to it but it still has that solid one length shape and it just bevels my one length shape. So sometimes a one length bob can look very very blunt and broom like. So by going through and doing it this way I certainly bevel that but at the same time I keep it really straight. And most of the movement and texturizing is in the bottom two inches of the hair.
Even though I went through and texturized internally it was more of an even diffused thinning where I get the separation underneath. Now if I look at my razor side you can certainly tell when I run my fingers through this I've got a lot more separation of texture from the center all the way down through the ends and it forces it to separate into pieces much more prevalently than the other side.
[caption id="attachment_39859" align="aligncenter" width="400"]
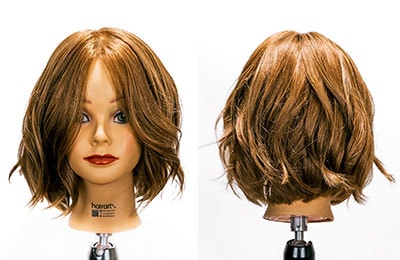 Final Results[/caption]
So when would I use one over the other to texture hair? Say for instance that I have somebody with very very thick but fine textured hair, I'm definitely using the razor. If I have someone with thinner hair that I want to maintain a solid shape and I just want to soften the edges, then I'll use a scissor for it. If I have hair that has a fuzziness in the texture, I'll definitely use a scissor and a thinning scissor for it because I can get my thinning and control without any fear of it exploding the cuticle.
Now there are other texturizing techniques such as twist cutting but it's not covered here. Click this link to see a video on twist cutting. While you can also create texturized hair by using chemical sprays or dry shampoos, cutting the hair with either a shear or razor can make texture last for a longer period of time. Sprays can leave build-up over time if they are not washed off thoroughly. Take care when using texturizing sprays and don't over use them.
We hope you learned something about how to add texture to hair and it's useful for you in the salon. Even though this was done on a one length bob, these techniques can be done on longer or shorter hair as well. A bob is just the simplest shape for this demonstration.
If you enjoyed this video, you can see our other videos in Jatai Academy's Education Connect where we have hundreds of videos to learn from. There are also a number of other videos that show you how to texturize hair in other ways. You can also shop any of our products from our store. We hope to see you again soon.
JATAI provides innovative and professional quality beauty implements with world-class customer service and educational support. To offer great products as a master distributor, we seek out and select only manufacturers who demonstrate superior workmanship, the most advanced technology, and respected business core values of reliability, honesty and integrity. Accordingly, JATAI represents three major ‘workhorse’ brands that dominate within their categories. Feather, Seki Edge and Fuji Paper. JATAI Academy brings beauty tools to creative life. It’s the ultimate professional information resource where Education, Artistry and Trends CONNECT for Stylists and Barbers.
When it’s time to remove your nail polish, you may be faced with a choice between acetone and non-acetone nail polish removers. Both options effectively remove nail polish, but they have different formulations and properties. Understanding the pros, cons, and differences between acetone and non-acetone nail polish removers can help you make an informed decision about which one is best...
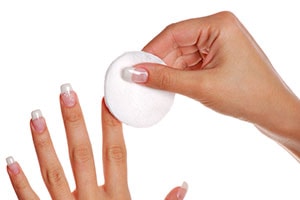
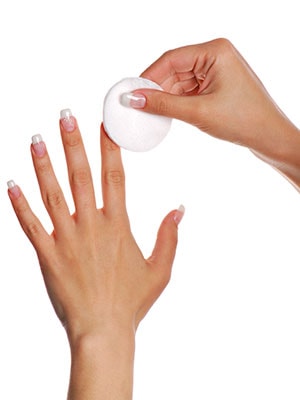 Acetone Nail Polish Remover
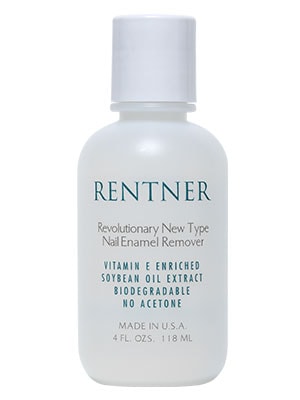 Non-Acetone Nail Polish Remover
JATAI provides innovative and professional quality beauty implements with world-class customer service and educational support. To offer great products as a master distributor, we seek out and select only manufacturers who demonstrate superior workmanship, the most advanced technology, and respected business core values of reliability, honesty and integrity. Accordingly, JATAI represents three major ‘workhorse’ brands that dominate within their categories. Feather, Seki Edge and Fuji Paper. JATAI Academy brings beauty tools to creative life. It’s the ultimate professional information resource where Education, Artistry and Trends CONNECT for Stylists and Barbers.
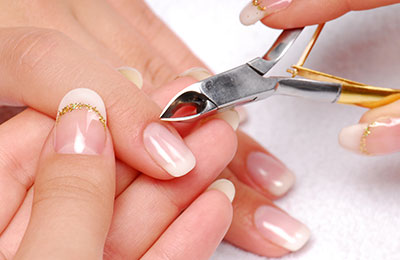
When it comes to achieving beautifully manicured nails, Japanese nail care tools are renowned for their precision, craftsmanship and attention to detail. With a rich tradition of nail art and an emphasis on nail health, Japan has become a global hub for innovative and effective tools that enable individuals to achieve salon-worthy nails in the comfort of their own homes....

 Embracing Precision:
Japanese nail care tools are designed with meticulous attention to detail. From nail clippers and files to cuticle pushers and nail nippers, these tools are crafted with high-quality materials and precise engineering. The sharp blades and ergonomic designs allow for precise and effortless nail shaping, ensuring a clean and professional finish. Japanese beauty tools are thoroughly tested for quality control to ensure they deliver excellent results.
Nail Art Innovation:
Japan is renowned for its intricate and creative nail art designs. From delicate floral patterns to eye-catching geometric shapes, Japanese nail art tools have played a significant role in enabling nail artists to create stunning and intricate designs. Nail art brushes, dotting tools, and stamping plates are among the popular tools that offer unparalleled precision and control. These tools allow individuals to explore their creativity and elevate their nail art game.
Focus on Nail Health:
Japanese nail care tools not only focus on aesthetics but also prioritize nail health. Cuticle nippers and pushers are designed to gently remove excess cuticles without damaging the nail bed. Nail buffers and polish correctors help maintain the integrity of the nail surface, ensuring healthier and stronger nails. Japanese nail clippers create sharp, clean cuts to keep nails at a decent length and help prevent jagged edges. Jagged edges can get caught on something and tear the nail. Nail nippers also help maintain health as they cut thick nails and keep them in check.
 Convenience and Portability:
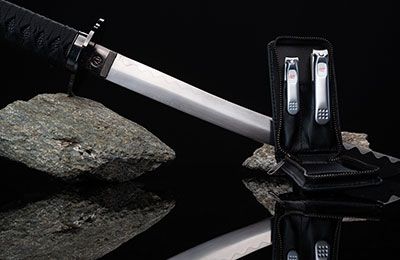
Japanese nail care tools are often designed with convenience and portability in mind. Compact and travel-friendly, they are perfect for those who prefer to do their nails on the go or during travel. From compact nail clippers to grooming kits, these tools make it easy to maintain and touch up your nails wherever you are.
Quality and Durability:
Japanese craftsmanship is synonymous with quality and durability and nail care tools are no exception. Made from high-quality materials such as stainless steel, these tools are built to last. By investing in Japanese nail care tools, you can be confident that you are purchasing reliable, long-lasting tools that will stand the test of time. Japanese nail tools such as the brand Seki Edge take great pride in making sure they only create quality products that are useful and prized by their users.
Japanese nail care tools offer a world of possibilities for achieving perfectly polished nails at home. From precision instruments for shaping and filing to innovative tools for nail art, these tools allow you to explore your creativity and maintain optimal nail health. Japanese nail care tools have captured the hearts of beauty enthusiasts worldwide with their focus on precision, durability and convenience. Home users feel empowered to achieve salon-worthy nails from the comfort of their own homes. It's time to embrace the allure of Japanese nail care tools and elevate your nail care routine to new heights.
JATAI provides innovative and professional quality beauty implements with world-class customer service and educational support. To offer great products as a master distributor, we seek out and select only manufacturers who demonstrate superior workmanship, the most advanced technology, and respected business core values of reliability, honesty and integrity. Accordingly, JATAI represents three major ‘workhorse’ brands that dominate within their categories. Feather, Seki Edge and Fuji Paper. JATAI Academy brings beauty tools to creative life. It’s the ultimate professional information resource where Education, Artistry and Trends CONNECT for Stylists and Barbers.
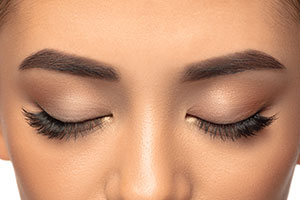
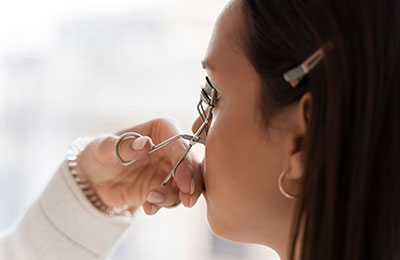
When it comes to achieving stunning and captivating eyes, eyelashes play a crucial role. They frame the eyes, enhance their shape and add that touch of glamour to any makeup look. Whether you’re a makeup artist or simply a beauty enthusiast, having the right tools for your eyelashes is essential. From application to maintenance, these tools can make all the...
 Eyelash Curler:
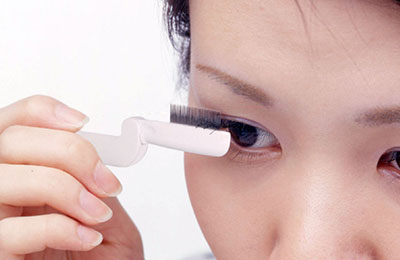 Eyelash Comb:
JATAI provides innovative and professional quality beauty implements with world-class customer service and educational support. To offer great products as a master distributor, we seek out and select only manufacturers who demonstrate superior workmanship, the most advanced technology, and respected business core values of reliability, honesty and integrity. Accordingly, JATAI represents three major ‘workhorse’ brands that dominate within their categories. Feather, Seki Edge and Fuji Paper. JATAI Academy brings beauty tools to creative life. It’s the ultimate professional information resource where Education, Artistry and Trends CONNECT for Stylists and Barbers.
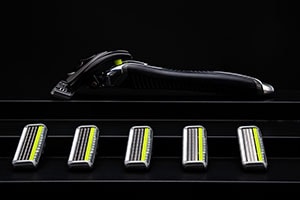
The Feather F3 Razor is a remarkable addition to Feather’s lineup, offering exceptional shaving performance and innovation. Designed for the modern man who seeks convenience and efficiency, this razor combines modern technology with a sleek and ergonomic design. Innovative Flexing Head: The Feather F3 Razor features a flexing head that pivots effortlessly to follow the contours of your face, ensuring...
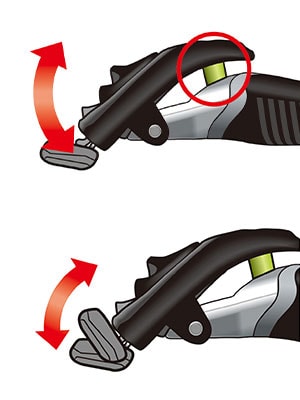
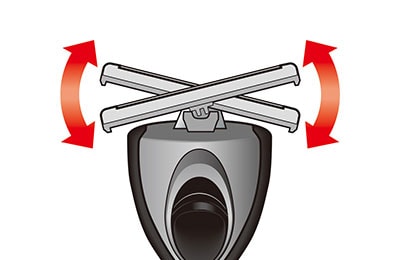 One Push Blade Release: Changing blades has never been easier with the Feather F3 Razor. With a simple push of a button, the blade is released, allowing for swift and seamless replacement. This feature saves time and eliminates the need to handle sharp blades directly.
Guard Bar for Added Safety: The F3 Razor incorporates a guard bar that helps to protect the skin from accidental cuts. This added safety measure gives users peace of mind, especially when navigating tricky areas.
Non-slip Handle: The ergonomic handle of the Feather F3 Razor is designed with a non-slip texture, ensuring a secure grip even in wet conditions. This feature enhances control and minimizes the risk of slips or drops during shaving.
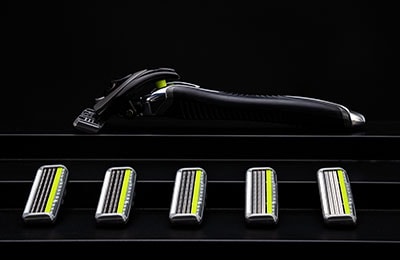 Compatible with Feather F-System Blades: The Feather F3 Razor is compatible with Feather's F-System blades, renowned for their sharpness and precision. These blades are easy to find and widely available, ensuring a hassle-free replacement process. The F-System Blades include the F3 blade, MR3 blade and F2 Blade. You can read more about these blades here.
The Feather F3 Razor exemplify Feather's commitment to exceptional craftsmanship, innovation, and delivers an unparalleled shaving experience. The modern convenience and flexibility of the Feather F3 Razor offers unique features and benefits that elevate the art of shaving to new heights. Whichever you choose, you can trust Feather to provide a superior grooming experience that meets the highest standards of quality and performance.

JATAI provides innovative and professional quality beauty implements with world-class customer service and educational support. To offer great products as a master distributor, we seek out and select only manufacturers who demonstrate superior workmanship, the most advanced technology, and respected business core values of reliability, honesty and integrity. Accordingly, JATAI represents three major ‘workhorse’ brands that dominate within their categories. Feather, Seki Edge and Fuji Paper. JATAI Academy brings beauty tools to creative life. It’s the ultimate professional information resource where Education, Artistry and Trends CONNECT for Stylists and Barbers.
Tweezers are versatile and indispensable tools that have been used for centuries for a wide range of purposes, from personal grooming to intricate tasks in various industries. These small, handheld devices have evolved over time, and today, there are numerous types of tweezers available, each designed for specific uses. Here is a simple guide to the different types of tweezers,...
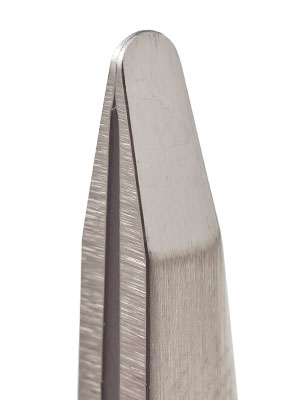 Types of Tweezers
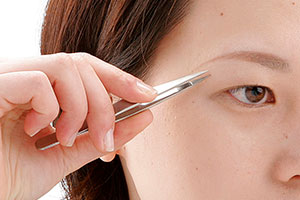
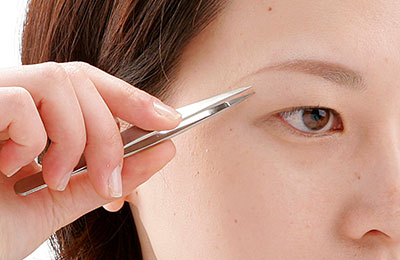 Grooming: Tweezers are widely used for grooming purposes, particularly for shaping eyebrows, removing unwanted facial or body hair, and maintaining a neat appearance. Slant tweezers are the go-to choice for eyebrow maintenance, allowing for precise plucking and shaping.
Medical Procedures: In the medical field, tweezers play a vital role in various procedures. Pointed tweezers are used for removing foreign objects, splinters, or debris from wounds. Rounded and curved tweezers are commonly used in surgical procedures or for delicate tasks such as suturing.
Crafting and Jewelry: Tweezers are invaluable tools for crafting and jewelry-making enthusiasts. Pointed tweezers are perfect for picking up small beads, stones, or other tiny components, while flat tweezers provide stability and control when working with delicate materials.
Electronics and DIY: When working with small electronic components or performing DIY repairs, tweezers are essential for precise handling. Flat or curved tweezers are often used to place or position components, while pointed tweezers can assist in tasks such as soldering or circuit board repair.
 Grip and Comfort: Look for tweezers with an ergonomic design and a comfortable grip. Some tweezers feature a textured or rubberized handle, providing better control and reducing hand fatigue during prolonged use.
Spring Mechanism: Some tweezers come with a built-in spring mechanism that helps reduce hand strain and fatigue. This can be especially useful for individuals who require repetitive or extended tweezing sessions. The Seki Edge Smart Tweeze has a unique spring technology that transfers strength from the hands to tweezer tips to prevent hand fatigue.
Maintenance: Consider the ease of cleaning and maintenance. Tweezers should be easy to sanitize and keep hygienic, particularly if they are used for medical or personal grooming purposes.
Tweezers are versatile tools that serve multiple purposes in various fields. By understanding the different types, uses, and key features, you can choose the right tweezers for your specific needs. Whether it's grooming, medical procedures, crafting, or electronics, having a reliable pair of tweezers in your toolkit will undoubtedly prove invaluable in countless situations.
JATAI provides innovative and professional quality beauty implements with world-class customer service and educational support. To offer great products as a master distributor, we seek out and select only manufacturers who demonstrate superior workmanship, the most advanced technology, and respected business core values of reliability, honesty and integrity. Accordingly, JATAI represents three major ‘workhorse’ brands that dominate within their categories. Feather, Seki Edge and Fuji Paper. JATAI Academy brings beauty tools to creative life. It’s the ultimate professional information resource where Education, Artistry and Trends CONNECT for Stylists and Barbers.
When it comes to shaving, finding the perfect razor is essential for achieving a smooth, comfortable, and irritation-free experience. Feather, a renowned Japanese company known for its high-quality shaving products, has introduced this exceptional razor that has gained popularity among shaving enthusiasts worldwide: the Feather Butler Razor. Let’s delve into what makes this razor unique and an impressive grooming tool....
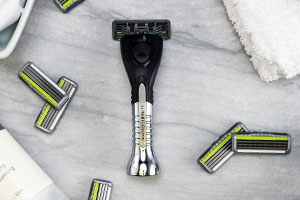
 When it comes to shaving, finding the perfect razor is essential for achieving a smooth, comfortable, and irritation-free experience. Feather, a renowned Japanese company known for its high-quality shaving products, has introduced this exceptional razor that has gained popularity among shaving enthusiasts worldwide: the Feather Butler Razor. Let's delve into what makes this razor unique and an impressive grooming tool.
The Feather Butler Razor is a true masterpiece that embodies elegance, precision, and functionality. Crafted with meticulous attention to detail, this razor combines classic design elements with cutting-edge technology to deliver an unmatched shaving experience. Let’s take a look at the Butler’s unique features.
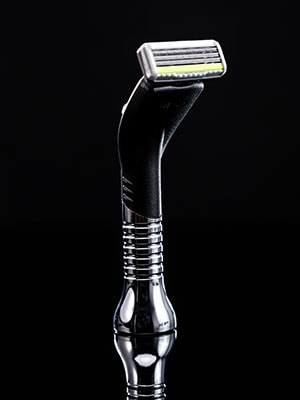
Artisanal Design: The Feather Butler Razor features a timeless design with a stainless steel handle that exudes luxury and sophistication. It has a heavier weight than most cartridge razors which allows the razor to do the work. It has an ergonomic shape allowing for precise control during shaving. And the horizontal grooves along the handle provides a comfortable grip. It’s free standing so it can take up less space when sitting on the counter or in the medicine cabinet. And lastly, the handle is short for greater control. This razor is not short of design features (no pun intended) which aid in a superior shaving experience.
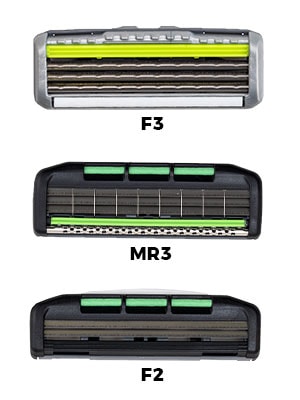 Uses 3 Different Blades: The Feather Butler Razor uses F3, MR3 Neo and F2 blades which allows you to pick the best blade to meet your shaving needs. The blade replacement process is quick and straightforward, ensuring a consistently smooth and effortless shave.
The F3 blade is a triple blade cartridge with a wavy guard built into each blade. This helps reduce pressure on the skin and makes it great for reducing irritation and razor burn. Perfect for sensitive skin, each blade has its own suspension so it can ride smoothly over the skin. The blades also feature SiC ceramic coating technology for durability and comfort. It comes in a 4 or 8 pack.
The MR3 Neo Blade is also a triple blade cartridge. It features a semicircular guard and provides the closest shave out of the 3 FSystem blades. It also features a metal roller for a close and comfortable shave. This blade is more aggressive than the F3 Blades. It comes as a pack of 9 blades.
The F2 Blade has 2 blades. It’s best for someone looking for a more economical blade choice. With sharp edges and thin blades and a one push cleaning feature, this blade does the job for less. It comes in a 10 pack.
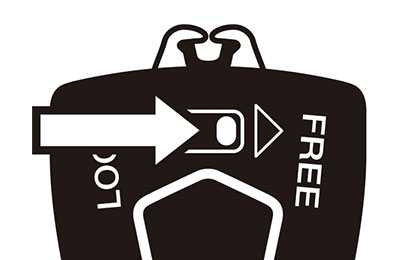 Adjustable Head Movement: This razor allows users to adjust the cartridge movement according to their preferences. By simply moving the switch between ‘lock’ and ‘free’ on the handle, you can customize the blade's maneuverability. When set to ‘lock’ the cartridge head locks in place for more controlled shaving such as around facial hair. When sent to ‘free’ the cartridge moves with the angles of the skin.
Luxurious Presentation: The Feather Butler Razor comes in a beautifully crafted presentation box, making it an ideal gift for any grooming enthusiast or a stylish addition to your shaving collection.
The Feather Butler Razor has unparalleled precision. The impeccable craftsmanship and unique design make this razor a great choice for addressing all areas of the face, even challenging areas such as around facial hair and the neckline. It provides superior comfort coupled with the razor's balanced weight distribution. With a gentle and comfortable shaving experience the reduction in pressure minimizes skin irritation and razor burn. The Butler is durable and long-lasting where each blade results in cost-effective shaving in the long run. And lastly, the Feather Butler Razor's unique adjustable blade movement feature allows users to customize their shave according to their needs. The razor's exquisite design and luxurious presentation box make it a desirable grooming accessory, elevating the shaving experience to a whole new level. As you can see, it’s not your ordinary cartridge razor. The Butler takes into consideration many downfalls that other cartridge razors have and bundles it all in one razor. You can check the Butler out here.
JATAI provides innovative and professional quality beauty implements with world-class customer service and educational support. To offer great products as a master distributor, we seek out and select only manufacturers who demonstrate superior workmanship, the most advanced technology, and respected business core values of reliability, honesty and integrity. Accordingly, JATAI represents three major ‘workhorse’ brands that dominate within their categories. Feather, Seki Edge and Fuji Paper. JATAI Academy brings beauty tools to creative life. It’s the ultimate professional information resource where Education, Artistry and Trends CONNECT for Stylists and Barbers.
During the pandemic salons and barbershops were forced to close for an extended period. This caused many people to find new ways of maintaining their hair. Whether it be cutting their hair at home or letting it grow out and run wild, trying something different was forced upon many people. Hair professionals, on the other hand, had to learn how...
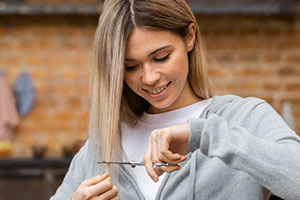
Gregory is a hairstylist based out of NYC. He’s a global educator and a celebrity brand ambassador. His IG is filled with quirky videos, haircutting tips and he always seems to be having fun! We asked him for 3 tips he could give for cutting hair at home. Here’s what he said. 1) PREP is EVERYTHING Especially when it comes to using the Feather Styling Razor at home, you want to use great tools in your hair that allows for an easy “slide and glide.” This not only helps you brush through any kinks or knots but also provides a perfect pairing when sliding your Feather Razor down the hair strands. USE A SUPER SHARP RAZOR BLADE! You can get a couple uses out of your razor blade but use a freshie every time if possible. This creates clean sharp hair ends, avoids drag and helps to eliminate frizz and split ends. To eliminate frizz, you can use leave-in treatments, creams or oils that are right for your hair type and texture. 2) Dry vs Wet Haircutting There has always been a debate about razor haircutting on dry hair vs. wet hair. Here’s my take… Call me controversial and a rule breaker (I’ve never been one to do things just one way), but I love to use my Feather Razor on both wet hair AND dry hair, especially when it comes to cutting your own hair. If you aren’t technically trained and don’t have a great understanding of hair physics, many things can go wrong when cutting wet hair. I always say “wet hair lies, dry hair truths.” Wet hair can bounce back, shrink up, group curls with strong hair growth patterns and create holes or imbalance in your finished shape. With dry hair (and specifically cutting your dry hair at home) it’s much easier to navigate the map. You see exactly what happens to the hair immediately. Whether you wear your hair air dried or blow dry it and style it, dry haircutting should be done after it’s in its final dried and/or styled state. So if you normally air dry your hair, wait until your hair is air dried and then dry cut it. And if you normally blow dry and style your hair, do that first, then dry cut it. If you always let your hair air dry (never or rarely blow dry it), dry razor hair cutting can give amazing results. You will see exactly where and what you want to take off, layer, texturize, and detail. 3) “MORE means MORE” The MORE you lift the hair and cut, the MORE layering you create. Below is a great guide to follow to understand the effect you’ll get from lifting your hair at different “zones” and the layers that can be achieved. Cutting CLOCK GUIDE Remember, the higher you lift into a “time zone” the more layering you create, meaning the more hair you will remove. BEFORE you cut or slice the hair that’s in your hands, ask yourself every time “What time is it?” Is that the time you’re wanting? If so, go ahead and cut or slice the hair. If not, lift the hair higher or drop the hair lower and then cut your hair at this “time” all around your clock (head shape). So what are these time zones? Imagine a clock with the numbers 1-12 on it. Now apply this to your head where 6:00 is the floor and 12:00 is the top of your head. If you cut your hair between 6:00 (floor) and 9:00 (ear) your layering will land anywhere from your ears and below. This is minimal to moderate hair removal in terms of length and weight. Your hair will have movement and layering within that zone. Depending on how high you lift within this time zone, you will get soft layering that falls anywhere from your ear height and below. If you cut your hair between 9:00 (ears) and 12:00 (top of head), you will get moderate to maximum hair removal in terms of length and weight. The layers are dependent on what “time” you lifted the hair to. Hair will fall anywhere within the 9:00 to 12:00 zone AND 9:00 to 6:00 zone. If you elevate the hair from 6:00 all the way up to 12:00, all of the time markers will become touched (6:00, 7:00, 8:00, 9:00, 10:00, 11:00, 12:00). This is the maximum elevation which gives the maximum hair removal. Keep in mind that these time markers are in reference to the right side of the head. The same would apply to the left side of the head where the time markers would be 6:00, 5:00, 4:00, 3:00, 2:00, 1:00 and 12:00. It’s very important to establish what your end result looks like. Then, reverse engineer to determine which technique(s) you will need to achieve the desired shape, movement, layering and amount of weight removal. The main takeaways: 1) PREP is Everything. Use good quality tools and sharp blades. 2) Dry vs Wet Haircutting. It’s okay to dry cut (in my opinion) as you will see exactly where and what you want to take off. Just make sure it’s in the air dried or blow dried and styled state before dry cutting. 3) MORE means MORE. The higher you lift the hair before you cut, the more length and weight gets removed. The lower you lift the hair before you cut, the more length and weight stays on. Use the Clock Guide to help determine how much hair removal you want to achieve.
Shay is a hairstylist based out of Sacramento. She specializes in shags, mullets and creative haircuts. She has a cute, fun style about here that shows through her content. Every once in a while, you’ll see her razor cutting her own hair too! Here are her tips. 1. Never use a razor on dry hair. You should only use a razor on wet hair because using it on dry hair will damage your hair and create split ends, leaving your hair looking and feeling frizzy and damaged. 2. Make sure you hold the hair you’re cutting taut. You should hold the hair taut to maintain control of the section you are cutting. Holding it loose can also create damage and frizz. 3. In this reel I’m removing internal weight from my hair so it looks less bulky without removing any length. I’m visually looking at my hair and seeing what looks heavy, grabbing those pieces and carving out anything that looks like it needed to go. If you do this at home be very mindful of what you’re cutting or you could accidentally cut into your length. After every carved-out piece I take, I then re- zhuzh my hair back into place to make sure it looks good.
Tiana is a stylist who provides hair tips and tutorials on TikTok. She talks about her favorite products and gives some useful styling tips. She also uses a Feather Styling Razor. Tiana’s content is very educational and you can learn a lot from her in all areas of haircutting and styling. Here are her tips for cutting your hair at home. Cutting your own hair at home can be intimidating, but with the right tools and techniques, you can achieve a fresh new look and have some fun! As a hairstylist, I understand the importance of a good haircut and want to share three tips to help you successfully cut your own hair at home. 1. Invest in the right tools To achieve a professional-looking haircut, you need to have the right tools. This includes a pair of sharp scissors, a comb, and a hair clip. Avoid using kitchen or craft scissors as they can cause split ends and make it difficult to get a clean cut. A pair of hair cutting scissors will make the job much easier and ensure a smooth cut. 2. Cut your hair when it's dry Cutting your hair when it's wet may seem like a good idea, but it can actually be quite challenging. Wet hair is heavier and stretches when you comb it out, which can cause it to look longer than it actually is. This can lead to uneven or asymmetrical cuts when the hair dries. Cutting dry hair allows you to see the exact length and shape of your hair, ensuring a more accurate and precise cut. 3. Take it slow and steady When cutting your hair at home, it's important to take your time and be patient. Start by washing and drying your hair, and then comb it thoroughly to remove any knots or tangles. When cutting, take small sections of hair and cut them one at a time. Don't try to cut too much hair at once, as this can lead to uneven cuts or mistakes that are difficult to fix. Remember, you can always go back and cut more if needed, but it's much harder to fix a cut that is too short. Before cutting hold the hair where it will “live” or land. Is this where you want the length to be? Take your time, take a deep breath and have fun! Cutting your own hair at home can be a fun and gratifying experience, but it's important to approach it with the right mindset and tools.@thehairaesthetic #razorhaircut #bangtrim #curtainbangs #hairstylisteducation #stylisttraining #hairhelp #howtotrimbangs #wispyfringe #eyeslipsface #cosmetology ♬ Luxury fashion (no vocals) - TimTaj
Kelly is a stylist and educator specializing in razor cutting. She loves to create shags, work with curls and natural texture, does non-toxic coloring and blonding and more. She is based out of Bellingham, WA. She offered some great tips. 1. Razor cutting works best when you have enough grow out to cut, at least an inch is ideal, less is doable once you have a bit more practice and understanding of the tool. Remember to step back and look at your work. We get up close in the mirror to see what we are doing when cutting our own hair so it’s important to take a couple steps back and really look at the shape. 2. Don’t start a home haircut when you are in a rush or have an event to be at. It just never works out well. 3. Take before and after photos for your own reference. It is so helpful to see the changes and take notes of what you do and don’t like. Adjust your technique next time. There are no rules despite what some people may tell you. We have all learned through trial and error. Wet hair, dry hair, small section, big section. Try different things and do what feels good to YOU! It’s your hair, you get to be an artist, and most importantly have fun doing it.View this post on InstagramA post shared by Kelly Bird Bellingham Razor specialist (@kellybird_hairstylist)
Megan is a hairstylist based out of Orlando, FL. She’s a lover of color services and does both scissor and razor cutting. She showcases some beautiful cuts and color on her Instagram page. She also chimed in with some tips on bang cutting. I love using the JATAI Feather Razor for cutting my own bangs! It’s perfect for taking off length and creating texture at the same time. My best advice would be to start with the hair wet, comb forward where you want to create your shape, and then start carving away! I choose to cut my bangs wet because I find the razor glides smoother through the hair. I will define it a little once the hair is dry with the razor as well! Another good tip is to always start with a new blade. Most importantly have fun! There’s so many cool shapes to create! Cutting your hair at home is best for in between maintenance. Whether it's trimming bangs or adding in a few face framing layers, these can be done at home. But for full haircuts, it's best to leave it up to a professional as they will have the proper techniques and skillsets to give you the haircut you want. Using a razor to cut your hair at home is easier to use than scissors simply because the cuts are less precise. With scissors, if you make a wrong snip it's easily noticeable. Scissors are less forgiving. And as you can see, there is much controversy about cutting hair wet vs. dry. If you're looking to cut your hair at home which includes razor cutting, take some of the advice from professionals. Experiment a bit and see what works!

JATAI provides innovative and professional quality beauty implements with world-class customer service and educational support. To offer great products as a master distributor, we seek out and select only manufacturers who demonstrate superior workmanship, the most advanced technology, and respected business core values of reliability, honesty and integrity. Accordingly, JATAI represents three major ‘workhorse’ brands that dominate within their categories. Feather, Seki Edge and Fuji Paper. JATAI Academy brings beauty tools to creative life. It’s the ultimate professional information resource where Education, Artistry and Trends CONNECT for Stylists and Barbers.
There are many shaving razors available on the market. There are cartridge razors which often have multiple blades and are used at home for both men and women for shaving legs, arm pits, face and more. Then you have the double edge razor or safety razor which gets a closer shave than a cartridge razor and it operates on a...
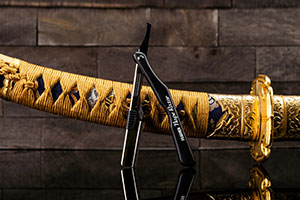
 There are many shaving razors available on the market. There are cartridge razors which often have multiple blades and are used at home for both men and women for shaving legs, arm pits, face and more. Then you have the double edge razor or safety razor which gets a closer shave than a cartridge razor and it operates on a single blade. It’s more eco-friendly and the blades are cheaper than cartridge blades. But it has a bit of a learning curve. And finally, you have the straight razor which gives the closest shave of the three. The straight razor uses a single blade. The handle either folds or has a straight handle. The straight razor is what’s used by barbers to do shaves, lineups, sideburns and to create crisp lines. There are many brands that carry a version of these 3 types of razor handles.
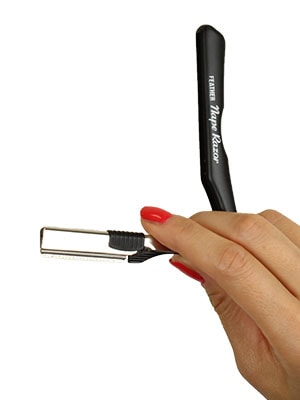
But then there is the Feather Nape & Body Razor. This razor is unique in that it does not easily fall in any of these three types of razors. It’s most closely related to the straight razor. However, it’s not meant to do full face shaves. The Feather Nape & Body Razor is a small-bodied folding shaving razor which houses a guarded blade. Its small nature allows it to be very useful for detailed work and to address small areas. This razor is called the Nape & Body Razor because it’s meant to shave the nape area and small areas of the body such as sideburns, eyebrows and even bikini line.
The razor only uses guarded replaceable blades so it can be used by hairstylists. Great for using on short men and women’s haircuts around the neckline or stray hairs around the face, this razor does the final touches that can make or break the haircut. Everyone who has short hair loves to feel their neck after a haircut. And they love it when their neck is super soft and smooth.
While the Feather Nape & Body Razor is generally used by professionals in the salon or shop, it’s possible for home users to use it at home to clean up their own neck or small areas that need maintenance between haircuts. Because the blades are guarded, this makes it safe for anyone involved. Whether you’re shaving yourself or someone else, the guard helps prevent unnecessary cuts and nicks. But don’t get us wrong, the blades are sharp and will shave smoothly. The blades and handle are made in Japan and come as 10 blades per cartridge.
To use, simply spray JATAI Blade Glide or other shaving lotion or clear shaving gel over the
 skin. If you don’t have a clear shaving gel, be sure to wipe before you shave. Then, shave the area. Always use some sort of lubricant when shaving to avoid skin irritation. You should never shave on dry skin with any razor.
Some people use the Feather Styling Razor to clean up the nape area. While this works, if you want a much closer shave, a Feather Nape & Body Razor would be a better choice. Barbers who don’t want to use a traditional straight razor can also opt to use the Nape & Body Razor.
The Feather Nape & Body Razor is a unique razor with a specific purpose. Its beauty lies in that it’s very good at one thing…detailed shaving in small areas. If you’re looking for a razor that can do these things, look no further. The Feather Nape & Body Razor can be purchased by itself or in a kit. The kit includes the handle, a pack of blades and a 2oz. bottle of JATAI Blade Glide shaving lotion. You can see the kit here.
JATAI provides innovative and professional quality beauty implements with world-class customer service and educational support. To offer great products as a master distributor, we seek out and select only manufacturers who demonstrate superior workmanship, the most advanced technology, and respected business core values of reliability, honesty and integrity. Accordingly, JATAI represents three major ‘workhorse’ brands that dominate within their categories. Feather, Seki Edge and Fuji Paper. JATAI Academy brings beauty tools to creative life. It’s the ultimate professional information resource where Education, Artistry and Trends CONNECT for Stylists and Barbers.
When it comes to haircutting, the most popular tool is the scissor. Scissors are the basic tool to cut hair, create layers, style bangs and create a desirable look. They are likely the first tool you are introduced to in beauty school and they will forever be in your tool kit until you retire. Most hair professionals are familiar with...
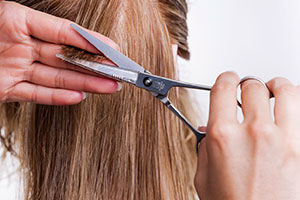
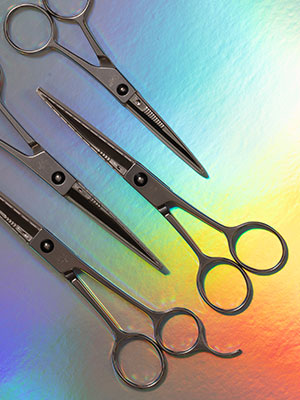 When it comes to haircutting, the most popular tool is the scissor. Scissors are the basic tool to cut hair, create layers, style bangs and create a desirable look. They are likely the first tool you are introduced to in beauty school and they will forever be in your tool kit until you retire.
Most hair professionals are familiar with a scissor that is composed of 2 parts. Each part consists of a finger hole and a blade. When you notch two of these together you get a pair of scissors. There are many different scissor styles, sizes and qualities but the best quality scissors are made of stainless steel and have placed careful attention to the scissor performance as well as the sharpness of the blade.
Stylists and barbers usually have more than one scissor. They can have different sizes, different brands and different functions such as texturizing scissors or thinning scissors. But over time and depending on how much any individual scissor is used, the scissor will need to be sharpened by a professional to bring back the cutting quality it once had. When frequently used, the blades lose some of their sharpness and it’s possible the hinge (where the two blades meet) needs to be fine-tuned. With special care and attention, a quality scissor can last a lifetime.
While maintenance is necessary, it is also inconvenient to have to send in scissors for repair. Scissors could be out of commission for a couple weeks or more depending on the location of the service and turnaround time. Furthermore, it’s important to do due diligence when deciding who should service your scissors. Because if left in the wrong hands, the scissors could get ruined, and heaven forbid unusable. There’s also a possibility the scissors could get damaged or lost in the mail when shipping to and from the service provider. Scissors are worthy investments that can cost a lot of money and the maintenance paired with downtime reveals some undesirable situations.
Fortunately, there is an alternative. Feather Switch Blade Shears are innovative haircutting scissors that eliminate the hassle of sending in your scissors for maintenance, reduces costs, and saves you money in the long term. There is no downtime, and they are high quality scissors.
 Feather Switch Blade Shears are scissors that use replaceable blades. You simply buy replaceable blades, and with a simple snap off and snap on you have fresh new blades! You’ll never have to sharpen your shears again.
Feather Switch Blade Shears also come in various sizes from a 4.5” to a 7.5” with or without a tang. They are made in Japan and made of high quality Japanese stainless steel.
Additionally, Switch Blade Shears have ‘no-nip’ tips which are rounded at the end to prevent nipping of the fingers. With safety in mind every step of the way, Feather Switch Blade Shears are a unique scissor that fills a very needed gap. You really can’t go wrong with these scissors.
People who use Feather Switch Blade Shears have been using them for years. They love the convenience, affordability and quality it entails. And you really can’t anything like it anywhere else. If you’re ready to give it a try, check them out at JATAI.net. You can also purchase the replacement blades here too.
JATAI provides innovative and professional quality beauty implements with world-class customer service and educational support. To offer great products as a master distributor, we seek out and select only manufacturers who demonstrate superior workmanship, the most advanced technology, and respected business core values of reliability, honesty and integrity. Accordingly, JATAI represents three major ‘workhorse’ brands that dominate within their categories. Feather, Seki Edge and Fuji Paper. JATAI Academy brings beauty tools to creative life. It’s the ultimate professional information resource where Education, Artistry and Trends CONNECT for Stylists and Barbers.


